
The HVAC vs. Automotive Terminology Trap
When searching for a wiring diagram for AC condenser circuits, the first hurdle is terminology. In residential HVAC, the 'condenser' refers to the entire outdoor cabinet containing the compressor, contactor, run capacitor, and fan motor. However, in automotive applications, the condenser is strictly the passive aluminum tube-and-fin heat exchanger mounted directly ahead of the vehicle's radiator. It contains zero electrical wires.
Therefore, when an automotive technician or DIYer references the 'AC condenser wiring,' they are actually referring to the active electrical components mounted to or surrounding the condenser assembly: the condenser cooling fan motor(s), the AC compressor clutch coil, and the high/low-pressure transducers threaded into the condenser lines. Misunderstanding this distinction leads to hours of wasted diagnostic time. This guide breaks down the actual vehicle wiring diagrams governing these critical cooling components.
Core Components in the Automotive AC Condenser Circuit
Modern vehicle climate control systems rely on the Powertrain Control Module (PCM) or a dedicated HVAC control module to manage heat rejection at the condenser. The circuit typically consists of four main electrical nodes:
- Condenser Fan Motor(s): Brushed DC motors (often drawing 15A to 30A under load) that pull ambient air through the condenser fins to liquefy the high-pressure refrigerant gas.
- Standard ISO Relays: Electromechanical switches that allow a low-current PCM signal to control the high-current fan motors and compressor clutch.
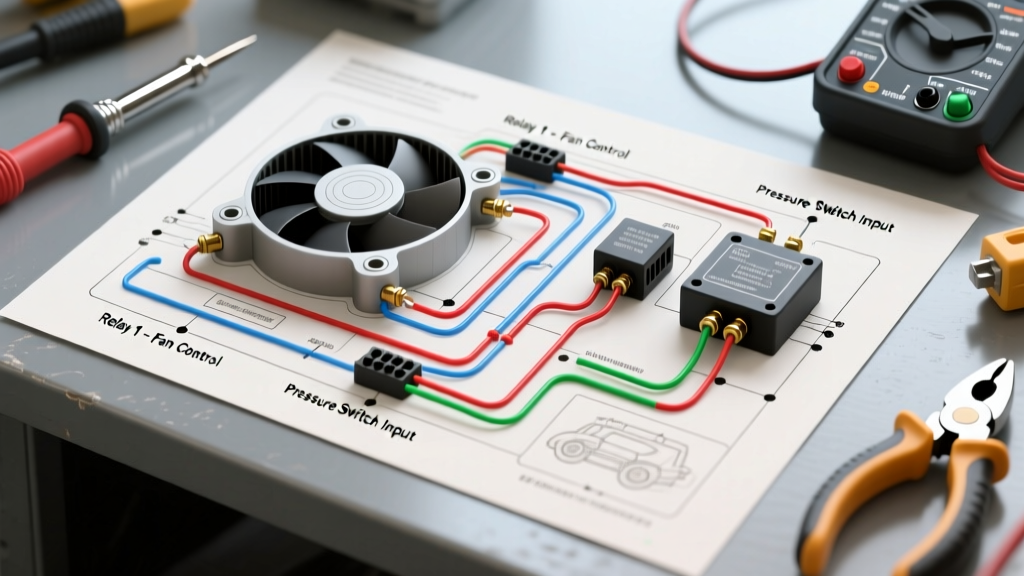
- Pressure Transducer/Switch: A 3-wire sensor (5V reference, ground, and signal return) threaded into the high-side liquid line of the condenser. It tells the PCM the exact refrigerant pressure.
- Compressor Clutch Coil: An electromagnetic coil (typically 3.5 to 4.5 ohms resistance) that engages the clutch plate to the compressor pulley.
Decoding the Standard ISO Relay Pinout
Almost all modern vehicles use standardized 4-pin or 5-pin ISO micro-relays for the condenser fan and compressor clutch. Understanding this pinout is mandatory for reading any automotive wiring diagram for AC condenser fans.
| Relay Pin | Function | Typical Wire Gauge | Circuit Role |
|---|---|---|---|
| 30 | Common / Power In | 12 AWG or 10 AWG | Direct battery power via a Maxi-Fuse (30A-50A). |
| 87 | Normally Open (NO) Load | 12 AWG | Output to the condenser fan motor or clutch coil. |
| 85 | Coil Ground / Control | 18 AWG | PCM ground-side switch or chassis ground. |
| 86 | Coil Power | 18 AWG | Ignition-switched 12V or PCM 12V supply. |
| 87a | Normally Closed (NC) | N/A | Usually unused in standard AC fan circuits (5-pin relays only). |
Step-by-Step: Tracing the Wiring Diagram for AC Condenser Fans
When the condenser fan fails to engage, the high-side pressure will rapidly spike, causing the PCM to disable the compressor clutch to prevent catastrophic hose failure. Follow this exact diagnostic sequence using a Digital Multimeter (DMM) and a wiring diagram:
1. Verify the Pressure Transducer Signal
Backprobe the signal wire at the condenser pressure switch. With the engine off and static pressure equalized, the voltage should read between 0.8V and 1.2V (depending on ambient temperature). If it reads 4.9V (open circuit) or 0.1V (short to ground), the PCM will inhibit the condenser fan and compressor. According to AA1Car's automotive electrical diagnostic guidelines, a faulty pressure sensor is a leading cause of perceived 'fan failure' because the PCM never commands the relay to close.
2. Test the PCM Control Side (Pins 85 & 86)
Remove the condenser fan relay. Turn the ignition to RUN and command the AC to MAX. Probe pins 85 and 86 in the fuse box. You should read 12V across these pins. If you have 12V on pin 86 but the PCM is not providing the ground path on pin 85, check for a broken 18 AWG control wire between the fuse block and the PCM connector.
3. Measure Voltage Drop on the Load Side (Pins 30 & 87)
Never just check for '12V presence.' A wire with 2 strands of copper left will show 12V with no load, but will fail to run a 20-amp fan motor. Perform a voltage drop test. Place your DMM leads on the battery positive terminal and relay pin 30. With the fan commanded on, a voltage drop greater than 0.2V indicates severe corrosion in the Maxi-Fuse holder or the fusible link.
Real-World Edge Case: GM Dual-Fan Series/Parallel Logic
One of the most complex wiring diagrams for AC condenser fans is found on GM full-size trucks and SUVs (e.g., Silverado, Tahoe) equipped with dual cooling fans. These systems do not simply turn 'on' and 'off'; they utilize a 3-relay matrix to achieve two distinct speeds without using expensive PWM motor controllers.
- Low-Speed Mode (Series Circuit): The PCM grounds Relays 1 and 2. Power flows from Relay 1 through Fan Motor A, then crosses over through a jumper wire into Fan Motor B, and finally to ground via Relay 2. Because the 12V is split across two identical motors, each fan receives roughly 6V and runs at half speed. This reduces electrical load and cabin noise during mild AC operation.
- High-Speed Mode (Parallel Circuit): When condenser pressure exceeds 250 PSI or engine coolant temps rise, the PCM grounds Relays 1, 2, and 3. Relay 3 provides a dedicated ground path for Fan Motor A. Both motors now receive full 12V independently and run at maximum RPM.
Diagnostic Trap: If Fan A burns out or its ground brush fails in a GM dual-fan setup, neither fan will run on low speed because the series circuit is broken. However, on high speed, Fan B will still operate normally because the parallel circuit bypasses Fan A. If a customer complains that 'only one fan works and only when the engine is hot,' you are looking at an open circuit in Fan A or its specific low-speed relay path.
Wire Gauge & Overcurrent Protection Specifications
When repairing or building custom condenser fan circuits (common in engine swaps or off-road buggy builds), adhering to SAE wire gauge standards is critical to prevent electrical fires. The wiring must handle the inrush current of the DC motor, which can be 3x to 5x the running amperage.
| Circuit Component | Max Continuous Draw | Minimum Wire Gauge (SAE J1128) | Required Overcurrent Protection |
|---|---|---|---|
| Single Condenser Fan (Compact Car) | 15 Amps | 14 AWG | 20A Blade Fuse |
| Single Condenser Fan (Truck/SUV) | 25 Amps | 12 AWG | 30A Blade / Maxi-Fuse |
| Dual Fan Main Power Feed | 50 Amps | 8 AWG or 10 AWG | 60A Mega-Fuse / Fusible Link |
| AC Compressor Clutch Coil | 4 Amps | 16 AWG or 18 AWG | 10A Blade Fuse |
| PCM Relay Control Signal | < 1 Amp | 18 AWG or 20 AWG | Protected by PCM internal driver |
Safety & EPA Section 609 Compliance
Warning: While diagnosing electrical faults at the condenser, you are working inches away from high-pressure refrigerant lines. Under normal operating conditions, high-side pressure at the condenser can reach 250 to 350 PSI on a 90°F day. If the condenser fan fails and the high-pressure cutout switch is bypassed or faulty, pressures can exceed 500 PSI, leading to catastrophic hose rupture. Always refer to EPA Section 609 guidelines regarding motor vehicle air conditioning (MVAC) safety and refrigerant handling before piercing or disconnecting any lines near the condenser assembly.
Frequently Asked Questions
Why does my condenser fan only turn on when the AC is off?
This is usually a sign of a crossed wire or a failing PCM driver. In some vehicles, the condenser fan and radiator fan share a relay block. If the coolant temperature sensor is reading erroneously high, the PCM may command the fans on for engine cooling, but inhibit the AC compressor (and thus the dedicated AC fan logic) to save parasitic load on an already overheating engine.
Can I wire a condenser fan directly to a toggle switch?
While physically possible for off-road or track vehicles, bypassing the PCM and pressure switches is highly discouraged for street vehicles. Without the high-pressure transducer signaling the PCM to engage the fan at specific pressure thresholds (e.g., 210 PSI), the condenser will suffer from heat soak at idle, leading to poor cabin cooling and accelerated compressor seal wear.
What causes the green crust on condenser fan connectors?
That green/white crust is copper oxide and aluminum galvanic corrosion, exacerbated by the condenser's location at the very front of the vehicle where it is constantly bombarded by road salt, rain, and bug acids. Always use dielectric grease on Weather-Pack and Metri-Pack connectors in this zone, and inspect the rubber wire seals for dry rot annually.