
Why the Weller WESD51 Soldering Station Remains a 2026 Beginner Favorite
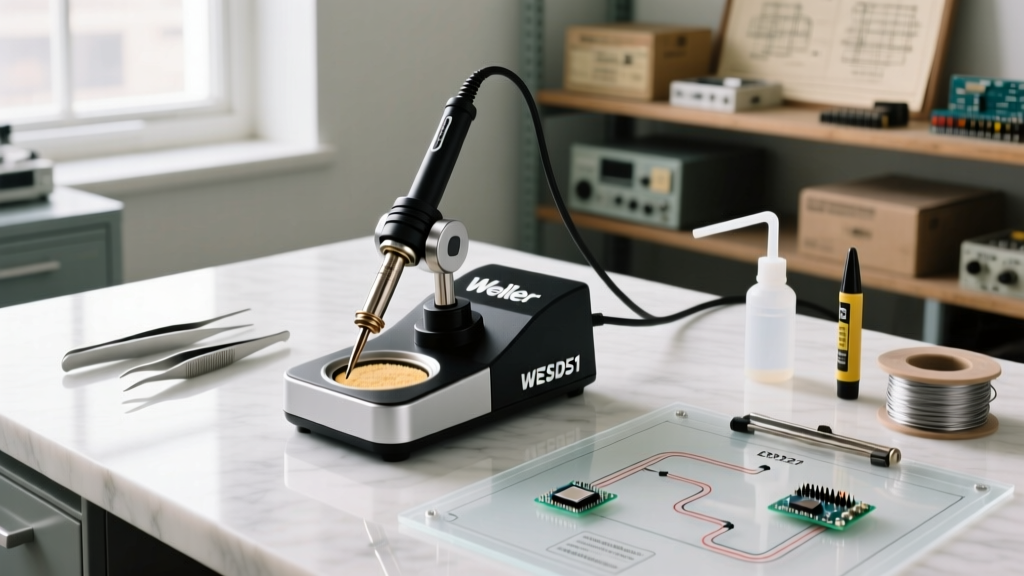
Even as we navigate the electronics landscape of 2026, the Weller WESD51 soldering station holds a revered spot on workbenches worldwide. Originally released as the digital sibling to the legendary analog WES51, the WESD51 offers 50 watts of closed-loop temperature control, a crisp digital readout, and the rugged PES51 handpiece. While Weller has since transitioned to newer models like the WE1010NA, the secondary market is flush with refurbished and well-maintained WESD51 units. For beginners, this presents a unique opportunity: acquiring professional-grade thermal recovery and ESD safety for roughly $90 to $130, bypassing the $150+ price tag of modern entry-level stations.
This guide will walk you through the exact setup, tip selection, and maintenance routines required to get flawless through-hole and surface-mount joints using this legendary machine.
Unboxing and Initial Setup: Getting the PES51 Ready
The heart of the Weller WESD51 is the PES51 handpiece. Unlike cheaper stations that use a separate ceramic heater and slip-on tip, the PES51 integrates the heater and thermocouple into a single, replaceable cartridge. This ensures rapid thermal feedback and eliminates the air gaps that cause temperature lag in budget irons.
Step-by-Step Assembly
- Insert the Cartridge: Slide the heater/sensor assembly into the stainless steel barrel of the handpiece. Ensure the connector pins align perfectly with the internal socket.
- Slide on the Tip: Push your chosen ETA series tip over the cartridge. It should slide on smoothly with a slight metallic scrape.
- Secure the Retaining Nut: Thread the aluminum retaining nut onto the barrel. Critical Beginner Tip: Only tighten this nut finger-tight. Using pliers will crush the tip collar and make future tip changes impossible without damaging the cartridge.
- Connect to the Base: Plug the heavy-duty 5-pin DIN connector into the front of the WESD51 base unit and tighten the locking ring.
Decoding the ETA Tip System
One of the most confusing aspects for beginners transitioning to Weller is the tip nomenclature. Weller's ETA series tips use a letter code at the end of the part number to denote the factory-calibrated temperature. This is a thermal limiting feature designed to prevent users from accidentally scorching sensitive PCBs.
| Tip Model | Calibrated Temp | Best Use Case |
|---|---|---|
| ETAA | 600°F (316°C) | Delicate SMD work, thermally sensitive ICs, thin traces. |
| ETA | 700°F (371°C) | Standard 60/40 leaded through-hole soldering, general DIY. |
| ETB | 750°F (399°C) | Lead-free solder (SAC305), larger ground planes. |
| ETK | 800°F (427°C) | Heavy-duty wire lugs, thick gauge automotive wiring. |
Recommendation: Buy an ETA (700°F) and an ETB (750°F) to cover 95% of beginner and intermediate electronics projects.
Dialing in Temperatures: Lead vs. Lead-Free
While the ETA tips have factory-calibrated limits, the WESD51's digital front panel allows you to set the target temperature anywhere between 350°F and 850°F. However, setting the station to 850°F with an ETA (700°F) tip will not yield 850°F at the tip; the internal sensor will max out at its physical limit, and the display will flash, indicating a thermal error.
According to IPC soldering standards, the ideal soldering iron tip temperature should be roughly 100°F to 150°F above the liquidus temperature of the solder alloy.
- For 63/37 or 60/40 Leaded Solder: Melts at ~361°F (183°C). Set your WESD51 to 650°F - 700°F.
- For SAC305 Lead-Free Solder: Melts at ~422°F (217°C). Set your WESD51 to 750°F - 800°F.
Pro Tip: Never run your WESD51 at maximum temperature 'just to heat up faster.' Running a 50W station at 850°F accelerates tip oxidation and drastically shortens the lifespan of the internal heating element.
ESD Safety and the Grounding Verification Test
The Weller WESD51 is an ESD-safe station. The grounding path travels from the wall outlet, through the power cord, into the base unit, down the handpiece cord, and directly to the soldering tip. This safely bleeds off static electricity from sensitive components like MOSFETs and microcontrollers.
The ESD Association strictly mandates grounded work surfaces and tools when handling static-sensitive devices. To verify your WESD51 is properly grounded:
- Set your multimeter to continuity or resistance mode.
- Touch one probe to the metal barrel of the PES51 handpiece (or the tip itself).
- Touch the other probe to the ground pin (the third, round prong) on the station's power plug.
- You should read less than 2 ohms of resistance. If it reads infinite (open circuit), your cord or internal ground wire is compromised.
Common Beginner Mistakes and WESD51 Failure Modes
1. The 'Flashing Display' Error
If the digital readout on your WESD51 begins flashing or displays an error code, the station has lost communication with the thermocouple. This is almost always caused by dropping the PES51 handpiece, which fractures the fragile ceramic sensor inside the cartridge. Solution: Replace the entire heater/sensor cartridge (Weller part number 8100-230).
2. Using a Wet Sponge
Many beginners use the included wet cellulose sponge to clean their tips. Dropping a 700°F tip into a room-temperature wet sponge causes a massive thermal shock. The 50W heater struggles to recover, and the rapid contraction can crack the iron plating on the tip. Solution: Discard the sponge and use a dry brass wire sponge. It cleans oxidation without dropping the tip temperature.
3. Leaving the Iron Idle
Leaving the WESD51 on for hours without soldering causes the tip to oxidize, turning it black and rejecting solder (a state known as 'dewetting'). Always turn the station off or use a physical timer switch if you are stepping away from the bench for more than 5 minutes.
WESD51 vs. Modern Alternatives in 2026
Should you hunt for a used WESD51 or buy a modern station? Here is how it stacks up against current market leaders:
| Feature | Weller WESD51 (Refurb/Used) | Weller WE1010NA (New) | Hakko FX-888D (New) |
|---|---|---|---|
| Power Output | 50W | 70W | 70W |
| Handpiece | PES51 (Heavy, robust) | WEP70 (Lighter, silicone cord) | T18/FX-951 style |
| Tip System | ETA (Screw-on) | Weller ET (Screw-on) | T18 (Slip-on) |
| 2026 Est. Price | $90 - $130 | $130 - $150 | $110 - $125 |
| Repairability | Exceptional (Analog-era design) | Good | Moderate |
The WESD51 wins on sheer mechanical repairability and the low cost of replacement cartridges. However, if you frequently solder large ground planes, the 70W output of the WE1010NA or Hakko FX-888D will provide noticeably faster thermal recovery.
Frequently Asked Questions
Can I use Hakko 900M tips on the Weller WESD51?
No. The WESD51 requires Weller ETA series tips. The internal heater cartridge dimensions and thermocouple placements are entirely different between the two brands. Forcing a mismatched tip will result in zero thermal transfer and potential damage to the sensor.
How do I calibrate the WESD51?
The WESD51 features a small calibration potentiometer inside the front panel (accessible via a tiny hole near the digital display). You will need a precision flathead screwdriver and a tip thermometer. Adjust the pot until the digital display matches the temperature read on your tip thermometer. For most beginners, factory calibration remains accurate for years.
Is the WESD51 safe for SMD (Surface Mount) soldering?
Yes, provided you use the correct tip geometry. Swap the standard chisel tip for an ETS (Small Screwdriver) or ETV (V-Groove) tip, lower the temperature to 600°F - 650°F, and use plenty of high-quality flux. For ultra-fine 0402 components, you may eventually want to upgrade to a hot air rework station, but the WESD51 is more than capable of handling SOIC and TQFP packages.
Final Thoughts
The Weller WESD51 soldering station proves that exceptional engineering doesn't expire. By understanding its ETA tip ecosystem, respecting its thermal limits, and maintaining the PES51 handpiece, beginners can achieve professional, IPC-compliant solder joints without breaking the bank. It remains a cornerstone of the DIY electronics community and a wise investment for anyone serious about learning the craft.