
When working in flame-restricted environments like hospitals, historical buildings, or occupied residential spaces, pulling out a propane or MAPP gas torch is often a violation of safety codes and insurance policies. This is where a high-wattage soldering iron for copper pipe becomes an indispensable tool. While most DIYers associate soldering irons with delicate electronics, heavy-duty plumbing irons (typically ranging from 200W to 500W) are specifically engineered to overcome the massive thermal conductivity of copper tubing. This guide covers the precise setup, thermal calibration, and sweating techniques required to achieve leak-proof capillary joints using electric plumbing irons in 2026.
The Case for Electric: Why Swap the Torch?
According to OSHA hot work guidelines, any operation involving open flames requires strict permitting, fire watches, and specialized insurance riders. By utilizing an electric soldering iron for copper pipe, contractors and advanced DIYers eliminate the risk of accidental structural fires and toxic smoke from burning flux residues in enclosed spaces. However, because electric irons rely on conductive heat transfer rather than convective flame heat, they require meticulous setup and thermal calibration to prevent 'cold joints'—the primary cause of plumbing leaks.
Equipment Matrix: Torches vs. High-Wattage Irons
Understanding the thermal dynamics of your tools is critical before attempting a joint. Below is a comparison of standard plumbing heat sources.
| Tool Type | Avg. Wattage / BTU | Heat-Up Time (1/2' Pipe) | Flame Risk | Best Use Case |
|---|---|---|---|---|
| Propane Torch | ~2,500 BTU | 15 - 25 seconds | High | Open-air, standard residential |
| MAPP Gas Torch | ~4,000 BTU | 10 - 15 seconds | High | Large diameter (1'+) lines |
| Weller D550 Gun | 260W / 200W | 45 - 60 seconds | None | Tight spaces, light plumbing |
| Dedicated 300W Plumbing Iron | 300W (Continuous) | 60 - 90 seconds | None | Hospitals, schools, historic homes |
Recommended High-Wattage Models
- Weller D550 Soldering Gun ($75 - $85): A dual-trigger 260W/200W gun. Excellent for 1/2' and 3/8' lines, but the chisel tip requires custom filing to contour to round pipes.
- Generic 300W Plumbing Copper Irons ($40 - $65): Often sold under various brand names, these feature massive, concave copper tips designed specifically to wrap around 1/2' and 3/4' tubing.
- Master Appliance ProHeat 1100 ($180+): While technically a heat gun, its specialized soldering nozzle attachment provides massive, continuous thermal output for larger joints.
Step 1: Thermal Calibration and Tip Verification
Unlike electronics stations with digital readouts, heavy-duty plumbing irons operate on raw wattage and thermal mass. To solder copper effectively, the tip must maintain a surface temperature of at least 650°F to 700°F (343°C to 371°C). Why so high when lead-free solder melts at ~430°F? Because copper acts as a massive heat sink. If your tip is only 450°F, the pipe will drop the tip temperature below the solder's melting point the moment they touch, resulting in a failed joint.
The Tempilstik and Thermocouple Method
To verify your iron is calibrated correctly and holding temperature under load, follow this procedure:
- Baseline Verification: Plug in the iron and allow it to heat for a full 5 minutes. High-wattage plumbing irons have massive thermal mass and take longer to reach equilibrium than 60W electronics irons.
- Thermocouple Check: Press a K-type thermocouple probe directly against the working face of the tip. You should see a reading between 680°F and 720°F.
- The Tempilstik Test: Take a Copper Development Association approved 450°F temperature-indicating crayon (Tempilstik) and draw a line on a scrap piece of 1/2' copper. Press the heated iron tip against the opposite side of the scrap pipe. Time how long it takes for the crayon mark to melt. A properly calibrated 300W iron should melt the 450°F mark in under 20 seconds.
Pro Tip: Never use a standard electronics damp cellulose sponge to clean a plumbing iron tip. The extreme thermal shock of 700°F hitting cold water will cause micro-fractures in the tip's iron plating, leading to rapid oxidation and pitting. Always use dry brass wool.
Step 2: Pipe Preparation and Flux Application
Capillary action is the mechanism that draws solder into the joint. The Uniform Plumbing Code (UPC) mandates strict preparation standards to ensure this action isn't blocked by debris or oxidation.
- Abrasion: Use 120-grit emery cloth or a dedicated copper fitting brush. Polish the outside of the pipe and the inside of the fitting until it shines like a new penny. Do not touch the cleaned metal with your bare fingers; skin oils will disrupt the flux.
- Flux Selection: For electric iron soldering, use a high-activity, lead-free tinning flux (such as Oatey No. 95 or La-Co Regular). Tinning flux contains microscopic solder particles that aid in thermal transfer and capillary draw.
- Application: Apply a thin, even layer of flux to the pipe end. Insert the pipe into the fitting and give it a quarter-turn to distribute the flux evenly. Wipe away any excess flux on the exterior with a rag to prevent corrosion.
Step 3: The Electric Sweating Technique
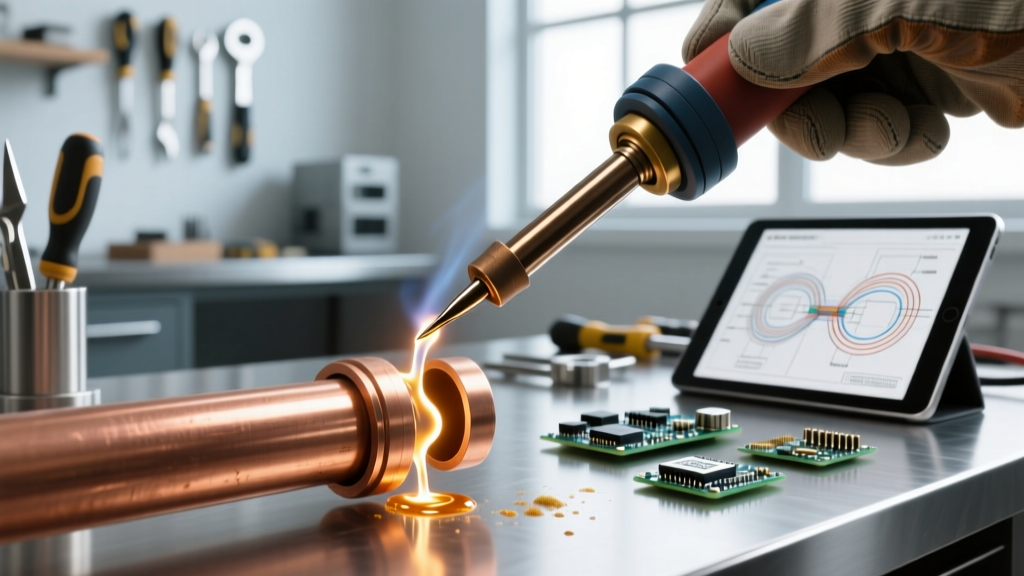
Sweating a joint with a soldering iron for copper pipe requires patience and a specific physical technique to compensate for the lack of an enveloping flame.
- Positioning: Hold the iron at a 45-degree angle. The concave face of the plumbing tip (or the broad chisel of a gun) must make maximum surface contact with the fitting, not the pipe. The fitting has more mass and needs more heat.
- The Clock-Face Method: Apply the iron to the 6 o'clock position (bottom) of the fitting. Hold it there for 30 to 45 seconds. You will hear the flux begin to sizzle and bubble. This indicates the water in the flux is boiling off and the base metal is reaching temperature.
- Feeding the Solder:Touch your lead-free wire solder (0.031' diameter) to the opposite side of the joint (the 12 o'clock position). Do not melt the solder directly with the iron tip. If the fitting is hot enough, capillary action will instantly suck the solder into the joint. If the solder balls up and drops to the floor, the fitting is too cold. Reapply the iron.
- The Solder Ring:Once a continuous, shiny silver ring of solder appears completely around the seam, remove the solder wire, then remove the iron.
- Cooling:Allow the joint to cool naturally for at least 3 minutes. Wiping it with a wet rag while it is semi-solid can cause 'thermal cracking' in the solder crystalline structure, leading to micro-leaks.
Tip Maintenance: Preventing Oxidation at 700°F
The greatest enemy of a plumbing soldering iron is oxidation. At 700°F, the iron plating on the tip will react with oxygen in the air, forming a black, crusty layer that completely insulates the tip and halts heat transfer. To prevent this during your setup:
- Pre-Tinning: Before the iron reaches maximum temperature (around 400°F), aggressively rub it with solid rosin-core solder. This creates a protective barrier of molten solder that blocks oxygen.
- Mid-Job Maintenance: If you notice the solder balling up and falling off the tip (de-wetting), the tip is oxidized. Use a specialized tip tinner/activator paste. Dip the hot tip into the paste, wipe on brass wool, and immediately re-tin with fresh solder.
- Storage: Never store the iron without a heavy coating of solder on the tip. This sacrificial layer will oxidize in storage, protecting the actual working face underneath.
Troubleshooting Cold Joints and Thermal Dropout
Even with a perfectly calibrated soldering iron for copper pipe, environmental factors can cause thermal dropout.
Edge Case 1: Water in the Line
Copper is an exceptional thermal conductor. If there is even a single drop of water resting inside the pipe near the joint, the iron's 300W output will be entirely consumed trying to boil that water rather than heating the copper. Solution: Use a dissolvable plumbing plug or a tightly crumpled piece of white bread to dam the water line upstream. The bread will safely dissolve once the water is turned back on.
Edge Case 2: The 'Burnt Flux' Barrier
If you hold the iron on the joint for more than 90 seconds, the flux will carbonize, turning into a hard, black, glassy residue. This residue acts as an insulator and blocks solder flow. Solution: Disassemble the joint while it is still hot using channel-lock pliers. Clean the pipe and fitting completely with emery cloth, re-flux, and start over. Do not attempt to force solder into a burnt flux joint.
Edge Case 3: Oversized Pipes (3/4' and 1')
Standard 300W plumbing irons struggle with 3/4' and 1' copper lines because the surface area dissipates heat faster than the electric element can generate it. Solution: For pipes larger than 1/2', pre-heat the fitting using a specialized electric heat blanket or a high-wattage heat gun (like the Master ProHeat) for 60 seconds before applying the soldering iron and the solder.
Mastering the electric soldering iron for copper pipe joints takes practice and a strict adherence to thermal management. By properly calibrating your equipment, maintaining your tips, and respecting the physics of capillary action, you can produce code-compliant, leak-free plumbing joints in any environment without ever striking a match.