
The Core Challenge of Horizontal Outlet Relocation
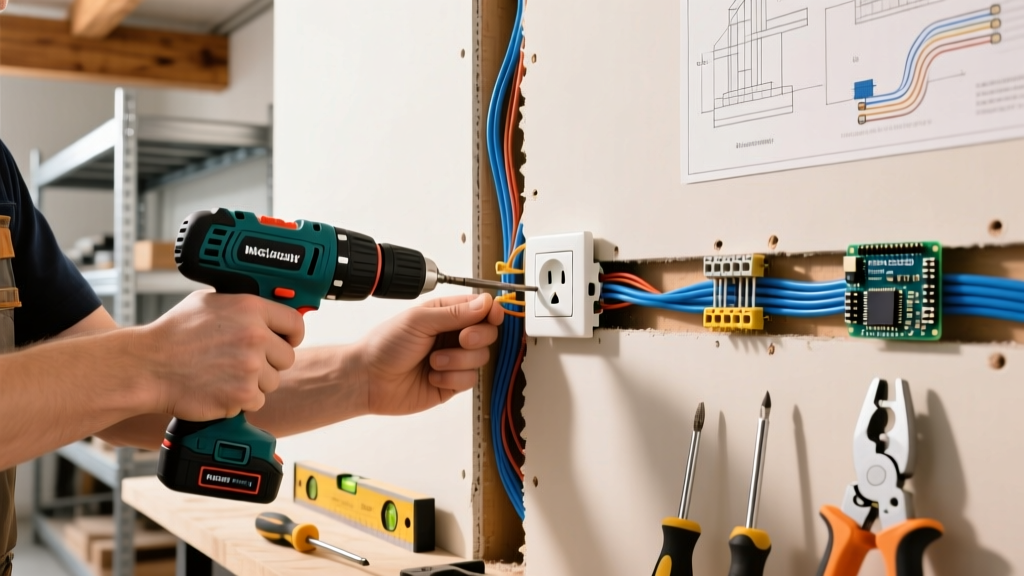
Relocating a receptacle along the same wall is one of the most common residential electrical modifications. Whether you are centering an outlet behind a newly mounted television, adjusting for kitchen cabinetry, or moving a plug out of the way of a new sofa, understanding how to move an electrical outlet horizontal to its original position requires navigating hidden wall cavities. Unlike vertical drops where gravity assists wire fishing, horizontal runs force you to drill through structural studs and navigate fire blocks, insulation, and existing plumbing.
This tool and material guide strips away the guesswork. We will detail the exact equipment, specific product models, and precise measurements required to execute a clean, code-compliant horizontal outlet relocation in 2026.
Essential Tools for Horizontal Wire Fishing
Standard screwdrivers and pliers will not suffice for this job. Fishing wire horizontally through framed walls requires specialized boring and pulling tools. Below is the professional-grade toolkit required for a standard 120V, 15-amp or 20-amp circuit relocation.
| Tool Category | Recommended Brand & Model | Est. Cost | Specific Purpose in Horizontal Runs |
|---|---|---|---|
| Non-Contact Voltage Tester | Fluke 2AC-II VoltAlert | $35.00 | Verifying zero-energy state before cutting drywall. |
| Drywall Saw | Stanley 6-Inch FatMax | $12.00 | Piercing and cutting the new outlet opening cleanly. |
| Flex Shaft Drill Bit | Greenlee 54" Bellhanger (3/4") | $55.00 | Drilling through studs horizontally from a single access hole. |
| Fish Tape | Klein Tools 50 ft. Steel | $38.00 | Pulling NM-B cable through the newly bored stud holes. |
| Oscillating Multi-Tool | Milwaukee M18 FUEL | $199.00 | Trimming drywall precisely if the initial cutout is misaligned. |
Material Breakdown: Boxes, Wire, and Connectors
Selecting the right materials ensures your new outlet sits flush against the drywall and maintains a secure, arc-free connection. Do not reuse the old electrical box; old-work (remodel) boxes are engineered specifically for post-drywall installations.
Selecting the Right Old-Work Box
For a standard single receptacle, the Carlon B618R 1-Gang Old Work Box (approx. $2.50) is the industry standard. It features adjustable flip-clamps that grip the back of the 1/2-inch drywall securely. If you are upgrading to a GFCI or a smart receptacle with a deeper chassis, opt for the Carlon B618R-2 which offers 20 cubic inches of volume, complying with NEC Article 314.16 box fill calculations for 12 AWG wire.
Wire Gauge and Type
You must match the existing circuit's wire gauge.
- 15-Amp Circuits: Use Southwire Romex SIMpull 14/2 NM-B (approx. $0.65/ft).
- 20-Amp Circuits (Kitchens/Bathrooms): Use Southwire Romex SIMpull 12/2 NM-B (approx. $0.85/ft).
The SIMpull jacket reduces friction by up to 30%, which is a massive advantage when pulling wire horizontally through tight stud bore holes.
Termination Connectors
Abandon traditional twist-on wire nuts for in-wall splices. Use Wago 221 Lever-Nuts (approx. $0.50 each). They provide a gas-tight connection, accommodate both solid and stranded wire, and feature a built-in test port for your multimeter without dismantling the splice.
Step-by-Step Execution: Fishing Wire Through Studs
When researching how to move an electrical outlet horizontal to the left or right, the primary obstacle is the wooden or metal studs spaced every 16 or 24 inches on center. Here is the professional methodology for bypassing them.
- Power Down & Verify: Turn off the breaker. Insert the Fluke 2AC-II into the top and bottom slots of the existing outlet. Confirm zero voltage.
- Map and Cut the New Opening: Use a magnetic or radar stud finder to locate the studs between the old and new locations. Mark a cutout exactly 2.25 inches wide by 3.75 inches high for a standard 1-gang box. Score the drywall with a utility knife, then pierce the center with the Stanley FatMax saw to remove the section.
- Bore the Studs: This is the most critical step. From the existing outlet hole and the new hole, insert the 54-inch Greenlee flex shaft bit into your drill. Angle the bit slightly upward or downward to catch the center of the intermediate studs. Pro Tip: Apply beeswax to the bit to reduce friction and prevent binding in dense Douglas Fir or LVL studs.
- Fish the Cable: Feed the Klein Tools steel fish tape from the new box location toward the old box. When the tape emerges, tape the stripped end of your NM-B cable to the fish tape using electrical tape, creating a smooth, tapered head. Pull the tape back through the cavities.
- Mount and Terminate: Push the cable through the knockout of the Carlon old-work box. Insert the box into the drywall hole and tighten the mounting screws until the flip-clamps pull tight against the back of the drywall. Strip the wires and terminate using Wago 221 connectors.
Expert Insight: When drilling through studs, NEC Article 300.4(A)(1) mandates that bore holes must be at least 1.25 inches from the face of the stud. If you drill too close to the drywall side, a future nail or screw could pierce the cable. Always install a steel nail plate (e.g., Gardner Bender NP-1) over the stud face if your hole is closer than 1.25 inches.
Common Edge Cases & Troubleshooting
Hitting Fire Blocks
In multi-story homes or specific fire-rated assemblies, horizontal wooden fire blocks are installed between studs. If your flex bit hits solid wood immediately after entering the wall cavity, you have found a fire block. Do not attempt to drill through it blindly. Instead, cut a small 4x4 inch access hole above the block, drill vertically through the top plate into the attic or crawlspace, and drop the wire down to the new outlet location, bypassing the horizontal block entirely.
Metal Studs in Modern Construction
If your home uses 25-gauge steel studs, standard wood-boring flex bits will fail. You must use a step bit (e.g., Milwaukee 1/2" to 1-1/4" Step Drill Bit) to punch clean, burr-free holes through the metal webbing. Burrs left by standard twist bits will slice the NM-B cable sheathing during the pull, creating a severe short-circuit hazard.
Safety & NEC Code Compliance
Adhering to the National Electrical Code (NEC) is not optional; it ensures your home remains insurable and safe. According to the National Fire Protection Association (NFPA), all splices must remain accessible. By using an old-work box with a blank cover plate at the original outlet location (if you are abandoning it), or by pulling continuous, unspliced wire from the source, you remain compliant.
Furthermore, the U.S. Consumer Product Safety Commission (CPSC) emphasizes that loose connections are a leading cause of electrical fires. This is why the Wago lever-nuts and proper box-fill calculations are heavily emphasized in this guide. Never cram excess wire into a shallow 14-cubic-inch box; the physical stress on the terminals can lead to arcing over time.
Frequently Asked Questions (FAQ)
Can I just use an extension cord inside the wall?
Absolutely not. NEC Article 400.8 strictly prohibits using flexible cords and cables as a substitute for the fixed wiring of a building. Extension cords lack the thermal rating and physical protection required for concealed in-wall installations and pose a severe fire risk.
How much slack should I leave inside the new outlet box?
NEC Article 300.14 requires at least 6 inches of unspliced conductor length to be left inside the box, measured from the point where the cable enters the box. This ensures you have enough wire to comfortably pull the receptacle out for future testing or replacement.
Do I need a permit to move an outlet horizontally?
Permit requirements vary by municipality. While minor repairs like swapping a receptacle usually do not require a permit, extending a circuit or relocating a box often falls under "alterations" requiring an electrical permit and a rough-in inspection before the drywall is patched. Always check with your local Authority Having Jurisdiction (AHJ) before starting.