
The Dual-Nature of RV Electrical Systems
When converting a Mercedes Sprinter van, outfitting an expedition truck, or upgrading a Class A motorhome, beginners often make a critical mistake: they treat the vehicle as a single electrical entity. In reality, modern recreational vehicles operate on two entirely distinct networks. The chassis system handles the engine, alternator, headlights, and starting battery. The house system powers the living quarters, including HVAC, induction cooktops, outlets, and refrigeration.
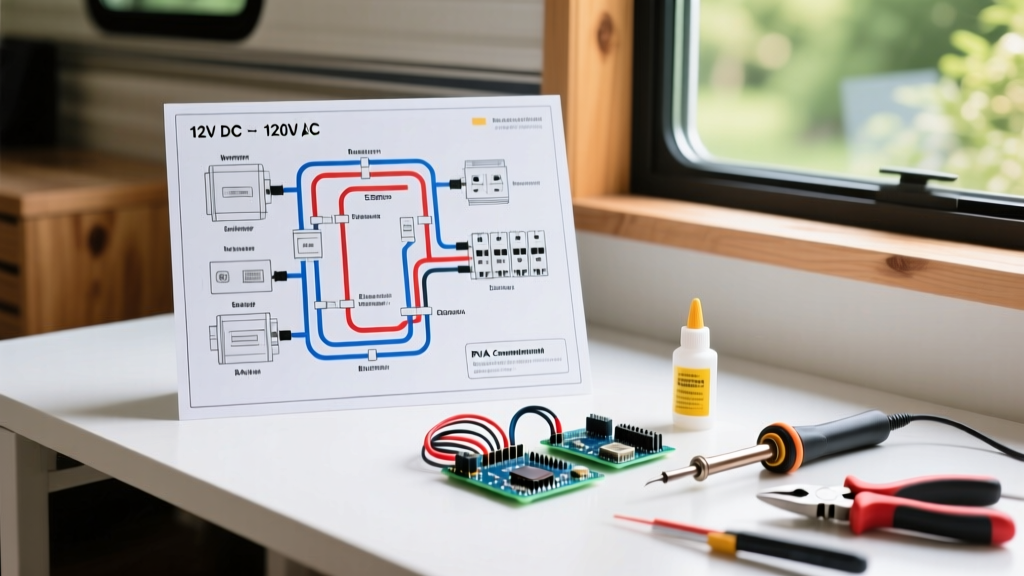
Understanding the electrical diagram of house wiring is the foundational skill required for safe upgrades, solar integration, and advanced troubleshooting. Unlike a stationary residential home, an RV house wiring diagram must account for high-vibration environments, extreme temperature fluctuations, and the seamless integration of 120V AC shore power with 12V/24V DC battery banks. In 2026, with the mass adoption of high-density LiFePO4 (Lithium Iron Phosphate) batteries and multi-phase inverter-chargers, these diagrams have become more complex—and more critical—than ever.
Deconstructing the Electrical Diagram of House Wiring
A comprehensive RV house wiring diagram is typically divided into three primary sub-systems. Let us break down the architecture you will see on the schematic.
1. 120V AC Shore Power & Distribution
The AC side of the diagram begins at the shore power inlet. Most modern motorhomes utilize a 50-amp (120/240V split-phase) inlet, while smaller camper vans and travel trailers rely on a 30-amp (120V single-phase) connection. The diagram will show the shore power line routing into an Automatic Transfer Switch (ATS). The ATS decides whether to pass power from the shore line or the onboard generator to the main AC breaker panel. From the breaker panel, individual circuits branch out to high-draw appliances like the rooftop A/C compressor, water heater, and microwave.
2. The Inverter/Charger Hub
The heart of any modern off-grid capable vehicle is the inverter-charger. In premium setups, you will see models like the Victron MultiPlus-II 12/3000/120 prominently featured in the center of the schematic. The diagram illustrates the AC-in and AC-out pathways, showing how the inverter acts as a pass-through when shore power is present, and instantly switches to battery inversion (creating 120V AC from 12V DC) when the grid is disconnected. Pricing for these premium units hovers around $1,400 to $1,600 in 2026, representing a significant investment that demands precise wiring.
3. 12V DC Battery & Solar Architecture
The DC side of the electrical diagram of house wiring is where the most customization occurs. It maps the flow from the solar array, through an MPPT charge controller (e.g., Victron SmartSolar 150/35), down to the main DC busbars. The diagram will detail the Battery Isolation Manager (BIM) or DC-DC charger (like the Victron Orion-Tr Smart 12/12-30) which safely charges the house bank from the vehicle's alternator without overloading the chassis wiring.
Wire Gauge Selection Matrix for 12V and 120V Systems
One of the most vital pieces of data extracted from a house wiring diagram is the required wire gauge. Because 12V DC systems operate at a much lower voltage, they require significantly thicker copper to prevent voltage drop and resistive heating. Below is a reference matrix for standard RV wire sizing based on a 20-foot round-trip run.
| Max Amperage | 12V DC Wire Gauge (Stranded Marine) | 120V AC Wire Gauge (THHN/THWN-2) | Common RV Application |
|---|---|---|---|
| 15A | 10 AWG | 14 AWG | LED Lighting circuits, USB outlets |
| 20A | 8 AWG | 12 AWG | 12V Water pump, 120V receptacles |
| 30A | 6 AWG | 10 AWG | Solar charge controller to busbar |
| 50A | 4 AWG | 6 AWG | DC-DC Charger, Slide-out motors |
| 100A | 2 AWG | 3 AWG | Small inverter (1000W) main feed |
| 200A+ | 2/0 AWG or 4/0 AWG | N/A | Main battery bank to inverter/busbar |
Note: Always use stranded, tinned marine-grade copper (UL 1426) for the DC side of an RV. Solid copper wire will fracture under the constant vibration of highway travel.
Decoding Standard RV Wiring Symbols
When reading an electrical diagram of house wiring provided by manufacturers like Winnebago, Airstream, or custom upfitters, you must understand the standardized symbology. While they share some overlap with residential diagrams, RV schematics feature specific automotive and marine symbols:
- Zig-Zag Line: Represents a resistive heating element (e.g., 12V tank heating pads or 120V water heater elements).
- Circle with an 'M': Indicates a DC motor, most commonly the 12V water pump or macerator pump.
- Parallel Lines of Unequal Length: The universal symbol for a battery cell or capacitor bank.
- Diode Triangle with a Line: Indicates a blocking diode, frequently used in solar arrays to prevent reverse current flow at night.
- Box with 'BMS': Denotes the internal Battery Management System of a LiFePO4 battery, which monitors cell balancing and temperature.
Critical Failure Modes and Troubleshooting
Even with a perfect diagram, physical installations in vehicles are prone to unique failure modes. Here are the most common issues encountered when auditing RV house wiring.
Voltage Drop in Long DC Runs
A common error in camper van conversions is placing the inverter too far from the battery bank. If a 3000W inverter draws 250A at 12V, running 2/0 AWG wire over a distance of 15 feet will result in a severe voltage drop, causing the inverter to trigger a low-voltage cutoff. The Victron Energy Wiring Diagrams Overview explicitly mandates keeping high-amperage DC cable runs under 5 feet whenever physically possible to maintain a voltage drop below 1%.
The Neutral-to-Ground Bonding Trap
Safety Warning: In a standard residential home, the neutral and ground wires are bonded together at the main service panel. In an RV, the house sub-panel must NEVER have a neutral-to-ground bond. The bond must only occur at the power source (the shore power pedestal, the onboard generator, or inside the inverter's internal transfer switch). Bonding neutral and ground at the RV sub-panel can energize the chassis and cause lethal shock hazards.
This specific requirement is outlined in NFPA 1192: Standard on Recreational Vehicles, which governs all life-safety and electrical systems in the RV industry. If your custom wiring diagram shows a bonding strap in the AC sub-panel, it is fundamentally flawed and violates NEC Article 551.
Hardware and Termination Best Practices
Translating an electrical diagram of house wiring into a physical, vibration-resistant reality requires specific hardware. Standard automotive crimpers are insufficient for the heavy-gauge wires used in modern 48V or high-amp 12V RV systems.
- Hex Crimping: For wires 6 AWG and larger, use a hex-crimp tool (such as the Knipex 10 AWG hex crimp or a hydraulic crimper). This creates a gas-tight seal that prevents oxidation.
- Adhesive-Lined Heat Shrink: Always use 3:1 ratio marine-grade heat shrink with an inner wall of polyamide adhesive. When heated, the adhesive melts and seals the wire entry point against moisture and corrosion.
- Busbar Torque: When terminating 2/0 AWG wires on a Blue Sea Systems busbar, use a calibrated torque wrench. The M8 terminal studs require exactly 5 Nm (44 in-lbs) of torque. Under-torquing causes arcing and melting; over-torquing strips the brass threads.
Code Compliance and Industry Standards
Whether you are a DIY van-lifer or a professional upfitter, your house wiring diagram must align with recognized safety standards. The RV Industry Association (RVIA) mandates strict adherence to NFPA 1192 for all certified manufacturers. For DIYers and custom skoolie builders, the National Electrical Code (NEC) Article 551 (Recreational Vehicles and Recreational Vehicle Parks) serves as the legal baseline for inspector sign-offs.
By thoroughly mastering the electrical diagram of house wiring, you move beyond guesswork. You gain the ability to design scalable power systems, safely integrate 2026's high-output alternators and smart BMS networks, and ensure your mobile home remains safe, efficient, and fully powered no matter where the road takes you.