
Understanding the 48-Volt Golf Cart Electrical Architecture
The 48-volt platform has been the undisputed industry standard for modern electric golf carts—such as the Club Car Precedent, EZ-GO RXV, and Yamaha Drive—since the early 2010s. When sourcing or troubleshooting a battery wiring diagram for 48 volt golf cart applications, technicians must understand that the system relies on a strict series configuration to achieve the nominal 48V (which actually rests between 50.9V and 51.2V when fully charged). Unlike parallel wiring, which increases amp-hour (Ah) capacity while maintaining voltage, series wiring adds the voltage of each cell block together while keeping the Ah capacity constant.
Getting the wiring sequence wrong, using undersized interconnect cables, or applying incorrect terminal torque will result in severe voltage drop, melted battery posts, and premature failure of the motor controller (such as a Curtis 1268 or Alltrax SRX-4855). This guide details the exact wiring topologies, hardware specifications, and 2026 lithium-upgrade pathways for 48V fleet and personal carts.
Standard Configurations: 8x6V vs. 6x8V vs. 4x12V
Before executing the battery wiring diagram for your 48 volt golf cart, you must identify your battery bank configuration. While 8x 6V is the traditional fleet standard, 6x 8V and 4x 12V setups are increasingly common for weight reduction and maintenance ease.
| Configuration | Standard Battery Model | Nominal Voltage | Total Capacity (Ah) | Approx. 2026 Cost | Maintenance Factor |
|---|---|---|---|---|---|
| 8x 6V | Trojan T-105 RE (225Ah) | 48V | 225Ah | $1,600 - $1,950 | High (8 water fill points) |
| 6x 8V | Trojan T-875 (150Ah) | 48V | 150Ah | $1,350 - $1,600 | Medium (6 water fill points) |
| 4x 12V | US Battery US12V200 | 48V | 150Ah | $1,400 - $1,700 | Medium (4 water fill points) |
| 1x 48V LiFePO4 | Relion RB48V100 / Eco Battery | 48V | 100Ah - 150Ah | $1,200 - $1,800 | Zero (Solid-state BMS) |
According to data from Trojan Battery Company, the 8x 6V configuration remains the most robust for heavy-duty, hilly terrain applications due to the higher 225Ah capacity and thicker internal lead plates, which better withstand high-amperage draws during steep inclines.
Step-by-Step: The 8x 6V Series Wiring Diagram
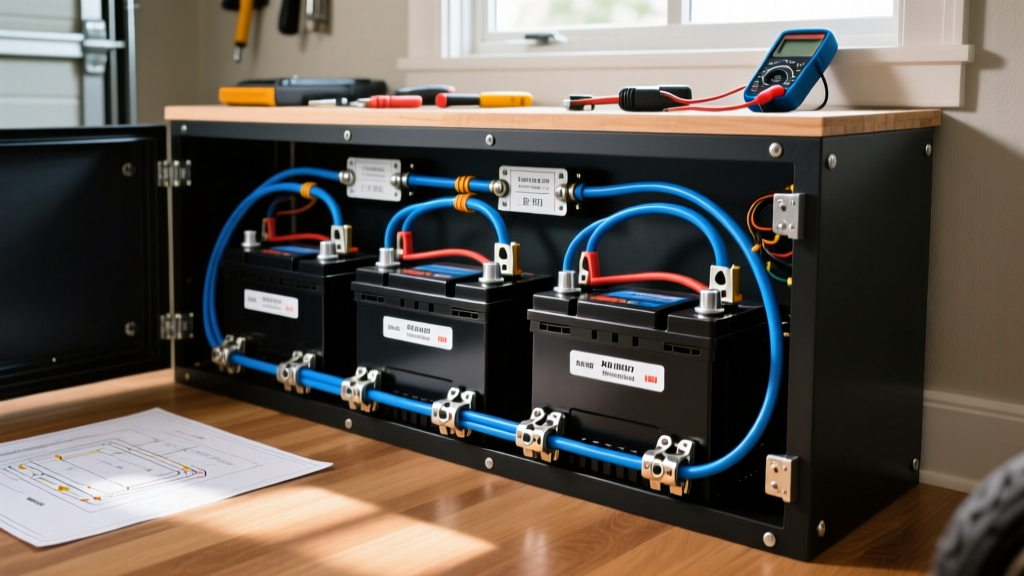
The most critical rule when following any series battery wiring diagram for a 48 volt golf cart is the daisy-chain sequence. You must connect the positive terminal of one battery to the negative terminal of the next.
1. Preparation and Safety
- PPE: Wear ANSI Z87.1 safety goggles and acid-resistant nitrile gloves. Lead-acid batteries contain sulfuric acid and can vent explosive hydrogen gas.
- Cleaning: Clean all battery posts and cable lugs with a brass wire brush. Apply a thin layer of NO-OX-ID A-Special or generic anti-oxidant dielectric grease to prevent galvanic corrosion.
- Cable Sizing: Use 2 AWG or 1/0 AWG flexible pure-copper welding cable for main runs (battery to controller), and 4 AWG for interconnects. Reference the Engineering Toolbox wire gauge standards to ensure your cables can handle the 300A+ peak draw of a 48V golf cart motor without excessive thermal resistance.
2. The Interconnect Sequence
- Battery 1 to 2: Connect B1 Positive (+) to B2 Negative (-).
- Battery 2 to 3: Connect B2 Positive (+) to B3 Negative (-).
- Battery 3 to 4: Connect B3 Positive (+) to B4 Negative (-).
- Continue the Chain: Repeat this alternating pattern through Battery 8.
3. Main Power Routing to the Controller
- Main Positive (B+): Route a heavy-duty 1/0 AWG red cable from the remaining open Positive (+) terminal on Battery 1. This connects to the main positive busbar, then through the main solenoid, and finally to the B+ terminal on the motor controller.
- Main Negative (B-): Route a 1/0 AWG black cable from the remaining open Negative (-) terminal on Battery 8. This connects directly to the B- terminal on the motor controller and the vehicle's main ground bus.
Expert Warning: Never connect the main positive and main negative to the same battery. Doing so creates a severe imbalance, causing the first and last batteries in the chain to degrade up to 30% faster than the middle batteries due to uneven current distribution and voltage drop across the interconnects.
Terminal Torque Specifications: The Hidden Failure Point
The most common cause of melted battery posts and intermittent cart shutdowns is improper terminal torque. Lead is a soft metal; over-tightening strips the threads or cracks the post seal, leading to acid weeping. Under-tightening creates microscopic air gaps that cause electrical arcing, immense heat, and melted cable lugs.
According to guidelines verified by the Battery Council International (BCI), proper torque is non-negotiable:
- SAE Automotive Posts (Tapered): 110 to 130 inch-pounds (in-lbs).
- Offset LPT / Stud Terminals: 95 to 100 inch-pounds (in-lbs).
- M8 / M10 Threaded Studs (Lithium): 70 to 90 inch-pounds (in-lbs), depending on manufacturer specs.
Always use a calibrated 1/4-inch drive torque wrench. Never use an impact driver or guess the tightness with a standard socket wrench.
Troubleshooting Common Wiring Failure Modes
Even with a perfect battery wiring diagram for your 48 volt golf cart, environmental factors and vibration can introduce faults. Use a digital multimeter (DMM) to diagnose these specific edge cases:
Voltage Drop Testing Under Load
If your cart loses power on hills, perform a voltage drop test across each interconnect cable while a helper presses the accelerator (with the rear wheels safely jacked up). A healthy 4 AWG interconnect should show a voltage drop of less than 0.05V. If you read 0.2V or higher across a single cable, that specific cable or terminal has high internal resistance and must be replaced or re-torqued immediately.
The 'Half-Bank' Charging Fault
If your onboard charger clicks off after only 20 minutes, but the cart dies quickly, check the charger receptacle wiring. The receptacle must be wired directly to the Main Positive (B1) and Main Negative (B8). If a previous owner wired the charger to the middle of the bank (e.g., B3 and B6), the charger will only see 24V or 36V, triggering a false 'fully charged' state while half the bank remains deeply discharged.
2026 Perspective: Upgrading to 48V LiFePO4 Lithium
In 2026, the shift from lead-acid to Lithium Iron Phosphate (LiFePO4) drop-in batteries has accelerated due to falling cell costs and integrated Bluetooth Battery Management Systems (BMS). Brands like Eco Battery, Allied Lithium, and Relion now offer single-box 48V solutions weighing under 60 lbs, compared to the 320 lbs of an 8x 6V lead-acid bank.
Wiring a 48V lithium drop-in requires a modified diagram:
- Remove all lead-acid batteries and old 4 AWG interconnect cables.
- Install the Lithium Battery: Connect the cart's Main Positive and Main Negative directly to the single LiFePO4 BMS terminals.
- Wire the CAN Bus / RS485 Communication: Modern lithium setups require a communication cable running from the battery's BMS port to a dedicated smart charger and an upgraded dashboard gauge. This allows the BMS to throttle the motor controller's current draw if the battery reaches low state-of-charge (SOC) or high-temperature thresholds.
- Update the Charger Profile: Flash your motor controller and charger to the specific 'LiFePO4 48V' profile. Lithium batteries require a constant current/constant voltage (CC/CV) charge curve with a strict cutoff at 58.4V, entirely different from the equalization phases used for lead-acid.
Frequently Asked Questions (FAQ)
Can I use four 12V automotive starting batteries instead of deep cycle?
No. Automotive batteries (SLI - Starting, Lighting, Ignition) feature thin lead sponge plates designed to deliver 600+ Cold Cranking Amps (CCA) for three seconds, not sustained 50A draws over four hours. Using them in a golf cart will result in severe plate sulfation and total failure within 3 to 6 months. Always use true deep-cycle marine/RV or dedicated golf cart batteries.
What is the exact fully-charged resting voltage of a 48V system?
A fully charged 48V lead-acid bank (8x 6V) will rest at 50.9V to 51.2V after surface charge has dissipated (usually 2-4 hours off the charger). A fully charged 48V LiFePO4 battery will rest at 53.5V to 54.0V. If your 48V lead-acid cart reads below 48.0V at rest, it is over 50% discharged and requires immediate charging to prevent irreversible sulfation.