
The Metallurgy of Electrical Wire Soldering
When soldering wire electrical connections, the base metal dictates your entire thermal and chemical strategy. Soldering is not merely gluing wires together; it is a metallurgical bonding process where the filler metal forms an intermetallic compound (IMC) with the base conductor. As we navigate the 2026 electronics landscape, the industry-wide shift toward RoHS-compliant lead-free alloys means that mastering material-specific thermal profiles is no longer optional—it is mandatory for joint reliability.
Whether you are assembling automotive harnesses, repairing marine electronics, or prototyping high-current power supplies, applying the wrong flux or temperature to a specific wire material will result in catastrophic field failures. This guide breaks down the exact techniques, temperatures, and chemical agents required for the most common electrical wire materials.
Solid vs. Stranded: Thermal Mass and Capillary Action
Before addressing specific alloys, you must account for the physical geometry of the wire. Solid core and stranded wires behave entirely differently under a soldering iron tip due to thermal mass and capillary wicking.
| Wire Type | Thermal Mass | Capillary Wicking | Flexibility | Best Application |
|---|---|---|---|---|
| Solid Core | High (heats uniformly) | Low (solder stays on surface) | Rigid | Breadboards, PCB through-holes, static junction boxes |
| Stranded (Fine) | Low (heats rapidly) | High (wicks under insulation) | Highly Flexible | Automotive harnesses, robotics, moving mechanical joints |
| Stranded (Coarse) | Medium | Medium | Moderate | Household AC wiring, heavy gauge power supplies |
Pro Tip for Stranded Wire: Never twist stranded wire tightly before tinning. Twisting compresses the strands, eliminating the capillary gaps and preventing flux penetration. Strip the wire and lay the strands parallel with a maximum 15-degree lay angle before applying heat.
Copper Wire: The Industry Standard
Copper is the undisputed king of electrical conductivity, but its surface oxidation requires specific chemical intervention. Bare copper oxidizes rapidly when heated, forming cupric oxide, which actively repels molten solder.
Bare Copper vs. Tinned Copper
Bare Copper: Requires a high-activity rosin flux. Kester 44 (a mildly activated rosin flux, or RMA) remains the gold standard for bare copper electrical work. It contains abietic acid, which dissolves copper oxide at soldering temperatures without being corrosive enough to damage adjacent components over time.
Tinned Copper: Often used in marine and outdoor environments, the wire is pre-coated in a thin layer of tin. This prevents base-metal oxidation but introduces a different challenge: the existing tin layer can dissolve into your solder pool, altering the alloy's melting point. When soldering tinned copper, use a slightly lower iron temperature (around 320°C) to prevent stripping the pre-tin layer before the joint is made.
Alloy Selection and Pricing in 2026
For commercial and consumer electrical assemblies, SAC305 (Sn96.5Ag3.0Cu0.5) is the default lead-free choice. A 1lb spool of 0.031" SAC305 currently retails between $38 and $45. Its melting point is 217°C–220°C, requiring an iron tip temperature of 340°C–360°C. For aerospace or high-vibration hobbyist applications where lead is permitted, Sn63Pb37 (60/40) remains superior due to its lower melting point (183°C) and resistance to thermal fatigue cracking.
Aluminum Wire: The High-Failure Edge Case
Soldering aluminum electrical wire is notoriously difficult and generally avoided in favor of mechanical crimping. The problem is aluminum oxide (Al2O3). Unlike copper oxide, which forms over hours or days, aluminum oxide reforms in milliseconds when exposed to air. Furthermore, aluminum oxide melts at 2,072°C—far beyond the capability of any standard soldering iron.
The Mechanical Abrasion Technique
Standard rosin fluxes will not penetrate aluminum oxide. You must use a specialized zinc-chloride-based flux or a proprietary aluminum soldering kit like Super Alloy 1 (retailing around $55–$65 for a multi-temperature kit).
- Prep: Strip the aluminum wire and immediately submerge the exposed tip in liquid aluminum flux to halt oxide formation.
- Heat: Apply a high-wattage iron (minimum 80W for 12 AWG or thicker) set to 380°C. Aluminum acts as a massive heat sink; low-wattage irons like the 70W Hakko FX-888D will struggle to maintain thermal equilibrium on thick gauges.
- Abrade: While the iron is heating the wire through the flux pool, use a stainless steel pick or the edge of the solder wire to physically scratch the surface of the aluminum underneath the liquid flux. This mechanically breaks the oxide layer while the flux prevents new oxygen from reaching the bare metal.
- Wet: Once the solder tins the scratched aluminum, remove the iron and allow the joint to cool naturally. Do not move the wire during solidification, or the joint will fracture.
Specialty Alloys: Nichrome and Constantan
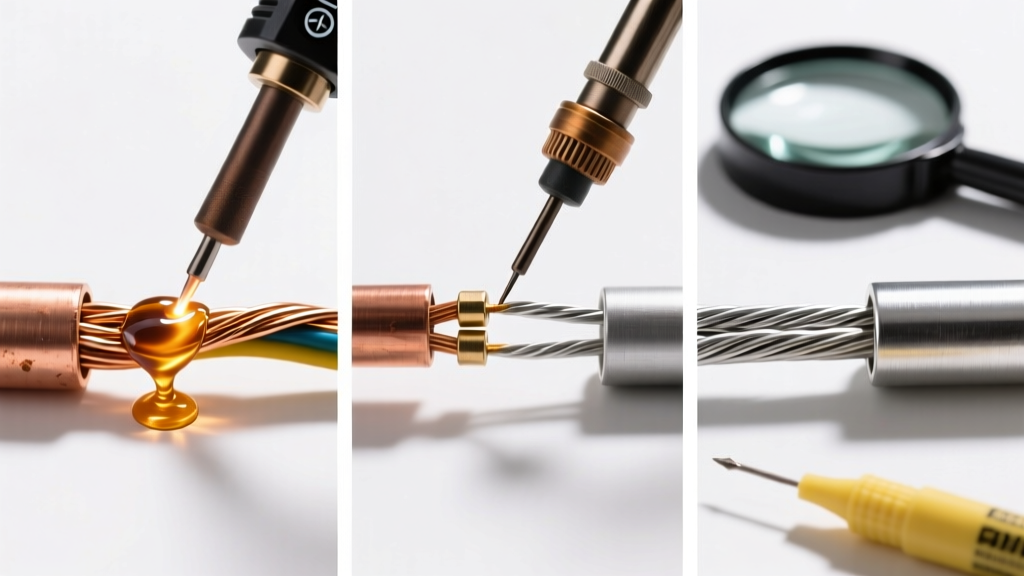
When working with heating elements or thermocouples, you will encounter Nichrome (Nickel-Chromium) or Constantan (Copper-Nickel). These materials resist standard soldering because their chromium and nickel oxides are highly stable. Standard electrical soldering is not recommended for these wires. Instead, use spot welding or high-temperature silver-bearing brazing alloys (like Easy-Flo 45) using an oxy-acetylene torch. If you must use a soldering iron for a low-stress sensor wire, you will need a highly corrosive, acid-based black flux and must thoroughly neutralize the joint with a baking soda solution post-solder to prevent galvanic corrosion.
Step-by-Step Workflow for Standard Copper Electrical Joints
For standard 18 AWG to 14 AWG stranded copper wire using SAC305 lead-free solder, follow this exact sequence to ensure IPC-compliant joints:
- Strip: Use a precision thermal wire stripper or calibrated mechanical strippers. Avoid nicking the copper strands, as nicks create stress risers that lead to fatigue failure under vibration.
- Flux: Apply a small drop of Kester 186 RMA liquid flux to the exposed strands.
- Heat: Touch the pre-tinned tip of your iron (e.g., Weller WE1010NA set to 350°C) to the wire. Hold for exactly 1.5 to 2 seconds to allow the thermal mass of the wire to reach the flux's activation temperature (approx. 180°C).
- Feed: Introduce the SAC305 solder wire to the opposite side of the wire from the iron tip. The solder should melt instantly upon touching the copper, not the iron.
- Inspect: The finished joint should exhibit a smooth, concave fillet with a wetting angle of less than 45 degrees. A shiny finish indicates a proper IMC layer; a dull finish on lead-free solder is normal and does not necessarily indicate a cold joint.
Common Failure Modes and Troubleshooting
- Insulation Wicking: If solder wicks up the stranded wire and under the PVC or silicone insulation, you applied heat for too long (typically >4 seconds) or used an iron temperature exceeding 400°C. This turns the flexible wire into a rigid antenna that will snap under vibration.
- Cold Joints: Characterized by a lumpy, convex profile. This happens when the iron tip is oxidized, or the wire's thermal mass drew the tip temperature below the solder's liquidus point. Clean your tip with a brass wire sponge and increase the station temperature by 15°C.
- Disturbed Joints: A grainy, fractured appearance caused by moving the wire while the SAC305 alloy is in its "pasty" phase (between solidus and liquidus temperatures). Always use a third-hand tool or heat-shrink tubing to immobilize the joint during cooling.
IPC Standards and Safety Compliance
Professional electrical soldering must adhere to stringent reliability standards. The IPC-A-610 standard categorizes electrical assemblies into three classes. Class 2 (Dedicated Service Electronic Products) requires a minimum 50% barrel fill and visible wetting on the termination. Class 3 (High-Performance/Life Support) demands 75% to 100% barrel fill and flawless fillet geometry. Furthermore, for aerospace and mission-critical applications, technicians must follow NASA-STD-8739.3, which strictly prohibits splayed strands and mandates specific solder cup fill percentages.
Finally, never ignore the health hazards of flux vaporization. Rosin and synthetic resin fluxes release colophony fumes when heated, which are known respiratory sensitizers and can cause occupational asthma. Always utilize a localized fume extractor with a HEPA and activated carbon filtration system, in accordance with CDC/NIOSH guidelines on soldering fumes. Proper ventilation is just as critical to your workflow as the temperature of your iron.