
Understanding Soldering Wire for Plumbing Applications
When professionals and DIYers search for soldering wire for plumbing, they are referring to the spooled, lead-free alloy wire used to "sweat" copper water lines—not electrical wires for plumbing sensors or pumps. The terminology can be confusing for beginners crossing over from electronics, but the metallurgy and techniques are entirely different. Unlike electrical soldering, which relies on rosin-core flux and low-temperature tin-lead alloys, plumbing requires water-soluble paste flux and high-temperature, lead-free alloys capable of withstanding 80+ PSI of municipal water pressure and thermal expansion.
Following the strict enforcement of the EPA's Safe Drinking Water Act amendments, the use of traditional 50/50 tin-lead solder in potable water systems is strictly illegal. Today's plumbing solder wire must contain no more than 0.2% lead to be considered "lead-free" for drinking water applications. In this comprehensive 2026 tutorial, we will break down the exact alloys, tools, and step-by-step techniques required to create leak-proof copper joints.
The Metallurgy of Plumbing Solder Wire
Choosing the correct spool of soldering wire for plumbing depends on the specific application, pressure requirements, and whether the system carries potable water or refrigerant. Below is a comparison of the three most common lead-free alloys available on the market today.
| Alloy Composition | Melting Point | Avg. Cost (8oz Spool) | Best Application |
|---|---|---|---|
| 95/5 (Tin/Antimony) | 452°F (233°C) | $13 - $16 | Standard residential potable water lines (most common). |
| 97/3 (Tin/Copper) | 457°F (236°C) | $15 - $18 | High-vibration lines, HVAC condensate drains, and commercial water. |
| 96/4 (Tin/Silver) | 430°F (221°C) | $26 - $32 | Medical gas lines, high-pressure refrigeration, and specialized HVAC. |
Pro Tip: For 95% of residential copper repiping and repairs, a standard 95/5 Tin-Antimony wire (such as the Oatey Safe Flo or Harvey's Lead-Free brands) is the industry standard. It flows beautifully and provides excellent shear strength.
The 2026 Essential Gear Loadout
Before striking a torch, ensure you have the correct materials. Attempting to sweat a joint with a cheap, underpowered butane torch or electrical rosin-core solder is a guaranteed path to a pinhole leak. Here is the exact loadout used by licensed plumbers:
- Torch: Bernzomatic TS8000 High-Intensity Trigger Torch (~$55). The auto-ignition and swirl flame are critical for even heat distribution.
- Fuel: MAP-Pro (Yellow Cylinder, e.g., Worthington 336142). Burns at 3,730°F, heating copper fittings 30% faster than standard blue propane, which prevents burning the flux.
- Flux: Oatey No. 5 Paste Flux (~$7). Contains zinc chloride and ammonium chloride to chemically clean the copper at high temperatures.
- Soldering Wire: 1/8-inch diameter 95/5 Lead-Free Plumbing Solder (~$14).
- Abrasive: 120-grit emery cloth or a specialized copper wire fitting brush.
Step-by-Step Tutorial: Sweating a Copper Joint
Step 1: Tube Preparation and Reaming
The capillary action that draws molten solder into a joint relies entirely on microscopic surface tension. If the copper is oxidized or scratched, the solder will not flow. Cut the copper pipe using a rotary tubing cutter—never a hacksaw, which leaves a jagged edge and severe burrs. After cutting, use the reamer attached to the back of the tubing cutter to remove the internal burr. Leaving an internal burr restricts water flow and creates turbulence, which can lead to water hammer and eventual pinhole leaks downstream.
Step 2: Abrasion and Flux Application
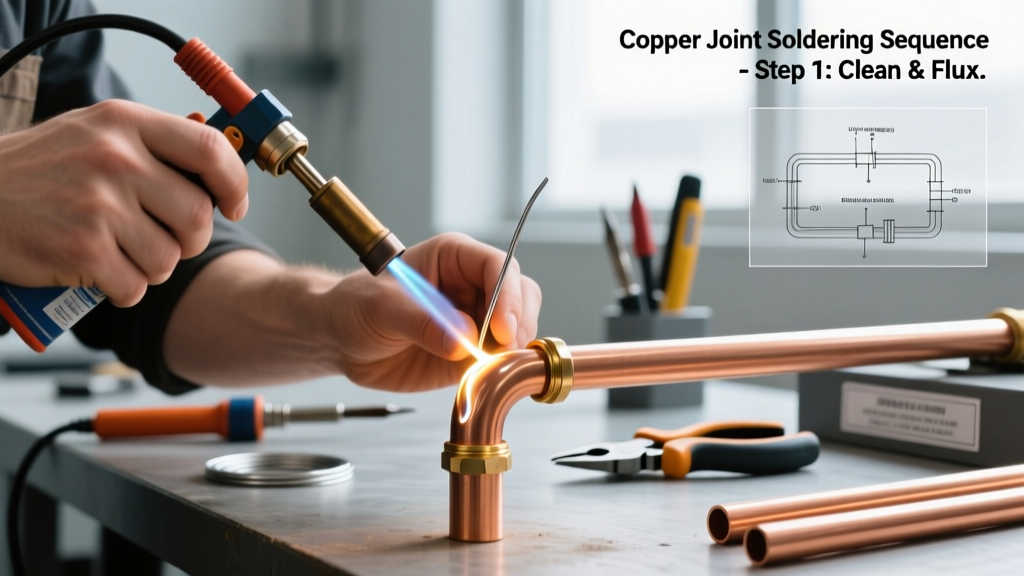
Wrap 120-grit emery cloth around the outside of the pipe and twist until the copper shines brightly. Do not touch the cleaned copper with your bare fingers; the oils from your skin will compromise the flux. Next, use a flux brush to apply a thin, even layer of paste flux to the outside of the pipe and the inside of the fitting. Do not over-apply flux. Excess flux will boil inside the joint, creating voids where the solder cannot penetrate, and will cause severe external corrosion over time.
Step 3: Heat Management (The Opposite-Side Rule)
Assemble the joint and wipe away any excess flux squeezed out of the seam. Ignite your MAP-Pro torch. Apply the flame to the fitting, not the pipe. The fitting has more mass and requires more heat. Keep the flame moving in a circular motion to heat the joint evenly. According to the Oatey soldering guidelines, you should test the heat by touching the soldering wire to the side of the joint opposite the flame. When the copper reaches approximately 450°F, the flux will bubble slightly, and the solder will instantly melt and be drawn into the joint via capillary action.
Step 4: Feeding the Soldering Wire
Once the joint is hot enough, feed the soldering wire into the seam. You do not need to melt the wire with the torch; the heat of the copper fitting should melt the wire on contact. A standard rule of thumb for 1/8-inch diameter solder wire:
- 1/2-inch fitting: Requires roughly 1/2 inch of solder wire.
- 3/4-inch fitting: Requires roughly 3/4 inch of solder wire.
- 1-inch fitting: Requires roughly 1 inch of solder wire.
Watch for a continuous silver ring to form around the entire edge of the fitting. Once you see this "sweat line," remove the heat immediately. Overheating will burn the flux, turning it into a hard, black carbon crust that prevents the solder from sealing.
Troubleshooting Common Failure Modes
Even experienced tradesmen encounter issues when environmental factors (like water trapped in the line) interfere with the thermodynamics of the joint. Here is how to diagnose and fix the most common soldering failures:
1. The Solder Balls Up and Won't Flow
Diagnosis: This is a "cold joint." The copper fitting has not reached the melting point of the alloy, or there is water inside the pipe absorbing the heat.
Fix: If water is the culprit, you must drain the line completely. Push a piece of white bread into the pipe upstream of the joint to act as a temporary water dam (the bread will dissolve and flush out when the water is turned back on). Re-heat and apply solder.
2. The Solder Only Penetrates Halfway
Diagnosis: The flux was burned off before the solder was applied, or the pipe was not adequately cleaned with emery cloth.
Fix: You cannot simply add more heat and solder to a burned joint. You must let the fitting cool, disassemble it using channel-lock pliers, re-clean both the pipe and the fitting with a wire brush, re-flux, and start over.
3. Pinhole Leaks After Pressurization
Diagnosis: Often caused by moving the joint while the solder was in its "pasty" (semi-solid) phase, or by using acid-core electrical solder instead of plumbing solder wire.
Fix: Drain the system, cut out the failed fitting with a tubing cutter, and install a new coupling. Never attempt to patch a pressurized pinhole leak with epoxy or sealants; the Plumbing-Heating-Cooling Contractors Association strictly mandates replacement of failed sweat joints to maintain code compliance.
Frequently Asked Questions
Can I use electrical solder wire for plumbing repairs?
Absolutely not. Electrical solder contains a rosin core designed to prevent oxidation on copper wire, but it lacks the aggressive chemical cleaning agents found in plumbing paste flux. Furthermore, electrical solder is typically too thin (0.031") and often contains lead. It will not withstand the thermal expansion and high pressure of municipal water lines.
Why is my solder wire turning green over time?
Green corrosion (verdigris) is caused by leaving excess paste flux on the outside of the joint after soldering. Always wipe the joint with a damp rag while it is still warm (but not molten) to neutralize and remove the acidic flux residue.
Do I need to use flux on the inside of the fitting?
Yes. Capillary action pulls the solder into the microscopic gap between the pipe and the fitting. If the inside of the fitting is oxidized and un-fluxed, the solder will stop at the edge of the joint, resulting in a shallow, weak connection that will eventually leak under pressure.