
The Short Answer: Yes, But With Major Caveats
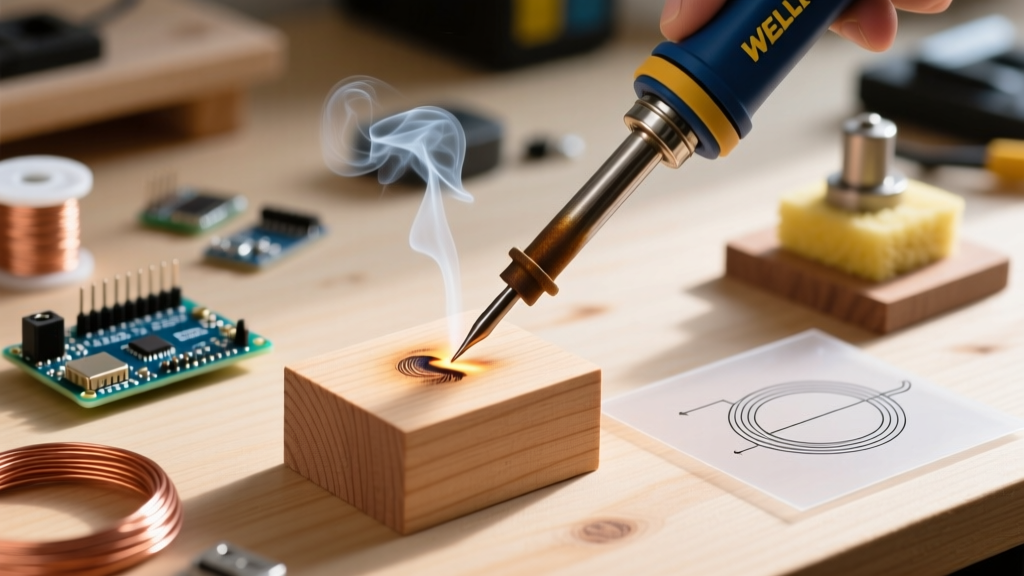
If you are a DIY electronics hobbyist wondering, can you use a soldering iron for wood burning? The short answer is yes. A standard soldering iron can scorch, shade, and draw on wood. However, treating a precision electronics tool like a dedicated pyrography pen will quickly lead to frustration, ruined equipment, and potential safety hazards if you do not understand the thermal dynamics at play.
As a beginner, you might assume that because a soldering iron gets hot enough to melt metal, it can easily burn wood. In reality, wood burning (pyrography) requires sustained thermal mass and specific tip geometries that standard soldering setups are not inherently designed to provide. This guide breaks down exactly how to adapt your soldering station for wood art, which tools survive the transition, and the critical safety protocols you must follow.
Thermal Dynamics: Soldering vs. Pyrography
To understand why your soldering iron might struggle with wood, you need to look at the numbers. Lead-free SAC305 solder melts at roughly 422°F (217°C). Therefore, most soldering stations are optimized to operate between 500°F and 700°F (260°C - 370°C) to maintain a liquid solder joint.
Wood, however, is a thermal insulator. To achieve a dark, crisp burn on hardwoods like maple or oak, the surface temperature of the wood must reach 700°F to 900°F (370°C - 480°C). When you press a low-thermal-mass soldering tip into wood, the wood rapidly absorbs the heat. Because the iron is optimized for rapid recovery on highly conductive copper pads—not insulating cellulose—the tip temperature plummets, resulting in faint, scratchy burns rather than smooth, dark lines.
Equipment Comparison: Soldering Station vs. Dedicated Burner
| Tool Type | Popular Model (2026) | Max Temp | Thermal Recovery | Est. Price |
|---|---|---|---|---|
| Analog Soldering Station | Weller WES51 | 850°F (454°C) | Moderate (50W) | $95 - $110 |
| Digital Soldering Station | Hakko FX-888D | 895°F (480°C) | Excellent (70W) | $110 - $130 |
| Portable Smart Iron | Pine64 Pinecil V2 | 842°F (450°C) | High (w/ 65W PD) | $26 - $35 |
| Dedicated Pyrography Pen | Walnut Hollow Versa-Temp | 1050°F (565°C) | Superior (Variable) | $45 - $60 |
Note: While the Pinecil V2 is incredibly versatile, its thermal limits on dense woods are constrained by the wattage of your USB-C power delivery brick. A dedicated wood burner uses a step-down transformer designed specifically to push continuous high-amp current through a thick nichrome wire.
The Golden Rule: Never Use Your Primary Soldering Tip
CRITICAL WARNING: Standard soldering tips are iron-plated copper. They rely on a microscopic layer of molten solder to transfer heat efficiently. Dragging an iron-plated tip across raw wood acts like sandpaper. The wood fibers will scour away the iron plating, and the carbonized wood resin will permanently pit the copper core. Once a tip is used for wood burning, it is permanently ruined for precision electronics soldering.
If you decide to use your Hakko or Weller station for pyrography, purchase a dedicated, inexpensive replacement tip (such as a generic Hakko T18-series clone for $5) and label it strictly for wood. Store it separately from your electronics gear.
Step-by-Step: Wood Burning with a Soldering Iron
If you are committed to using your existing soldering equipment, follow this workflow to maximize your results and minimize damage to your tools.
Step 1: Select the Right Wood
Do not start with hardwoods. Your soldering iron lacks the thermal mass to burn oak or walnut without stalling. Start with Basswood (Tilia americana) or Jelutong. These woods are incredibly soft, have a tight, uniform grain, and scorch at lower temperatures (around 300°F / 150°C). Avoid MDF (Medium-Density Fiberboard) entirely, as the heat will release toxic formaldehyde resins.
Step 2: Choose the Correct Tip Geometry
The standard conical tip (B2 or BC2) that comes with 99% of soldering irons is virtually useless for wood burning. It has too little surface area and will cool down the millisecond it touches the wood.
- Chisel Tip (e.g., D24 or D32): Best for straight lines, borders, and shading. The flat edge maintains better thermal contact with the wood grain.
- Knife Tip (K-Type): Excellent for detail work and calligraphy-style burns. The edge can be used for fine lines, while the flat side can be laid down for shading.
- Spatula/Bevel Tip: Ideal for filling in large background areas, though it requires a steady hand to avoid gouging the soft basswood.
Step 3: The Drag and Lift Technique
Because your soldering iron has a lower thermal ceiling than a dedicated pyrography pen, you cannot use the "stamp and hold" method. Instead, use the Drag Technique:
- Set your station to its maximum safe operating temperature (usually around 750°F - 800°F for digital stations).
- Allow the iron to fully heat-soak for 3 minutes before touching the wood.
- Drag the tip slowly across the grain. If the line is too light, do not press harder. Pressing harder causes "tip starvation" and can crack the ceramic heating element inside your iron.
- Instead, slow your hand speed down, or make two passes over the same line.
Health, Safety, and Toxicity Risks
Wood burning generates significant amounts of smoke, which is fundamentally different from the rosin flux fumes generated during electronics soldering. According to the American Lung Association, wood smoke contains fine particulate matter (PM2.5) and volatile organic compounds (VOCs) that can penetrate deep into the lungs and cause respiratory distress.
Furthermore, the Occupational Safety and Health Administration (OSHA) classifies certain wood dusts and smoke byproducts as known carcinogens and sensitizers. When adapting a soldering iron for wood burning, you must implement the following safety measures:
- Ventilation: A standard desktop soldering fan with a carbon filter (designed for rosin flux) is insufficient for wood smoke. You need active extraction venting to the outside, or an N95/P100 respirator mask.
- Material Verification: Never burn pallet wood, pressure-treated lumber, or painted woods. Heat will vaporize arsenic, copper azoles, and lead-based paints, creating highly toxic, potentially lethal fumes.
- Fire Hazard: Soldering iron stands are designed to hold a hot iron safely over a metal base. When doing wood burning, you will frequently set the iron down to reposition your workpiece. Ensure your stand is heavy and features a brass coil or enclosed metal holster to prevent the iron from rolling onto your wooden workbench.
Common Failure Modes and Edge Cases
Even with the right technique, beginners using soldering irons for pyrography often encounter specific edge cases:
1. Carbon Buildup (The Black Crust)
As wood burns, it leaves behind a hard, black carbon residue on the tip. This carbon acts as a severe thermal insulator. Within minutes, your 800°F tip will transfer heat as if it were set to 400°F.
The Fix: Keep a brass wire tip cleaner nearby. Every few minutes, plunge the hot tip into the brass wool to scour off the carbon. Never use sandpaper or a steel file, as this will strip the iron plating instantly.
2. Voltage Drop on Portable Irons
If you are using a USB-C smart iron like the Pinecil V2 or FNIRSI HS-01, plugging it into a standard 5V/2A phone charger will limit the tool to 10W. It will barely scorch the wood. You must use a certified 65W (or higher) USB-C PD (Power Delivery) power brick to allow the iron's internal PID controller to draw the amperage required to maintain high temperatures in an insulating material like wood.
3. Grain Tearing
Soldering tips are machined for smooth metal surfaces. If you drag a chisel tip against the grain of the wood, the sharp edges of the tip will catch and tear the wood fibers, leaving a ragged, ugly trench.
The Fix: Always sand your wood to at least 400-grit smoothness before burning, and try to burn with the grain whenever possible. If you must cross the grain, use a rounded bevel tip rather than a sharp chisel.
Final Verdict: Should You Do It?
Can you use a soldering iron for wood burning? Absolutely. It is an excellent way to test your interest in pyrography without spending money on a dedicated kit. A cheap 60W adjustable iron from a hardware store or a generic T18 chisel tip on your Hakko station will let you burn basic designs, sign your name, and shade soft basswood.
However, if you find yourself wanting to do detailed portraits, work on dense hardwoods, or spend hours shading large areas, the thermal limitations of a soldering iron will quickly become a bottleneck. At that point, investing $50 in a dedicated variable-temperature pyrography station with a heavy nichrome wire pen will exponentially improve your art and save your precision electronics tools from an early, carbon-crusted death.