
The Hidden Economics of Soldering Iron Tip Replacement
Every electronics workbench eventually faces the same inevitable maintenance task: soldering iron tip replacement. Whether you are dragging through heavy-gauge XT60 connectors or meticulously reworking 0402 surface-mount components, the tip is the critical interface between your station's thermal energy and the solder joint. Yet, the market is flooded with options ranging from $1.50 generic clones to $38.00 precision-engineered cartridges.
Does paying a premium actually save you money in the long run, or are budget tips sufficient for hobbyist work? This analysis breaks down the metallurgical differences, real-world failure modes, and the true cost-per-hour of budget versus premium soldering tips to help you make an informed decision for your next soldering iron tip replacement.
Anatomy of a Soldering Tip: Why They Fail
To understand the price disparity, you must first understand the engineering of a modern soldering tip. A high-quality tip is not just a piece of metal; it is a complex, multi-layered composite designed to balance thermal conductivity with chemical resistance.
- Copper Core: Copper provides the necessary thermal mass and conductivity (approximately 390 W/m·K) to rapidly transfer heat from the ceramic heating element to the joint.
- Iron Plating: Because molten solder (especially lead-free SAC305) aggressively dissolves copper, the working surface is electroplated with a layer of iron. This layer dictates the tip's lifespan.
- Chromium Barrier: A microscopic layer of chromium is applied above the iron to prevent solder from wetting the sides of the tip, keeping the molten alloy strictly on the working face.
Primary Failure Modes
Soldering iron tip replacement becomes necessary when these layers degrade. The three most common failure modes are:
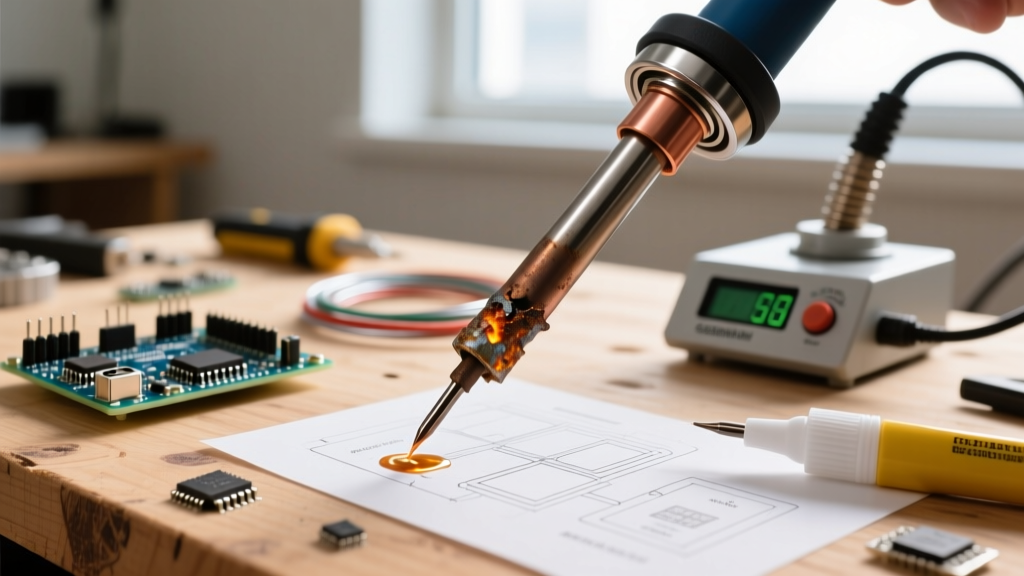
- Pitting and Leaching: The molten solder slowly dissolves the iron plating, creating microscopic craters (pitting). Once the copper core is exposed, the tip is destroyed within minutes.
- Oxidation and De-wetting: Excessive temperatures (above 400°C) or leaving the iron idle without a protective solder coating causes the iron layer to oxidize. This creates a black, crusty barrier that solder will not adhere to.
- Thermal Fatigue: Repeated, rapid heating and cooling cycles can cause the iron plating to micro-fracture, especially on budget tips with poor metallurgical bonding to the copper core.
Budget vs. Premium: The Core Differences
The primary difference between a $2 generic tip and a $15 premium OEM tip lies in the thickness and purity of the iron plating, as well as the precision of the machining. According to the IPC J-STD-001 standard for soldered electrical assemblies, maintaining strict thermal profiles is critical for joint reliability. A degraded or poorly manufactured tip introduces unpredictable thermal lag, leading to cold joints or thermal damage to sensitive PCB pads.
Cost-Per-Hour Analysis Matrix
Upfront cost is a poor metric for evaluating soldering tips. The table below illustrates the estimated cost-efficiency based on active soldering hours (excluding idle time) at a standard 350°C operating temperature.
| Tip Category | Example Models | Avg. Cost | Est. Lifespan | Cost per 100 Hrs |
|---|---|---|---|---|
| Ultra-Budget | Generic 900M-T-K | $1.50 | 15 hrs | $10.00 |
| Budget Clone | Clone T12-ILS | $4.50 | 60 hrs | $7.50 |
| Premium OEM | Genuine Hakko T12-D24 | $14.00 | 450 hrs | $3.11 |
| Ultra-Premium | JBC C245-945 Cartridge | $38.00 | 900 hrs | $4.22 |
Note: Lifespan estimates assume proper maintenance, including regular tinning and the use of leaded 63/37 Sn/Pb solder. Lead-free SAC305 solder accelerates iron leaching and will reduce these lifespans by approximately 40%.
Visual and Thermal Diagnostics: When to Replace
Do not wait until your tip is completely blackened and useless. Proactive soldering iron tip replacement ensures consistent joint quality. Use these diagnostic criteria to determine if your current tip has reached the end of its service life:
The Sandpaper Rule: Never use sandpaper, a file, or an abrasive wire brush to clean an oxidized tip. As highlighted in the Adafruit Guide to Excellent Soldering, abrasive cleaning instantly strips the microscopic iron plating, exposing the copper core and permanently destroying the tip in a matter of seconds.
1. The Wetting Test (Visual)
Melt a small amount of fresh, flux-cored solder onto the tip. If the solder balls up and rolls off the edges (de-wetting), or if it only adheres to isolated patches while avoiding blackened areas, the iron plating has oxidized beyond repair. Tip replacement is required.
2. The Thermal Recovery Test (Performance)
Touch the tip to a standard 0805 SMD pad with a grounded thermal plane. A healthy premium tip (like a Weller RT or Hakko T12) should reflow the solder in under 1.5 seconds. If you find yourself holding the iron in place for 3 to 5 seconds while applying excessive downward pressure, the tip's thermal transfer efficiency has degraded due to internal pitting or delamination.
3. Physical Inspection (Tactile)
Once the tip is completely cool, run a wooden toothpick or a soft cotton swab over the working surface. If you feel physical craters, grooves, or a rough texture, the iron layer has been leached away. Continuing to use a pitted tip will result in uneven heat distribution and concave, unreliable solder joints.
Step-by-Step: Proper Tip Replacement and Priming
The way you install and prime a new tip dictates its ultimate lifespan. The SparkFun Soldering Tutorial emphasizes that the first 60 seconds of a new tip's life are the most critical. Follow this procedure for both traditional slide-on tips and modern integrated cartridges:
- Power Down and Cool: Never attempt a soldering iron tip replacement while the station is powered on. Thermal shock from handling or dropping a cold tool into a hot ceramic heater can crack the heating element.
- Inspect the Heater Coupling: For traditional tips (like the 900M series), ensure the ceramic heater rod is free of old, burnt flux debris. Wipe it gently with a dry, lint-free cloth. A dirty coupling creates an air gap, acting as a thermal insulator.
- Pre-Tin Before Heating: This is the most crucial step. Before turning the station on, physically apply solid solder wire directly to the working face of the cold, new tip. Ensure the entire surface is coated.
- Gradual Heat-Up: Turn the station on to a moderate temperature (250°C for leaded solder). As the tip heats up, the pre-applied solder will melt and flux, creating an immediate protective barrier against oxidation before the iron layer can react with the oxygen in the air.
- Wipe and Re-Tin: Once at temperature, gently wipe the tip on a damp brass sponge (never a soaking wet cellulose sponge, as the rapid temperature drop causes thermal shock and micro-fractures). Apply a fresh layer of solder before making your first joint.
Cartridge vs. Traditional: The Form Factor Debate
When planning your soldering iron tip replacement strategy, the physical form factor of your station matters immensely. Traditional tips (e.g., Hakko 900M) slide over a separate ceramic heater and rely on a thermocouple located deep inside the handpiece. This design inherently suffers from thermal lag.
Premium cartridge systems (e.g., Hakko T12, JBC C245, Weller RT) integrate the heater, thermocouple, and tip into a single, unified unit. Because the thermocouple is located millimeters from the working face, the station's PID controller can detect a temperature drop the exact millisecond the tip touches a copper ground plane, injecting maximum wattage instantly. While the upfront cost for a cartridge replacement is significantly higher ($15–$40), the reduction in thermal stress on sensitive ICs and the elimination of cold joints make them the undisputed choice for professional micro-soldering and PCB rework.
Expert Verdict: Which Should You Buy?
The decision between budget and premium soldering iron tip replacement ultimately hinges on your use case, volume, and the value of the components you are working on.
- Choose Ultra-Budget (Generic 900M / Clone T12) if: You are a casual hobbyist soldering large through-hole components, repairing simple wiring, or practicing basic techniques where thermal precision is forgiving. Expect to replace the tip every few months.
- Choose Premium OEM (Genuine Hakko / Weller / JBC) if: You are working with multi-layer PCBs, sensitive surface-mount ICs, or lead-free solder. The superior iron plating thickness (often 0.2mm vs 0.05mm on clones) ensures hundreds of hours of reliable thermal transfer, protecting expensive components from thermal damage caused by prolonged heating.
Investing in genuine OEM tips is not a luxury; it is a baseline requirement for reliable electronics assembly. By understanding the metallurgy of your tools and adhering to strict priming and maintenance protocols, you can maximize the lifespan of your tips and ensure every solder joint meets professional reliability standards.