
The Metallurgical Challenge of Aluminum Oxide
For decades, soldering onto aluminum has been considered one of the most frustrating tasks in electronics and DIY fabrication. The root of this difficulty is not the aluminum itself, but its immediate reaction with oxygen. When exposed to air, aluminum instantly forms a microscopic layer of aluminum oxide (Al2O3). While pure aluminum melts at a manageable 660°C (1220°F), aluminum oxide is essentially a ceramic that does not melt until it reaches a staggering 2072°C (3762°F).
Standard rosin-based fluxes (RMA) and traditional tin-lead (Sn60/Pb40) or lead-free (SAC305) solders cannot penetrate this ceramic barrier. If you attempt to use standard electronics solder on an aluminum heatsink or chassis, the solder will simply bead up and roll off. To achieve a reliable metallurgical bond, you must utilize aggressive chemical fluxes, specialized alloy compositions, and precise thermal management.
The 'Brazing vs. Soldering' Trap: What You Need to Know
Before purchasing materials, it is critical to distinguish between true soldering and brazing. Many products marketed at hardware stores as 'aluminum welding rods' or 'low-temp aluminum solder' (such as Blue Demon or Hobart aluminum rods) are actually brazing alloys.
Expert Distinction: According to the American Welding Society (AWS), soldering occurs below 450°C (842°F), while brazing occurs above 450°C. Most 'DIY aluminum rods' require a propane or MAPP gas torch and operate around 380°C to 400°C, pushing the absolute upper limits of soldering and often crossing into brazing territory. True soldering onto aluminum for electronics and delicate components requires alloys that melt below 350°C to prevent thermal damage to nearby PCB traces or plastic housings.
Selecting the Right Aluminum Solder and Flux
To successfully bond to aluminum at true soldering temperatures, you must use alloys containing zinc or indium, paired with highly active fluxes. As of 2026, the IPC J-STD-001 standard strictly categorizes the fluxes required for these difficult-to-solder surfaces, mandating specific post-solder cleaning protocols due to high corrosivity.
Alloy and Flux Comparison Matrix
| Alloy Type | Melting Point | Best Application | Approx. Cost (2026) | Required Flux Chemistry |
|---|---|---|---|---|
| Zinc-Aluminum (Zn95/Al5) | 382°C (720°F) | High-strength structural joints, thick gauge wire | $45 / lb | Zinc Chloride / Organic Acid |
| Tin-Zinc (Sn91/Zn9) | 199°C (390°F) | Electronics, low-temp PCB, sensor housings | $65 / lb | Fluoroaluminate / Mild Organic |
| Indium-Based (In97/Ag3) | 143°C (289°F) | Aerospace, cryogenic, ultra-sensitive components | $950+ / lb | No-Clean / Mild Organic |
For general DIY and electrical enclosure work, Tin-Zinc (Sn91/Zn9) is the gold standard. It melts at standard electronics soldering temperatures, allowing you to use a conventional soldering station. For the flux, you must abandon rosin. Look for specialized aluminum fluxes containing zinc chloride or fluoroaluminate complexes, such as Superior Flux 30 or Worthington 8325.
Essential Equipment for Aluminum Soldering
Aluminum is an exceptional thermal conductor (roughly 205 W/m·K). When you apply a soldering iron to an aluminum chassis, the heat dissipates almost instantly. A standard 40W hobby iron will fail to maintain the necessary tip temperature.
- Soldering Station: You need a minimum of 70W to 80W with high thermal recovery. The Hakko FX-951 (72W) or the Weller WE1010NA (70W) are excellent choices that maintain stable tip temperatures under heavy thermal loads.
- Soldering Tip: Avoid fine conical tips. Use a heavy chisel tip (e.g., Hakko T18-D24 or T18-D32) to maximize surface area contact and thermal transfer.
- Mechanical Prep Tools: Stainless steel wire brush, fiberglass scratch pen, and mineral oil.
- Post-Solder Cleaning: Isopropyl alcohol (99%), distilled water, and a stiff nylon brush to neutralize and remove corrosive flux residues.
Step-by-Step Procedure: Soldering Aluminum to Aluminum
Follow this precise methodology to ensure the solder wets the aluminum substrate rather than just sitting on top of the oxide layer.
Step 1: Sub-Surface Mechanical Abrasion
Clean the joint area with isopropyl alcohol. Apply a thin layer of mineral oil or liquid flux directly to the aluminum. Using a stainless steel wire brush or fiberglass pen, scrub the aluminum through the liquid layer. The liquid acts as a temporary barrier, preventing oxygen from immediately reforming the Al2O3 layer while you scratch it away.
Step 2: Flux Application and Pre-Heating
Apply a generous amount of your zinc-chloride or fluoroaluminate flux to the abraded area. Set your soldering station to 350°C (662°F) if using Sn-Zn alloy. Apply the iron tip to the workpiece (not the solder) and allow the aluminum to absorb heat for 10 to 15 seconds. You will see the flux bubble and activate.
Step 3: Friction Tinning (The Critical Phase)
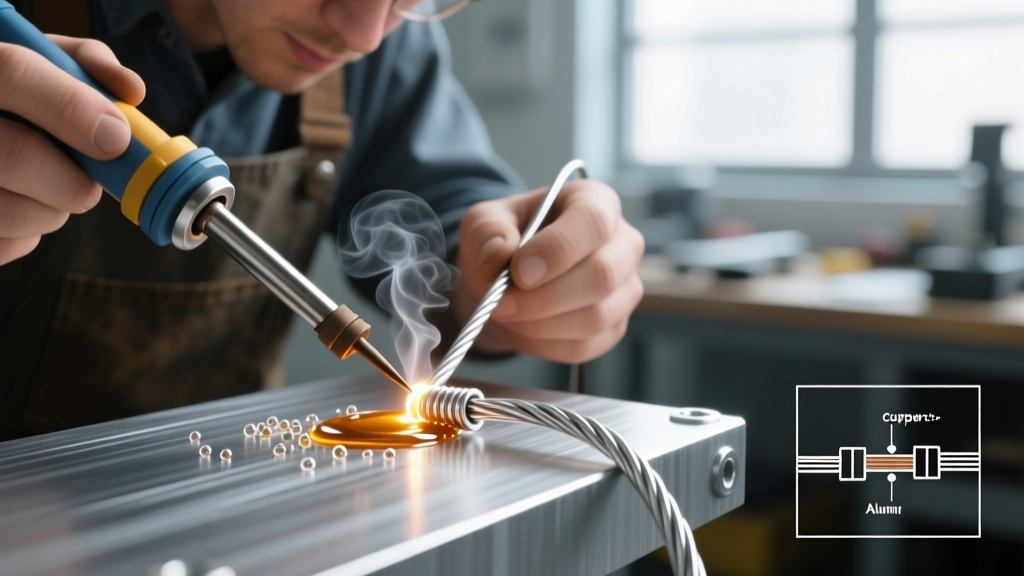
Feed the Sn-Zn or Zn-Al solder wire into the joint. As it melts, use the edge of your chisel tip to gently 'scrub' or apply lateral friction to the molten solder pool against the aluminum surface. This mechanical action, combined with the chemical flux, breaks the remaining micro-oxide layers and allows the zinc in the solder to alloy with the aluminum substrate. Once the aluminum is 'tinned' (coated in a thin layer of solder), the hard part is over.
Step 4: Joining and Cooling
If attaching a copper wire to the aluminum chassis, pre-tin the copper wire with standard Sn60/Pb40 or SAC305 solder first. Then, place the tinned wire onto the tinned aluminum pad, apply fresh flux, and heat until the two solder pools merge. Remove the iron and hold the joint perfectly still for 5-10 seconds until the solder crystallizes.
Step 5: Mandatory Post-Solder Cleaning
Zinc chloride fluxes are highly hygroscopic and corrosive. If left on the joint, they will absorb moisture from the air and rapidly corrode the aluminum, leading to joint failure within months. Scrub the cooled joint vigorously with hot distilled water and a nylon brush, followed by a rinse with 99% isopropyl alcohol to displace the water.
Advanced Technique: Ultrasonic Soldering
For production environments or applications where chemical flux residue is strictly prohibited (such as medical devices or sealed aerospace sensors), the industry has increasingly adopted ultrasonic soldering.
Ultrasonic soldering irons feature a transducer in the tip that vibrates at frequencies between 20 kHz and 60 kHz. When the molten solder touches the aluminum, the acoustic cavitation creates microscopic vacuum bubbles in the solder pool. When these bubbles collapse, they generate localized shockwaves that physically shatter the aluminum oxide layer, allowing the solder to wet the bare metal without any chemical flux. While historically costing upwards of $5,000, by 2026, entry-level ultrasonic soldering units from manufacturers like Sunbonder and Minghe have become accessible to advanced DIYers and small labs, typically ranging from $1,200 to $2,500.
Troubleshooting Common Failure Modes
- Solder Beading / Rolling Off: The oxide layer was not broken. You either used the wrong flux (rosin), failed to scrub the surface under a liquid barrier, or the iron temperature dropped too low to activate the flux.
- Crumbly, Dull Joint: This indicates phase separation or excessive zinc oxidation. You likely overheated the joint or moved the components before the solder fully crystallized. Sn-Zn alloys are particularly sensitive to mechanical disturbance during the plastic (semi-solid) phase.
- White Powdery Residue Weeks Later: Incomplete flux removal. The zinc chloride has reacted with atmospheric moisture, creating hydrochloric acid that is eating the aluminum. You must mechanically remove the corrosion, re-solder, and implement a rigorous aqueous cleaning protocol.
Frequently Asked Questions
Can I use standard solder paste for aluminum SMD pads?
Standard SAC305 solder paste will not wet aluminum pads. You must source specialized Sn-Zn or Sn-Bi-Zn solder pastes paired with a high-activity organic acid flux vehicle. These are generally only available through industrial suppliers like Indium Corporation or Alpha Assembly, rather than consumer retail channels.
Is it safe to solder aluminum indoors?
Yes, but with strict ventilation requirements. When zinc chloride and fluoroaluminate fluxes are heated, they release harsh, acrid fumes that can cause respiratory irritation. Always use a high-CFM fume extractor with a HEPA and activated carbon filter positioned within 6 inches of the soldering zone.