
The Hidden Variable in Micro-Joints: Thermal Mass and Workholding
Every seasoned electronics technician knows that applying heat is only half the battle; immobilizing the workpiece is the other. In the DIY and professional repair community, the dual discipline of soldering and holdering (the strategic use of workholding jigs, vises, and fixtures) is what separates a reliable, IPC-compliant joint from a cold, stressed fracture. When you are reworking a 0402 surface-mount capacitor or splicing 10 AWG silicone wire, the physical stability of your board directly dictates your thermal transfer efficiency.
According to the IPC J-STD-001 standard for soldered electrical assemblies, proper board support is mandatory to prevent mechanical stress on the solder joint during the cooling phase. Yet, most hobbyists rely on inadequate, flimsy tools that introduce vibration and unintended heat-sinking. In this guide, we dissect the top workholding methodologies available in 2026, evaluating their thermal dynamics, mechanical stability, and ideal use cases.
The Thermal Trap: Why Your Holder is Stealing Your Heat
Before comparing specific products, we must address the physics of workholding. Metal is an excellent conductor of heat. When you clamp a brass alligator clip directly onto a copper trace or a component lead to "hold" it in place, you are fundamentally altering the thermal mass of the joint.
- The Heat Sink Effect: If you are using a 65W smart iron (like the Pinecil V2 or FNIRSI HS-01) set to 340°C for SAC305 lead-free solder, a standard metal clip will wick heat away from the joint faster than the iron can replenish it. This results in prolonged dwell times, oxidized flux, and lifted pads.
- The ESD Risk: Bare metal clamps can introduce electrostatic discharge (ESD) to sensitive MOSFETs or microcontrollers if not properly grounded to the workstation's common point ground.
Pro-Tip: Always use silicone-sheathed clips or high-temperature Kapton tape to isolate your workholding mechanism from the immediate thermal zone of the solder joint. As noted in SparkFun's soldering tutorials, minimizing thermal drain is critical for achieving a proper metallurgical bond without damaging the substrate.
Workholding Method Comparison Matrix
| Method | Best Application | Est. Price Range | Thermal Interference | Setup Time |
|---|---|---|---|---|
| Articulated Arms (Helping Hands) | Wire splicing, 3D printing inserts, DIP ICs | $45 - $85 | High (if metal clips touch joint) | Medium (2-3 mins) |
| Low-Profile PCB Vises | SMD rework, BGA stenciling, QFP soldering | $40 - $60 | Low (neoprene jaws insulate) | Fast (30 seconds) |
| Magnetic Modular Jigs | Quick prototypes, jumper wires, sensor modules | $30 - $55 | None (non-contact magnetic hold) | Instant |
| Custom 3D Printed Fixtures | High-volume production, repetitive harness builds | $2 - $10 (filament) | None (plastic is an insulator) | Slow (Design + Print) |
Deep Dive: Articulated Arm Systems (The Evolution of Helping Hands)
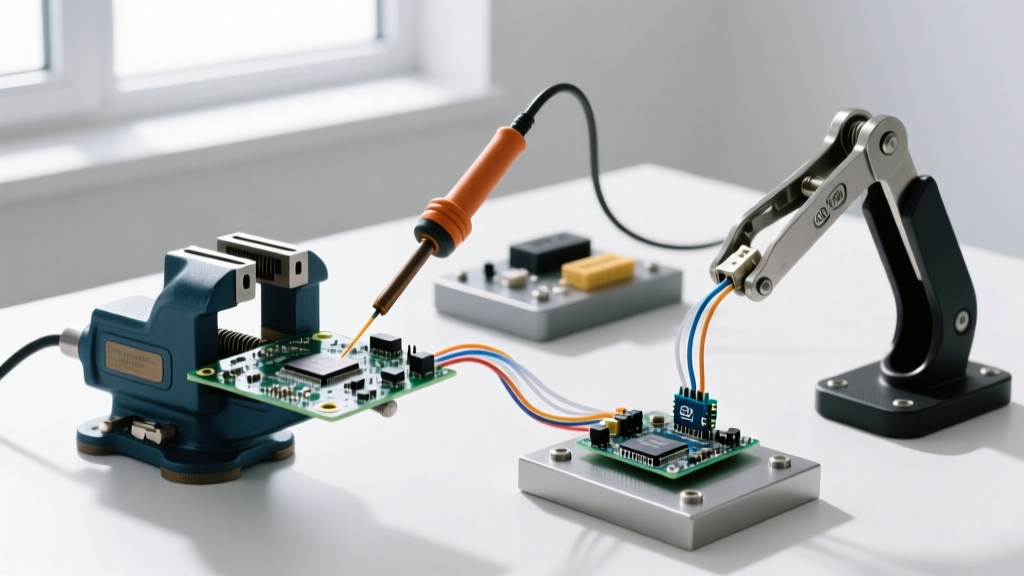
The classic "helping hands" with heavy cast-iron bases and stiff goosenecks are obsolete. Modern soldering and holdering relies on multi-axis articulated arms with high-tension friction hinges. The Quad Hands Pro and the Fixtured Magnetic Arm are current market leaders.
Key Features to Demand
- Silicone-Tipped Jaws: Essential for preventing PCB scratching and reducing thermal wicking. The silicone must be rated for at least 250°C continuous exposure.
- Counterweighted Bases: When extending an arm to hold a 200g development board (like an Arduino Mega or Raspberry Pi 5), a lightweight base will tip over when you apply pressure with your soldering iron. Look for bases weighing at least 1.5 lbs.
- ESD-Safe Materials: Premium arms use carbon-infused plastics or anodized aluminum with integrated grounding lugs.
Edge Case Warning: Avoid using articulated arms for heavy gauge wire (8 AWG or thicker) splicing unless the arms feature locking collars. The torque required to feed thick solder wire will easily overcome friction hinges, causing the wire to slip and potentially burn your workspace.
Deep Dive: Low-Profile PCB Vises
For surface-mount technology (SMT) and precision through-hole work, nothing beats a dedicated PCB vise. The PanaVise Model 201 (Low-Profile Junior) remains the gold standard for bench work. Unlike tall vises that raise the board to an awkward height, the Model 201 keeps the PCB less than 2 inches from the bench surface, allowing you to rest your wrists on the mat for maximum stability.
Why the PanaVise Dominates SMD Rework
- Neoprene Jaw Pads: The factory-installed neoprene grips the edges of the FR4 fiberglass board securely without crushing plated through-holes (PTH) or acting as a massive heat sink.
- Tilt and Rotate: When drag-soldering a QFP-64 microcontroller, you need to view the meniscus of the molten solder from a 45-degree angle under a microscope. The PanaVise's split-head design allows you to lock the board at any compound angle.
- Thermal Isolation: Because the vise only touches the extreme edges of the board (usually the ground rail margins), the center of the board where your components live remains thermally isolated. Hakko's official soldering resources emphasize that maintaining a stable ambient board temperature is key to preventing thermal shock to ceramic capacitors.
Deep Dive: Magnetic and Modular Workholding
For rapid prototyping and wire harness assembly, mechanical clamps are too slow. Magnetic holdering systems utilize high-temperature silicone mats embedded with neodymium magnets, paired with magnetic steel pucks or weighted arms. Systems like the Hakko CHP Magnetic Workstation allow you to snap a PCB down instantly.
This method is unparalleled for hot-air rework. When using a station like the Quick 861DW at 380°C with high airflow, traditional alligator clips will blow the component off the pad. A magnetic mat holds the board flat against the bench, resisting the 15-20 PSI of airflow from your hot-air nozzle, ensuring your 0603 resistors don't end up in the carpet.
The 3D Printed Jig: High-Volume Holdering
If you are building repetitive projects—such as custom mechanical keyboard PCBs or drone flight controller stacks—designing a custom 3D printed soldering jig is the ultimate expression of soldering and holdering efficiency.
Material Selection is Critical
Do not use PLA for soldering fixtures. PLA has a glass transition temperature of roughly 60°C; the radiant heat from your iron will warp the jig and ruin your alignment.
- PETG: Good for general purpose. Withstands up to ~80°C. Keep the soldering iron tip at least 15mm away from the plastic walls.
- ABS / ASA: Excellent choice. Withstands ~105°C. Can handle accidental iron bumps.
- Polycarbonate (PC) or Ultem (PEI): The professional standard for production jigs. Withstands 140°C+ and is inherently ESD-safe if doped with carbon fiber.
Actionable Decision Framework: Which Holder Do You Need?
To optimize your bench, match your holdering strategy to your specific project profile:
- The Wire Splicer (Drones, RC, Automotive): Invest in a heavy-duty articulated arm system with silicone-lined, locking-jaw clamps. You need mechanical leverage to hold 12 AWG wires perfectly still while feeding 63/37 rosin-core solder.
- The Micro-SMD Repair Tech (Laptops, Phones): Buy a low-profile PCB vise (PanaVise 201) and a silicone magnetic mat. You need absolute zero vibration for 0.3mm pitch BGA work under a stereo microscope.
- The Production Builder (Keyboards, LED Arrays): Spend an hour designing a custom ABS 3D-printed pogo-pin fixture. The upfront time cost pays off by reducing per-board soldering time by up to 60%.
Final Thoughts on Bench Ergonomics
Mastering soldering and holdering is not just about buying the most expensive vise; it is about understanding the thermal and mechanical interaction between your tool, your fixture, and your workpiece. By eliminating vibration and managing thermal wicking, you will drastically reduce your defect rate, prevent pad delamination, and produce joints that meet rigorous aerospace and consumer electronics standards. Evaluate your current bench setup today, identify where your workholding is compromising your heat transfer, and upgrade your fixtures accordingly.