
Mastering the Servo Motor SG90 Arduino Interface
If you are stepping into robotics, home automation, or kinetic art in 2026, the TowerPro SG90 9g micro servo is likely your first actuator. Priced between $1.50 and $3.00 for generic variants (and around $5.00 for genuine TowerPro models), it offers an unmatched entry point into precise angular control. However, beginners often encounter frustrating issues like erratic jittering, Arduino brownouts, or stripped plastic gears. This comprehensive guide will walk you through the exact wiring, power management, and Pulse Width Modulation (PWM) coding required to build a robust servo motor SG90 Arduino setup.
Understanding the SG90 Hardware Profile
Before writing a single line of code, you must understand the physical and electrical limits of the SG90. Unlike continuous rotation DC motors, standard RC servos use an internal potentiometer and a control circuit to hold a specific shaft angle based on the PWM signal they receive.
| Parameter | Specification | Practical Implication |
|---|---|---|
| Operating Voltage | 4.8V - 6.0V DC | Do not exceed 6V; 5V from a USB power bank is ideal. |
| Stall Torque (4.8V) | 1.8 kg/cm (25 oz/in) | Sufficient for lightweight robotic arms and camera pan/tilts. |
| Operating Speed | 0.1 sec / 60° (4.8V) | Fast enough for most hobbyist tracking applications. |
| Dead Band Width | 1000 - 2000 µs (Standard) | SG90 often responds to 500 - 2400 µs for full 180° sweep. |
| Stall Current | ~700 mA | Exceeds standard Arduino 5V pin limits; requires external power. |
Step-by-Step Wiring Guide
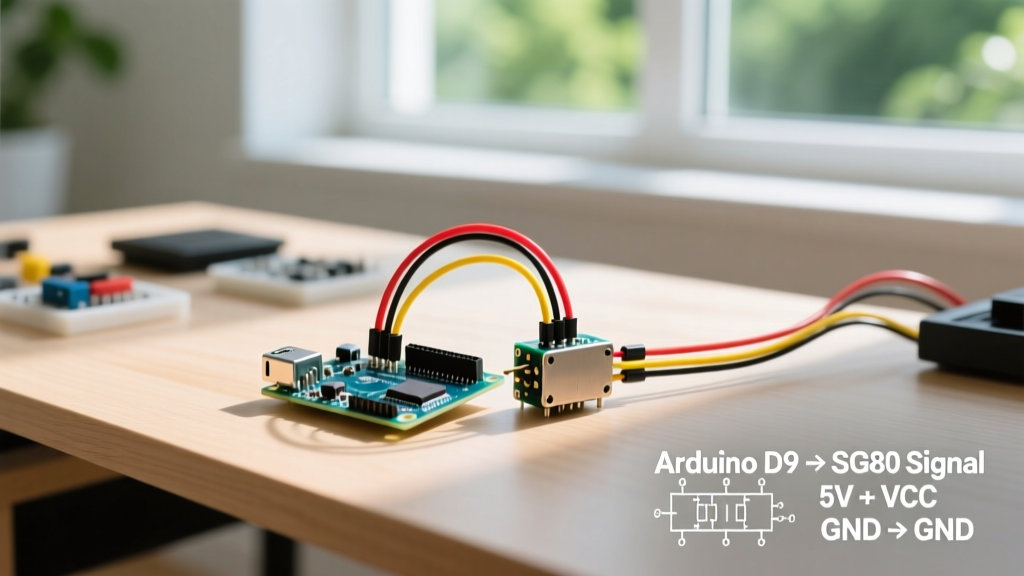
The most common point of failure in a servo motor SG90 Arduino project is improper power routing. The SG90 features a standard 3-pin JST connector.
Step 1: Pinout Identification
- Brown Wire: Ground (GND)
- Red Wire: VCC (Positive Power, 4.8V - 6V)
- Orange (or Yellow) Wire: PWM Signal Input
Step 2: Powering the Circuit Safely
Many beginner tutorials suggest wiring the red wire directly to the Arduino's 5V pin. Do not do this if your servo is under any mechanical load. When the SG90 stalls or starts moving a heavy load, it can draw up to 700mA. The onboard voltage regulator of an Arduino Uno R3 (and even the newer Uno R4 Minima) will overheat, and the microcontroller will experience a 'brownout' and reset continuously.
Expert Power Tip: Use an external 5V 2A USB power supply or a dedicated sensor shield to power the servo's red and brown wires. Crucially, you must connect the Ground (GND) of the external power supply to the GND of the Arduino. Without a common ground, the Arduino's PWM signal will have no reference voltage, resulting in violent servo jittering.
Step 3: Signal Wiring
Connect the Orange signal wire to any of the Arduino's digital pins capable of hardware PWM (marked with a ~ symbol, such as pins 3, 5, 6, 9, 10, or 11 on the Uno). While the Servo.h library can use software PWM on any digital pin, hardware PWM pins yield smoother microsecond timing and less jitter.
Programming the Arduino for PWM Control
Arduino controls the SG90 by sending a 50Hz PWM signal (a pulse every 20 milliseconds). The width of the HIGH pulse determines the angle. According to the Arduino Servo Library documentation, the write() function maps 0-180 degrees to standard pulse widths. However, the SG90 is notorious for having a wider operational range.
The Microsecond Advantage
While myServo.write(90) sends the arm to the center, you will achieve much higher precision by using writeMicroseconds(). For the SG90, a pulse of 500µs typically corresponds to 0°, and 2400µs corresponds to 180°. Using microseconds allows you to calibrate out the mechanical slop inherent in cheap plastic gears.
Here is a production-ready code snippet that moves the servo to specific angles and then detaches it to prevent idle jitter and save power:
#include <Servo.h>

Servo sg90;
const int servoPin = 9;

void setup() {
  sg90.attach(servoPin, 500, 2400); // Calibrated min/max microseconds for SG90
  Serial.begin(9600);
}

void loop() {
  // Move to 0 degrees
  sg90.writeMicroseconds(500);
  delay(1500); // Allow time to reach position

  // Move to 90 degrees (center)
  sg90.writeMicroseconds(1450);
  delay(1500);

  // Move to 180 degrees
  sg90.writeMicroseconds(2400);
  delay(1500);

  // Detach to stop idle jitter and reduce power draw
  sg90.detach();
  delay(5000);

  // Re-attach for next cycle
  sg90.attach(servoPin, 500, 2400);
}
Real-World Troubleshooting and Failure Modes
Even with perfect code, physical hardware introduces variables. Here is how to diagnose the most common SG90 issues encountered in the field:
- Violent Jittering on Boot: This happens because the Arduino pins float before
setup()runs and attaches the servo. Fix this by adding a 4.7kΩ pull-down resistor between the PWM signal pin and GND, or ensure your mechanical design tolerates the initial sweep to 90° upon boot. - Arduino Randomly Resetting: As mentioned, this is a USB brownout. If you are powering the Arduino via a laptop USB port (limited to 500mA), the servo's startup current spike will trip the host's overcurrent protection. Use a powered USB hub or an external 5V rail.
- Grinding Noise and Stripped Gears: The SG90 uses nylon/plastic internal gears. If you command the servo to move to 0° or 180° and the mechanical linkage hits a hard stop, the motor will stall, draw maximum current, and strip the teeth. Always limit your software range to 10° - 170° to protect the end-stops.
When to Upgrade: SG90 vs. MG90S
As your 2026 projects evolve, you will likely outgrow the SG90. The Adafruit Motor Selection Guide recommends stepping up to metal-gear servos when torque and durability become critical. The MG90S is the direct metal-gear drop-in replacement for the SG90.
| Feature | TowerPro SG90 | TowerPro MG90S |
|---|---|---|
| Internal Gears | Plastic / Nylon | Brass / Metal |
| Stall Torque (4.8V) | 1.8 kg/cm | 2.2 kg/cm (up to 2.8 kg/cm at 6V) |
| Average Cost (2026) | $1.50 - $3.00 | $4.50 - $7.00 |
| Best Use Case | Prototyping, lightweight sensors, indoor art | RC vehicles, robotic arms, outdoor mechanisms |
Final Thoughts on Peripheral Interfacing
Interfacing a servo motor SG90 Arduino setup is a foundational skill that bridges the gap between digital logic and physical movement. By respecting the electrical limits of the microcontroller, utilizing external power rails with a common ground, and leveraging microsecond-level PWM calibration, you can extract professional-grade reliability from a budget component. Whether you are building an automated pet feeder or a LiDAR scanning mount, mastering these edge cases ensures your hardware survives long past the prototyping phase.