
Introduction to Ultrasonic Proximity Sensing
When building robotics, smart home automation, or fluid level monitors in 2026, integrating a proximity sensor Arduino ultrasonic setup remains the most cost-effective method for non-contact distance measurement. While LiDAR and Time-of-Flight (ToF) optical sensors have dropped in price, the classic 40kHz ultrasonic transducer pair—most notably the HC-SR04 module—continues to dominate the beginner and intermediate DIY space. A genuine HC-SR04 or high-quality clone currently costs between $1.50 and $3.00, making it an indispensable tool for prototyping.
However, simply copying and pasting legacy code from 2015 forum posts often leads to frustrating edge cases: frozen microcontrollers, inaccurate readings, and fried logic pins. This comprehensive tutorial goes beyond the basics, covering the physics of acoustic ring-down, precise voltage division for modern 3.3V boards, and advanced software debouncing.
The Core Component: Understanding the HC-SR04
Before wiring, it is crucial to understand what happens inside the module. The HC-SR04 utilizes two piezoelectric transducers: one to transmit a burst of 40kHz ultrasound and one to receive the echo. The onboard LM324 operational amplifier and MAX232 equivalent circuitry handle the signal boosting and threshold detection.
Hardware Specifications Matrix
| Parameter | Specification | Practical Implication |
|---|---|---|
| Operating Voltage | 5V DC | Requires 5V power; 3.3V will cause unstable triggering. |
| Quiescent Current | ~2mA | Safe for most MCU 5V rails, but beware of deep sleep modes. |
| Measurement Range | 2cm to 400cm | Objects closer than 2cm cannot be detected (Blind Zone). |
| Resolution | ~0.3cm | Limited by the speed of sound and MCU timer granularity. |
| Beam Angle | ~15 degrees | Narrow cone; off-axis objects will cause false negatives. |
Wiring the Proximity Sensor (Arduino Ultrasonic Setup)
The most common mistake beginners make in 2026 is ignoring logic level voltages. While legacy 5V boards like the Arduino Uno R3 or Mega 2560 can tolerate the HC-SR04's 5V Echo pin, modern favorites like the ESP32-S3, Raspberry Pi Pico (RP2040), and Nano 33 IoT operate at 3.3V. Feeding 5V into a 3.3V GPIO pin will permanently damage the microcontroller.
5V vs 3.3V Wiring Configurations
For 5V Boards (Arduino Uno R3, Mega):
- VCC: Connect to 5V
- GND: Connect to GND
- Trig: Connect to Digital Pin 9
- Echo: Connect to Digital Pin 10
For 3.3V Boards (ESP32, RP2040, STM32):
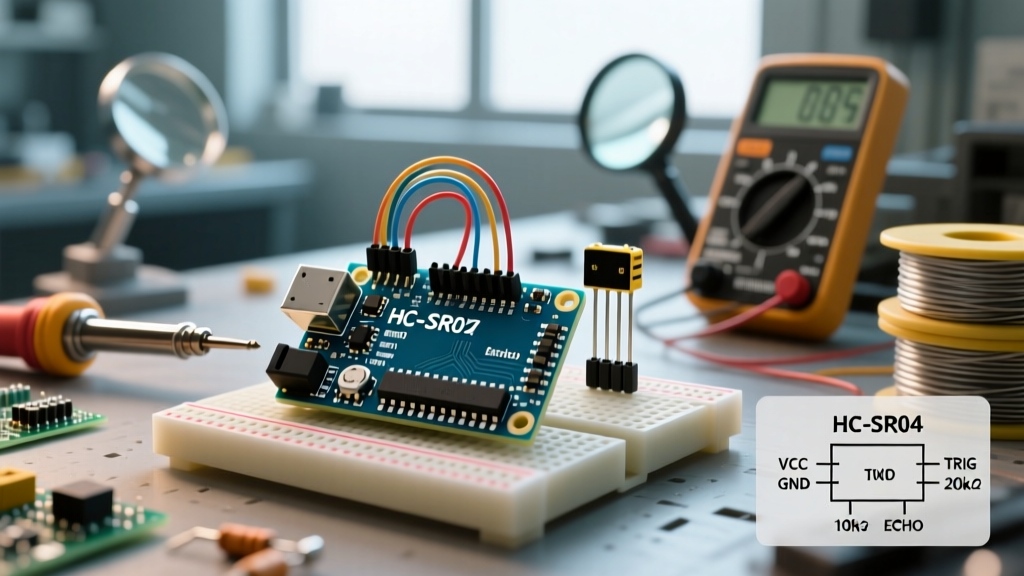
You must step down the 5V Echo signal using a voltage divider. According to SparkFun's voltage divider guide, you can achieve a safe ~3.3V output using a 1kΩ resistor (R1) and a 2kΩ resistor (R2).
- Echo Pin (5V out) connects to the junction of R1 and R2.
- R1 (1kΩ) connects between the Echo pin and the MCU GPIO (e.g., ESP32 GPIO 4).
- R2 (2kΩ) connects between the MCU GPIO and GND.
Pro Tip: If you don't have a 2kΩ resistor, you can use two 1kΩ resistors in series to achieve the exact same voltage division ratio.
Writing the Arduino Ultrasonic Code
To measure distance, the microcontroller must send a 10-microsecond HIGH pulse to the Trig pin, which prompts the module to emit eight 40kHz bursts. The module then pulls the Echo pin HIGH for the exact duration it takes for the sound wave to return.
const int trigPin = 9;
const int echoPin = 10;

void setup() {
  Serial.begin(115200);
  pinMode(trigPin, OUTPUT);
  pinMode(echoPin, INPUT);
}

void loop() {
  long duration;
  float distanceCm;

  // Clear the trigPin condition
  digitalWrite(trigPin, LOW);
  delayMicroseconds(2);

  // Trigger the sensor
  digitalWrite(trigPin, HIGH);
  delayMicroseconds(10);
  digitalWrite(trigPin, LOW);

  // Read the echo pin with a 30ms timeout
  duration = pulseIn(echoPin, HIGH, 30000);

  // Calculate distance
  distanceCm = duration * 0.0343 / 2;

  if (duration == 0) {
    Serial.println("Error: Timeout or out of range.");
  } else {
    Serial.print("Distance: ");
    Serial.print(distanceCm);
    Serial.println(" cm");
  }

  delay(60); // Wait 60ms to prevent acoustic cross-talk
}
Critical Code Analysis: The Timeout and The Math
Notice the 30000 parameter in the pulseIn() function. As detailed in the official Arduino pulseIn() reference, omitting this timeout means your code will hang indefinitely if the sound wave is absorbed by a soft material and never returns. A 30,000-microsecond (30ms) timeout safely covers the maximum 400cm range plus a small margin for error.
The math relies on the speed of sound. At 20°C (68°F), sound travels through dry air at roughly 343 meters per second, or 0.0343 centimeters per microsecond. Because the sound wave travels to the object and back, we must divide the total distance by 2. For those who prefer integer math, dividing the duration by 58 yields the distance in centimeters directly.
Real-World Failure Modes & Calibration
Ultrasonic sensors are not magic; they are bound by the laws of acoustics. When your proximity sensor Arduino ultrasonic project fails in the field, it is usually due to one of the following edge cases:
- The Blind Zone (Ring-Down Time): When the transmitter fires, the piezoelectric crystal vibrates violently. It takes a few milliseconds for this physical vibration to stop (ring-down). If an object is closer than 2cm, the echo returns while the receiver is still 'deafened' by the transmitter's ring-down. Solution: Use an infrared ToF sensor like the VL53L0X for sub-2cm measurements.
- Temperature Variations: The speed of sound is not a static constant. According to The Engineering Toolbox, the speed of sound in air increases by approximately 0.6 m/s for every 1°C rise in temperature. If your outdoor robot operates in 40°C heat, your distance calculations will be off by nearly 4% unless you integrate a temperature sensor (like a BME280) to dynamically adjust the 0.0343 multiplier.
- Acoustic Absorption: Soft materials like cotton, foam, and heavy curtains absorb 40kHz sound waves rather than reflecting them. The sensor will report a timeout error even if the object is directly in front of it.
- Multi-Path Echoes: In corners or V-shaped enclosures, sound waves can bounce multiple times before returning. This results in distance readings that are exact multiples of the actual distance (e.g., reading 90cm when the wall is 30cm away).
Upgrading: When to Ditch the HC-SR04
While the HC-SR04 is perfect for indoor robotics and basic learning, harsh environments require specialized peripherals. Here is how it compares to modern alternatives available in 2026:
| Sensor Model | Technology | Best Use Case | Approx. Cost |
|---|---|---|---|
| HC-SR04 | Ultrasonic (Open Air) | Indoor robotics, basic learning, dry environments. | $1.50 - $3.00 |
| JSN-SR04T | Ultrasonic (Waterproof) | Car reversing, outdoor rain exposure, liquid level sensing. | $6.00 - $9.00 |
| TF-Luna | LiDAR (ToF Optical) | Precision indoor drones, high-speed counting, dark environments. | $12.00 - $16.00 |
| RCWL-0516 | Microwave Doppler | Human presence detection through drywall/plastic (no precise distance). | $1.00 - $2.00 |
Frequently Asked Questions
Can I power the HC-SR04 from the Arduino's 3.3V pin?
No. The HC-SR04 requires a stable 5V supply to drive the piezoelectric transducers and the internal MAX232 voltage inverter. Powering it with 3.3V will result in erratic behavior, severely reduced range (often less than 20cm), and failure to trigger. Always use the 5V pin for VCC, and use a voltage divider only on the Echo signal wire.
Why am I getting random '0' or 'Timeout' readings?
Random timeouts are usually caused by acoustic cross-talk or power supply noise. If you have multiple ultrasonic sensors on the same robot, they will interfere with each other. You must fire them sequentially with at least a 60ms delay between readings. Additionally, ensure your 5V rail is not sagging due to servos or motors drawing heavy current; a dropping voltage rail will cause the HC-SR04's internal comparator to fail.
How do I smooth out jittery distance readings?
Raw ultrasonic readings naturally jitter by 1-2mm due to minor air currents and MCU timer quantization. Implement a simple software moving average filter. Store the last 5 readings in an array, sort them, discard the highest and lowest values (to eliminate outlier multi-path echoes), and average the remaining three. This drastically stabilizes the output for PID control loops in robotics.