
The Challenge of Multi-Peripheral FSR Integration
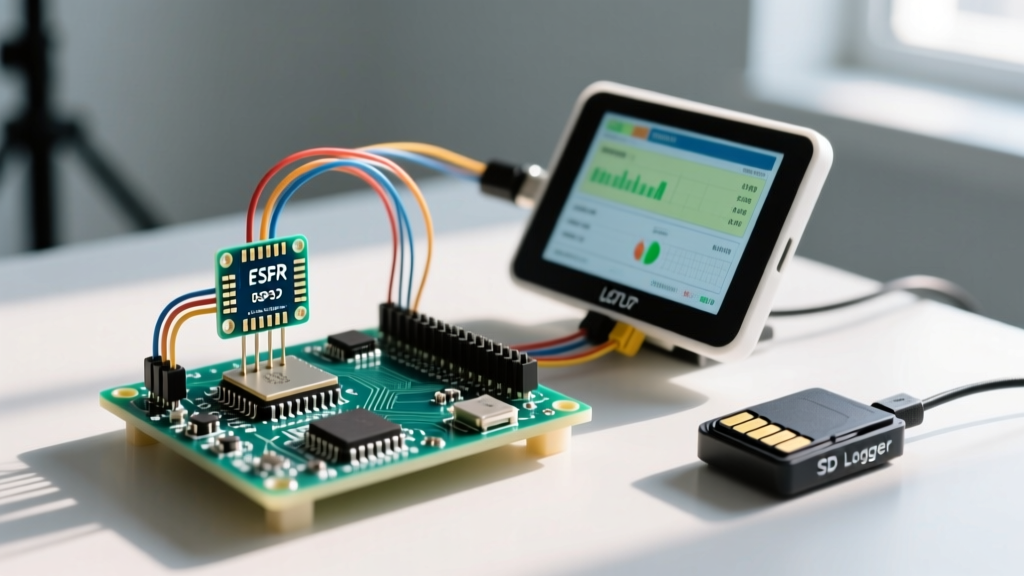
Designing a multi-peripheral setup around a force sensor Arduino architecture presents unique electrical challenges that single-sensor tutorials completely ignore. When you introduce an Interlink FSR 402 alongside an SPI-based MicroSD data logger and an I2C/SPI TFT display, you create a noisy electrical environment. The primary failure mode in these complex builds is not code-related; it is analog crosstalk and voltage rail sag.
Force Sensitive Resistors (FSRs) operate as variable resistors, requiring a voltage divider circuit to translate physical pressure into an analog voltage. If your SD card initiates a write cycle—drawing upwards of 100mA in microsecond bursts—the shared 3.3V logic rail sags. This sag alters the reference voltage of your FSR voltage divider, injecting massive transient noise into your analog readings. Furthermore, the high-frequency switching noise from TFT display backlights can couple into high-impedance analog traces, destroying your signal-to-noise ratio (SNR). This guide provides a professional-grade blueprint for isolating your analog force sensing from digital peripheral noise.
Recommended Hardware Stack
To achieve reliable data logging and real-time visualization without ADC degradation, we bypass standard entry-level microcontrollers in favor of architectures with dedicated power domains and external precision ADCs.
| Component | Model / Specification | Approx. Price | Role in Setup |
|---|---|---|---|
| Force Sensor | Interlink Electronics FSR 402 (1" Round) | $14.95 | Piezoresistive analog input (10g - 10kg range) |
| Microcontroller | Adafruit Feather RP2040 | $11.99 | Dual-core processing (Core0: I/O, Core1: DSP) |
| External ADC | Texas Instruments ADS1115 Breakout (16-bit) | $10.95 | I2C precision analog-to-digital conversion |
| Display | Adafruit 1.3" 240x240 TFT (ST7789 Driver) | $24.95 | SPI real-time force curve visualization |
| Storage | Adafruit MicroSD SPI Breakout | $7.50 | High-speed CSV data logging |
Wiring Architecture: Eliminating Analog Crosstalk
The most critical mistake in a force sensor Arduino multi-peripheral build is powering the FSR voltage divider from the same 3.3V rail that feeds the TFT display and SD card. To solve this, we implement a star-ground topology and utilize an external I2C ADC.
The Voltage Divider and Low-Pass Filter
The FSR 402 resistance drops from >1MΩ (unpressed) to ~250Ω (maximum 10kg pressure). We use a 10kΩ pull-down resistor to create the voltage divider. However, to filter out the 10MHz+ switching noise generated by the ST7789 TFT display driver, we must add a hardware low-pass filter.
- Resistor (R1): 10kΩ (1% tolerance metal film)
- Capacitor (C1): 100nF (X7R Ceramic) placed in parallel with R1.
- Cutoff Frequency: Using the formula
fc = 1 / (2 * π * R * C), this yields a cutoff of approximately 159Hz. Since human-applied force rarely changes faster than 20Hz, this aggressively filters high-frequency digital noise while preserving the physical signal.
Instead of wiring the analog output to the RP2040’s internal ADC—which suffers from an Effective Number of Bits (ENOB) of roughly 8.5 in noisy environments—we route the filtered signal to the ADS1115 external ADC. As detailed in the SparkFun FSR Hookup Guide, external ADCs provide galvanic isolation from the MCU's internal digital switching noise, yielding true 16-bit resolution.
Firmware: Non-Blocking Sensor Polling
When managing an SD card, a TFT display, and an I2C ADC simultaneously, blocking code (like delay()) will cause buffer overruns and UI freezing. The RP2040’s dual-core architecture allows us to segregate tasks.
- Core 0 (I/O and Storage): Handles the SPI SD card file system. It uses a ring buffer to collect force data and writes to the SD card in 512-byte chunks only when the buffer is full, preventing continuous SPI bus locking.
- Core 1 (Display and ADC): Polls the ADS1115 at 860 SPS (samples per second) and updates the TFT display using DMA (Direct Memory Access). This ensures the screen redraws do not halt sensor polling.
By utilizing the Adafruit_ZeroDMA library alongside the ADS1X15 driver, you ensure that I2C transactions for the force sensor do not block the SPI transactions required for the display, a crucial optimization for multi-peripheral setups.
Calibration, Hysteresis, and Drift Compensation
FSRs are not precision load cells; they are qualitative sensors. According to the Interlink FSR Integration Guide, these sensors exhibit significant hysteresis and creep. If you apply a constant 5kg weight, the resistance will continue to drop over time (creep), and the unloading curve will not match the loading curve (hysteresis).
Implementing Software Compensation
To make your force sensor Arduino data logger accurate enough for practical analysis, implement a software calibration routine:
- Polynomial Curve Fitting: Do not use linear mapping. The FSR 402 response is highly non-linear. Sample known weights (1kg, 3kg, 5kg, 8kg) and use a 3rd-order polynomial regression in your firmware to map ADC values to Newtons.
- Dynamic Tare (Zeroing): Implement a rolling average of the first 500ms of boot-up to establish a baseline zero-point, compensating for ambient temperature shifts which can alter the 10kΩ pull-down and FSR resting resistance.
- Hysteresis Deadband: Introduce a 2% deadband in your code. If the force delta between consecutive reads is less than 2%, ignore the change to prevent UI jitter and SD card log spam.
Real-World Failure Modes and Edge Cases
Expert Warning: Never solder directly to the FSR 402 conductive polymer tabs with a standard 350°C soldering iron. The substrate will melt, destroying the sensor. Always use a specialized conductive epoxy or a ZIF (Zero Insertion Force) connector breakout board for termination.
Edge Case: SD Card Initialization Failures
When powering up a multi-peripheral setup, the MicroSD card requires a massive inrush current to initialize the SPI bus. If the FSR and TFT display are pulling power simultaneously, the voltage regulator may brown out, causing the SD card to fail initialization while the FSR reads garbage data. Solution: Stagger your setup() initialization. Initialize the TFT first, wait 200ms, initialize the ADS1115, wait 100ms, and initialize the SD card last.
Edge Case: Mechanical Shearing Forces
FSRs are designed strictly for perpendicular compressive force. If your mechanical housing allows lateral shearing (sliding) forces, the conductive polymer layers will abrade, leading to permanent dead spots. Ensure your 3D-printed or machined housing includes a captive Delrin puck that translates lateral movement into pure vertical compression.
Building a reliable force sensor Arduino multi-peripheral setup requires moving beyond basic wiring diagrams. By isolating your analog domain with an ADS1115, implementing hardware RC filtering, and managing dual-core firmware architectures, you transform a fragile prototype into a robust, professional-grade data logging instrument capable of surviving real-world electrical noise.
For further reading on advanced microcontroller peripheral integration and noise mitigation, refer to the Adafruit TFT Display Overview for specific DMA configurations that pair perfectly with high-speed sensor polling.