
The Shift to Solid-State Interfaces in 2026
Mechanical switches are rapidly disappearing from modern DIY enclosures and industrial IoT panels. As makers and engineers demand sealed, waterproof, and wear-free interfaces, integrating a capacitive sensor with Arduino has become the standard approach for detecting human presence, touch, and liquid levels. However, not all capacitive sensing ICs are created equal. The physics of measuring picofarad-level changes in human skin capacitance requires specialized silicon.
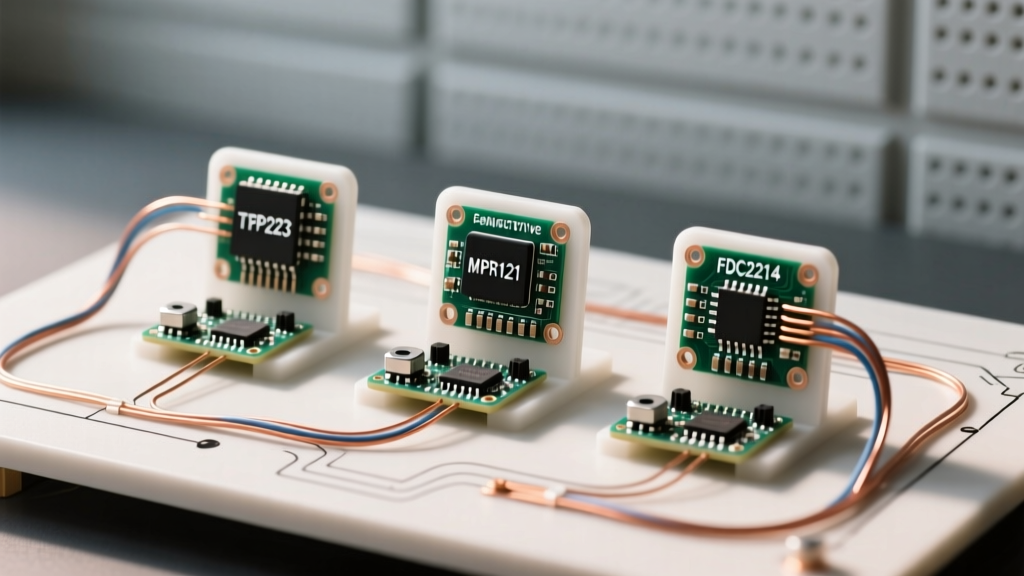
In this component comparison, we dissect four distinct approaches to capacitive sensing on the Arduino platform: the ubiquitous TTP223 digital touch module, the multi-channel MPR121 keypad controller, the high-resolution FDC2214 LC-tank sensor, and the zero-cost bare-copper CapSense library method. We will evaluate their real-world pricing, I2C/digital wiring pitfalls, and specific failure modes to help you choose the exact right silicon for your 2026 project.
Contender 1: TTP223 (The Digital Touch Standard)
The TTP223 is the undisputed king of entry-level touch detection. Originally designed by TonTek, this IC measures the capacitance change when a finger approaches the sensor pad and outputs a simple HIGH/LOW digital signal.
Technical Specifications & Pricing
- Operating Voltage: 2.0V to 5.5V DC
- Interface: Single Digital GPIO (Active High or Low)
- Response Time: ~220ms (low power mode) to ~60ms (fast mode)
- 2026 Market Price: $0.45 – $1.20 per breakout module
Most breakout boards feature the TTP223-BA6 (SOT-23-6 package) and include two solder jumpers: 'A' (active high/low toggle) and 'B' (momentary/toggle mode). This hardware-level configurability eliminates the need for complex Arduino debouncing code.
Failure Modes & Edge Cases
The TTP223 relies on an internal auto-calibration sequence that runs for approximately 0.5 seconds on startup. If a finger is touching the pad during boot, the IC will calibrate the 'touched' state as its baseline, rendering the sensor unresponsive until a hard reset. Furthermore, the TTP223 is highly susceptible to 50Hz/60Hz electromagnetic interference (EMI). Routing these sensors near AC mains wiring or unshielded switching power supplies will result in phantom triggers.
Contender 2: MPR121 (The Multi-Touch Keypad Master)
When your project requires a 12-key capacitive keypad or a slider interface, the NXP MPR121 is the industry benchmark. Unlike the TTP223's simple threshold trigger, the MPR121 continuously streams raw 10-bit electrode data via I2C, allowing the Arduino to calculate touch deltas and proximity gradients.
Technical Specifications & Pricing
- Operating Voltage: 1.71V to 3.6V (Requires level shifting for 5V Arduinos)
- Interface: I2C (Up to 400kHz Fast Mode)
- Channels: 12 independent capacitive inputs
- 2026 Market Price: $4.50 – $7.50 for Adafruit/SparkFun breakouts
According to the official NXP MPR121 datasheet, the IC features a sophisticated baseline tracking algorithm that compensates for slow environmental drifts, such as temperature changes and humidity accumulation on the PCB overlay.
I2C Addressing & Wiring Pitfalls
The MPR121 offers four selectable I2C addresses based on the ADDR pin configuration: 0x5A (GND), 0x5B (VCC), 0x5C (SDA), and 0x5D (SCL). A common failure mode occurs when makers attempt to wire the ADDR pin to SDA or SCL without a 4.7kΩ pull-up resistor, causing the I2C bus to lock up during initialization. Additionally, because the MPR121 operates at 3.3V logic, connecting its I2C lines directly to an Arduino Mega's 5V pins without a bi-directional logic level converter will degrade the I2C rise times and cause communication timeouts.
Contender 3: FDC2214 (The High-Resolution Proximity Giant)
For applications requiring extreme precision—such as liquid level sensing through thick glass, metal proximity detection, or sub-millimeter displacement tracking—the Texas Instruments FDC2214 is in a league of its own. Instead of measuring charge time, the FDC2214 uses an LC-tank oscillator circuit to measure frequency shifts with a massive 28-bit ADC.
Technical Specifications & Pricing
- Operating Voltage: 2.7V to 3.6V
- Interface: I2C (Supports up to 3.4MHz High-Speed Mode)
- Resolution: 28-bit (Sub-femtofarad sensitivity)
- 2026 Market Price: $14.00 – $19.00 per evaluation/breakout board
As detailed in the TI FDC2214 Silicon Data Sheet, the sensor excels in noisy environments because it measures the resonant frequency of the LC circuit, making it inherently immune to amplitude-based EMI noise that plagues charge-transfer sensors like the TTP223.
The LC Tank Challenge
The FDC2214 is not plug-and-play. You must design an LC tank circuit for each channel. Selecting the correct inductor (typically 18µH to 33µH with a high Q-factor and low DC resistance) is critical. If the parasitic capacitance of your PCB traces exceeds the sensor's tuning range, the oscillator will fail to start. Furthermore, the physical layout requires a solid ground plane beneath the sensor traces to prevent signal coupling, making it difficult to implement on standard single-layer perfboards.
Contender 4: Bare Copper & CapSense (The Zero-Cost Hack)
Before dedicated ICs were cheap, the Arduino community relied on the CapSense library. This method uses two Arduino GPIO pins and a high-value resistor to measure the RC time constant of a bare copper pad or aluminum foil.
Expert Warning: The CapSense library blocks the main execution thread while measuring the RC decay time. On an ATmega328P running at 16MHz, a single high-resolution read can take up to 15ms, making it unsuitable for fast-loop control systems.
Implementation Specifics
To use the Arduino CapSense library, you must place a 1MΩ to 40MΩ resistor between the 'send' and 'receive' pins. The receive pin is connected to your copper pad. The resistance value dictates the sensitivity: a 10MΩ resistor is ideal for direct touch, while a 40MΩ resistor allows for proximity detection up to 5cm away. However, breadboard parasitic capacitance (often 2pF to 5pF per contact) will severely skew your baseline readings, forcing you to solder the resistor directly to the microcontroller pins for stable operation.
Head-to-Head Comparison Matrix
| Feature | TTP223 Module | MPR121 Breakout | FDC2214 Breakout | CapSense (Bare) |
|---|---|---|---|---|
| Interface | Digital GPIO | I2C (3.3V) | I2C (3.3V) | 2x Digital GPIO |
| Channels | 1 | 12 | 4 | Limited by RAM/Pins |
| Resolution | Binary (Threshold) | 10-bit Raw Data | 28-bit Frequency | RC Time (Variable) |
| Overlay Thickness | Up to 3mm (Plastic) | Up to 5mm (Glass) | Up to 20mm+ (Any Dielectric) | Up to 1mm |
| EMI Immunity | Poor | Moderate | Excellent | Poor |
| Avg Cost (2026) | $0.85 | $5.50 | $16.00 | $0.05 (Resistor) |
Real-World Wiring & Pull-Up Resistor Pitfalls
When wiring I2C-based capacitive sensors (MPR121 and FDC2214) to an Arduino Uno or Nano, the internal pull-up resistors (typically 20kΩ to 50kΩ) are far too weak to maintain clean signal edges at 400kHz I2C speeds. You must install external 4.7kΩ pull-up resistors on both the SDA and SCL lines to 3.3V.
If you are daisy-chaining multiple sensors or using long ribbon cables, the bus capacitance will exceed the I2C specification limit of 400pF. In this edge case, drop the pull-up resistor value to 2.2kΩ or 1.0kΩ to force faster rise times, or switch to an I2C bus extender IC like the PCA9600.
Environmental Drift and Calibration Strategies
Capacitive sensors do not just measure fingers; they measure the dielectric constant of the air and materials around them. In 2026, with extreme weather patterns causing rapid humidity shifts in unsealed enclosures, environmental drift is a primary cause of field failures.
Combating Humidity and Condensation
Water has a dielectric constant of ~80, compared to air at ~1 and FR4 fiberglass at ~4.5. A single drop of condensation on a TTP223 pad will trigger a permanent 'ON' state. To mitigate this:
- Use Hatched Ground Planes: When designing custom PCBs for the MPR121, use a hatched (grid) ground plane beneath the sensor pads rather than a solid copper pour. This reduces the baseline parasitic capacitance, leaving more dynamic range for the actual touch signal.
- Implement Software Baselines: Never hardcode touch thresholds in your Arduino sketch. Read the raw sensor data on startup, calculate a moving average over 50 samples, and set your trigger threshold at exactly 10% above that dynamic baseline.
- Acrylic Overlays: Use a 2mm to 3mm cast acrylic sheet as a physical barrier. Cast acrylic has superior moisture resistance compared to 3D-printed PLA or PETG, which are hygroscopic and will absorb ambient moisture, altering their dielectric properties over time.
Final Verdict: Which Sensor Fits Your Project?
Choosing the right capacitive sensor with Arduino ultimately depends on your physical constraints and budget. If you are building a simple waterproof doorbell or a single-button sealed enclosure, the TTP223 remains the most cost-effective and code-free solution. For interactive control panels, synthesizers, or security keypads requiring multiple touch zones, the MPR121 provides the perfect balance of multi-channel capability and raw data access.
However, if your 2026 project involves non-contact liquid level sensing through thick glass, or sub-millimeter precision industrial metrology, the FDC2214 is worth the premium price and layout complexity. Finally, reserve the CapSense library strictly for rapid prototyping on a breadboard when you need a proof-of-concept before committing to a dedicated silicon IC.