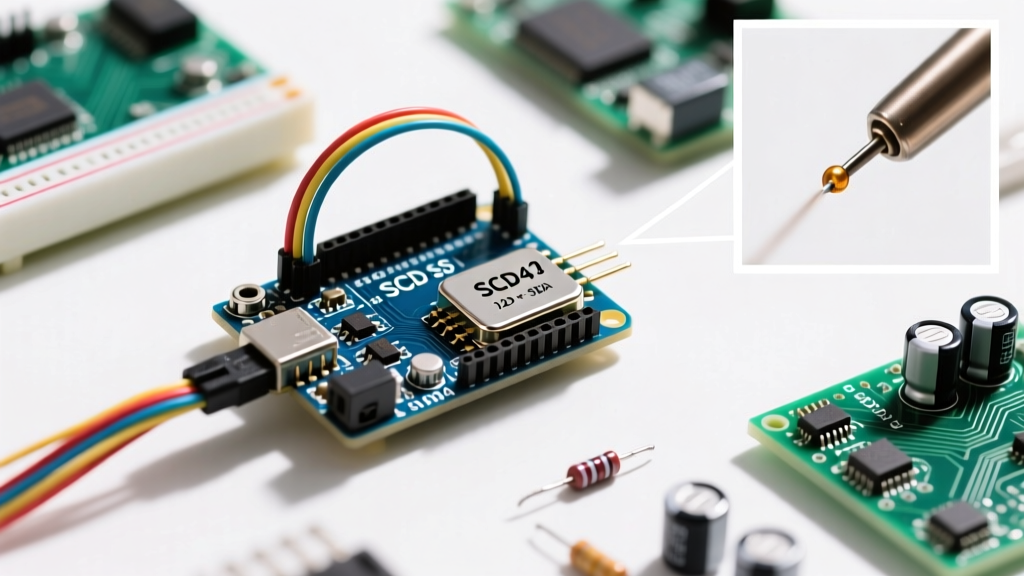

Modern Indoor Air Quality: Beyond Cheap MQ Sensors
Building a reliable air quality sensor Arduino project requires moving past the outdated MQ-135 resistive gas sensors that dominate beginner kits. Those cheap components suffer from severe cross-sensitivity, baseline drift, and require continuous high-current heating. In 2026, the gold standard for DIY and professional indoor air quality (IAQ) monitoring is the photoacoustic NDIR (Non-Dispersive Infrared) technology found in the Sensirion SCD41.
According to the U.S. Environmental Protection Agency (EPA), indoor CO2 levels exceeding 1,000 ppm lead to measurable cognitive decline and fatigue. The SCD41 measures CO2 with an accuracy of ±(40 ppm + 5%), alongside temperature and relative humidity, all in a miniature 10.1 x 10.1 x 6.5 mm package. This guide provides a definitive, expert-level wiring and coding walkthrough for integrating the SCD41 with the Arduino Uno R4 WiFi.
Hardware BOM & Cost Breakdown (2026)
To ensure signal integrity and processing headroom, we are pairing the sensor with the Renesas RA4M1-based Arduino Uno R4 WiFi. Below is the exact bill of materials required for a production-grade prototype.
| Component | Model / Part Number | Est. Price | Purpose |
|---|---|---|---|
| MCU Board | Arduino Uno R4 WiFi (ABX00087) | $27.50 | Processing & Wi-Fi telemetry |
| IAQ Sensor | Adafruit SCD41 Breakout (PID 5187) | $59.95 | Photoacoustic CO2, Temp, RH |
| Wiring | 26 AWG Silicone Stranded Wire | $12.00 | Low-resistance I2C connections |
| Pull-up Resistors | 4.7kΩ Through-Hole (1/4W) | $2.00 | I2C bus stabilization (if needed) |
Total Estimated Cost: $101.45. While the upfront cost is higher than an ESP8266 and MQ-135 combo, the SCD41 eliminates the need for burn-in periods and provides laboratory-grade data.
SCD41 Pinout and Arduino Uno R4 Wiring
The Sensirion SCD41 communicates via I2C. The Adafruit breakout board includes a 3.3V LDO regulator and level shifters, meaning it is 5V tolerant. However, the Uno R4 WiFi operates its I2C bus natively at 3.3V, which perfectly matches the sensor's logic level.
Step-by-Step Wiring Map
- VIN (Breakout) to 5V (Arduino): Powers the onboard regulator. Do not use the 3.3V pin on the Arduino to power the VIN pad; use the 5V pin.
- 3Vo (Breakout) to NC: Leave unconnected. This is the regulated 3.3V output from the breakout.
- GND to GND: Establish a common ground. Use a thick wire (22 AWG or 24 AWG) to minimize ground bounce.
- SCL to SCL (Arduino Uno R4): Located on the dedicated I2C header near the AREF pin, or pin D19 on the digital header.
- SDA to SDA (Arduino Uno R4): Located on the dedicated I2C header, or pin D18 on the digital header.
⚠️ Critical I2C Pull-Up Resistor Warning: The Adafruit breakout includes 10kΩ pull-up resistors. According to the Sensirion SCD41 Datasheet, 10kΩ is often too weak for reliable high-speed I2C communication if your wire length exceeds 10cm. If you experience I2C timeouts or corrupted CRC checksums, solder external 4.7kΩ pull-up resistors between the SDA/SCL lines and the 3.3V line to reduce the RC time constant.
Arduino IDE Configuration and Library Setup
Before writing code, ensure your environment is configured for the Uno R4 WiFi. Open the Arduino IDE (v2.3 or newer), navigate to the Boards Manager, and install the Arduino Renesas UNO R4 Boards core.
Next, install the official sensor library:
- Open Sketch > Include Library > Manage Libraries.
- Search for
Sensirion I2C SCD4xand install the latest version by Sensirion. - Ensure the
Sensirion Coredependency is also installed when prompted.
Complete C++ Code for CO2, Temp, and Humidity
The following code initializes the sensor, applies a temperature offset to compensate for PCB self-heating, and outputs formatted data to the serial monitor. For comprehensive hardware details, refer to the official Arduino Uno R4 documentation.
#include <Arduino.h>
#include <SensirionI2CScd4x.h>
#include <Wire.h>

SensirionI2CScd4x scd4x;

// Offset to compensate for MCU and voltage regulator heat
const float TEMP_OFFSET = 2.5;

void printUint16Hex(uint16_t value) {
    Serial.print("0x");
    Serial.print(value, HEX);
}

void setup() {
    Serial.begin(115200);
    while (!Serial) { delay(100); }

    Wire.begin();

    uint16_t error;
    char errorMessage[256];

    scd4x.begin(Wire);

    // Stop any previous measurements before configuring
    error = scd4x.stopPeriodicMeasurement();
    if (error) {
        Serial.print("Stop Error: ");
        errorToString(error, errorMessage, 256);
        Serial.println(errorMessage);
    }

    // Apply temperature offset
    error = scd4x.setTemperatureOffset(TEMP_OFFSET);
    if (error) {
        Serial.print("Temp Offset Error: ");
        errorToString(error, errorMessage, 256);
        Serial.println(errorMessage);
    }

    // Start periodic measurement (updates every 5 seconds)
    error = scd4x.startPeriodicMeasurement();
    if (error) {
        Serial.print("Start Error: ");
        errorToString(error, errorMessage, 256);
        Serial.println(errorMessage);
    }

    Serial.println("SCD41 Initialized. Waiting for first reading (5s)...");
}

void loop() {
    uint16_t error;
    char errorMessage[256];

    // Read measurement
    uint16_t co2 = 0;
    float temperature = 0.0f;
    float humidity = 0.0f;
    bool isDataReady = false;

    error = scd4x.getDataReadyFlag(isDataReady);
    if (error) {
        errorToString(error, errorMessage, 256);
        Serial.print("DataReady Error: "); Serial.println(errorMessage);
        return;
    }

    if (isDataReady) {
        error = scd4x.readMeasurement(co2, temperature, humidity);
        if (error) {
            errorToString(error, errorMessage, 256);
            Serial.print("Read Error: "); Serial.println(errorMessage);
        } else if (co2 == 0) {
            Serial.println("Invalid sample detected, skipping.");
        } else {
            Serial.print("CO2 [ppm]: "); Serial.print(co2);
            Serial.print("\tTemp [C]: "); Serial.print(temperature, 1);
            Serial.print("\tRH [%]: "); Serial.println(humidity, 1);
        }
    }

    delay(1000); // Polling interval
}
Real-World Calibration: Avoiding the 'Stale Air' Trap
The most common failure mode in DIY air quality sensor Arduino builds is improper calibration. The SCD41 features two calibration methods: Automatic Self-Calibration (ASC) and Forced Recalibration (FRC).
Why You Should Disable ASC for DIY Projects
ASC assumes the sensor will be exposed to fresh outdoor air (approx. 425 ppm in 2026) at least once every 7 days. If your Arduino project is deployed in a continuously occupied office or bedroom, ASC will slowly drift the baseline upward, causing the sensor to under-report CO2 levels. For permanent indoor deployments, disable ASC via the scd4x.setAutomaticSelfCalibrationEnabled(false) function.
Performing Forced Recalibration (FRC)
To achieve absolute accuracy, perform an FRC. Take the sensor outside to a well-ventilated area away from exhaust vents or crowds. Let it run for 10 minutes, then execute the FRC command targeting the current global atmospheric baseline:
// Execute FRC to 425 ppm (2026 Mauna Loa baseline approx.)
error = scd4x.performForcedRecalibration(425, frcCorrection);
This single procedure ensures your sensor reads true atmospheric baseline, making subsequent indoor spikes highly accurate.
Troubleshooting Common I2C and Heating Errors
When deploying your sensor, use this diagnostic matrix to resolve edge-case hardware and environmental failures.
| Symptom | Root Cause | Engineering Solution |
|---|---|---|
| Serial outputs 'Read Error: 0x0100' or CRC mismatch | I2C bus capacitance too high; signal edges are too slow. | Add 4.7kΩ pull-up resistors to 3.3V. Reduce I2C wire length below 15cm. |
| Temperature reads 2°C - 4°C higher than ambient | Thermal coupling from the Arduino's voltage regulator or MCU. | Increase TEMP_OFFSET in code. Physically separate the sensor from heat sources using a 5cm wire harness. |
| CO2 reads 0 ppm continuously | Sensor is in sleep mode or measurement wasn't started. | Ensure startPeriodicMeasurement() is called in setup() and check for 5V power delivery. |
| Humidity reads 99%+ constantly | Condensation on the PTFE membrane. | Move sensor away from humidifiers. The SCD41 membrane is waterproof but not vapor-proof; allow 2 hours to dry out. |
Final Deployment Considerations
When 3D printing an enclosure for your air quality sensor Arduino setup, avoid fully sealed boxes. The SCD41 requires passive airflow to measure ambient CO2 accurately. Design your enclosure with a minimum of 15% open surface area (using louvers or a mesh grill) and ensure the PTFE vent on top of the sensor is not blocked by the enclosure ceiling. By combining the photoacoustic precision of the SCD41 with the robust processing of the Uno R4 WiFi, you create an IAQ monitor that rivals commercial $300+ units in both accuracy and reliability.