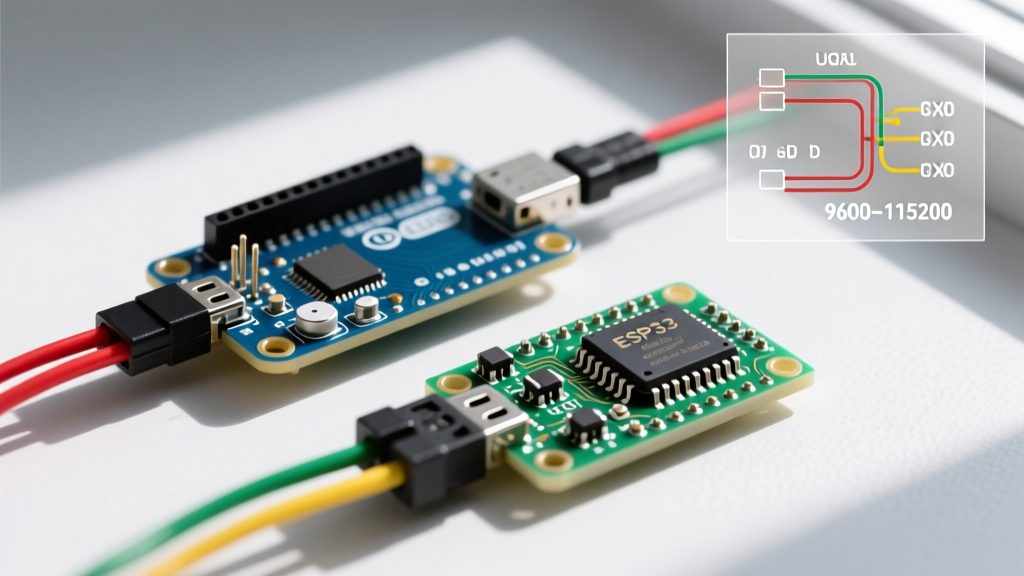

Establishing reliable Arduino to Arduino serial communication via UART (Universal Asynchronous Receiver-Transmitter) is a foundational skill for complex maker projects. Whether you are offloading sensor processing to a secondary microcontroller, building a multi-node data logger, or isolating high-power motor controls from a sensitive master board, UART remains the most straightforward protocol. However, mismatched logic levels, missing ground references, and buffer overflows frequently derail beginners.
This quick reference guide and FAQ cuts through the fluff, providing exact wiring matrices, hardware specifications, and actionable troubleshooting steps for 2026 and beyond.
Quick-Reference Wiring & Logic Matrix
Before connecting any TX/RX pins, you must verify the operating voltage of both boards. Sending 5V logic into a 3.3V microcontroller will permanently damage the silicon. Use this matrix to determine your hardware requirements.
| Master Board (TX) | Slave Board (RX) | Logic Levels | Level Shifter Required? | Hardware Notes & Costs |
|---|---|---|---|---|
| Uno R3 / Mega 2560 | Uno R3 / Mega 2560 | 5V to 5V | No | Direct cross-connect. Ensure common ground. |
| Uno R3 (5V) | Nano 33 IoT / ESP32 | 5V to 3.3V | Yes | Use a BSS138 MOSFET or TXS0108E IC (~$2.50 - $4.00). |
| ESP32 / Nano 33 IoT | ESP8266 / RP2040 | 3.3V to 3.3V | No | Direct cross-connect. Do not use 5V USB pins. |
| Any Arduino | Any Arduino (>50ft) | Varies | Yes (Transceiver) | Use MAX485 RS-485 modules (~$1.50 each) with twisted pair. |
Core FAQs: Arduino to Arduino Serial Communication
1. Do I absolutely need a common ground wire?
Yes. This is the most common point of failure. Serial communication relies on voltage differentials. The TX pin outputs a voltage relative to its own ground. If the two Arduinos do not share a common ground reference, the RX pin will read floating electrical noise, resulting in garbage characters or total failure. Always run a dedicated ground wire between the GND pins of both boards, even if they are powered by separate USB cables or battery packs.
2. Hardware Serial vs. SoftwareSerial: Which should I use?
When configuring Arduino to Arduino serial communication, you have two software options. According to the Arduino Official Serial Documentation, Hardware Serial is always preferred when available.
- Hardware Serial (Serial1, Serial2, Serial3): Utilizes dedicated UART pins (e.g., Pins 18/19 on the Mega 2560). It is handled by a dedicated hardware chip, meaning it operates in the background via interrupts. It supports high baud rates (up to 2,000,000 on some boards) and features deep hardware buffers (64 bytes on Uno, 256 bytes on Mega).
- SoftwareSerial: Emulates UART using software timer interrupts on any digital pin. Drawbacks: It blocks the CPU while transmitting or receiving, cannot reliably handle baud rates above 57600, and only one SoftwareSerial port can listen at a time. Use this only on boards like the Uno R3 when Pins 0 and 1 are occupied by the USB-to-Serial converter.
3. How do I safely shift 5V logic down to 3.3V?
While a simple resistor voltage divider (e.g., 2kΩ and 3.3kΩ) can step down 5V to ~3.3V, it is not recommended for serial communication above 9600 baud. The parasitic capacitance of the resistors and the RX pin will smear the square wave edges, causing bit errors at high speeds.
Expert Recommendation: Invest $3 in a bi-directional logic level converter breakout board utilizing BSS138 MOSFETs or a Texas Instruments TXS0108E IC. These actively drive the pins, preserving sharp signal edges up to 115200 baud and beyond. For a deep dive into voltage thresholds, refer to the SparkFun Logic Levels Guide.
4. What is the maximum reliable cable length for standard UART?
Standard UART is designed for on-PCB or very short cable runs. Rule of Thumb:
- Under 50 cm (20 inches): Reliable at almost any baud rate using standard jumper wires.
- Up to 3 meters (10 feet): Reliable at 9600 baud using shielded twisted-pair cable. Higher baud rates will suffer from capacitive signal degradation.
- Beyond 10 meters: Standard UART will fail due to noise and voltage drop. You must switch to RS-485. By adding a MAX485 transceiver module ($1.50) to each Arduino, you convert the UART signal to a differential voltage pair, allowing reliable communication up to 1,200 meters (4,000 feet) at 100 kbps.
Troubleshooting Garbage Data & Connection Failures
If your receiving Arduino is printing hieroglyphics, question marks, or nothing at all, follow this sequential diagnostic checklist based on SparkFun's Serial Communication principles.
- Verify the Baud Rate Match: Both Arduinos must initialize serial at the exact same speed (e.g.,
Serial.begin(115200);). A mismatch (e.g., 9600 vs 115200) guarantees corrupted data. - Check TX/RX Cross-Wiring: TX must connect to RX, and RX must connect to TX. Never connect TX to TX.
- Disconnect USB for Hardware Serial: If you are using Pins 0 and 1 on an Uno R3, disconnect the USB cable from the master board. The onboard ATmega16U2 USB chip uses these exact same pins; plugging in USB creates a bus contention that corrupts data.
- Inspect for Buffer Overflows: If the transmitting Arduino sends data faster than the receiving Arduino can process it, the 64-byte serial buffer will overflow, dropping bytes. Implement a handshake protocol or use start/end markers (e.g., sending
<data>) so the receiver can parse complete strings without blocking. - Check for Ground Loops: If using long wires between boards powered by different mains adapters, you may introduce a ground loop. If using RS-485 for long distances, utilize opto-isolated MAX485 modules to protect your microcontrollers from ground potential differences.
Code Quick-Start: Non-Blocking Serial Parsing
Never use delay() while waiting for serial data in a multi-node setup. Use a non-blocking state machine approach to read incoming bytes. Below is the structural logic for robust Arduino to Arduino serial communication:
// Receiver Arduino Logic Concept
bool messageComplete = false;
String incomingData = "";

void loop() {
  while (Serial.available()) {
    char inChar = (char)Serial.read();
    if (inChar == '<') {
      incomingData = ""; // Clear buffer on start marker
    } else if (inChar == '>') {
      messageComplete = true; // End marker detected
    } else {
      incomingData += inChar;
    }
  }

  if (messageComplete) {
    processCommand(incomingData);
    messageComplete = false;
  }
  // Other non-blocking loop tasks go here
}
Summary Checklist for Makers
- [ ] Common Ground: GND to GND connected.
- [ ] Crossed Lines: TX to RX, RX to TX.
- [ ] Logic Levels: Level shifter installed if mixing 5V and 3.3V boards.
- [ ] Baud Rates: Matched in both
setup()functions and Serial Monitors. - [ ] Pin Conflicts: USB disconnected if using Pins 0/1 on Uno/Nano.
By adhering to these hardware constraints and software best practices, your Arduino to Arduino serial communication networks will remain stable, scalable, and immune to the most common environmental and logical errors.