
The Silicon Heartbeat: Understanding the Core Architecture
When beginners and intermediate makers search for the ultimate Arduino Leonardo vs Uno comparison, the discussion almost always revolves around a single, pivotal architectural difference: how the board handles USB communication. While both boards share the same familiar footprint and operate at 5V logic, their underlying silicon dictates entirely different project trajectories.
The classic Arduino Uno R3 relies on the ATmega328P microcontroller. Because this chip lacks native USB hardware, the Uno requires a secondary bridge chip (the ATmega16U2) to translate USB signals into UART serial data. The Arduino Uno Rev3 Hardware Guide details this dual-chip dance. Conversely, the Arduino Leonardo is powered by the ATmega32U4, which features built-in USB communication. This eliminates the bridge chip, reducing component count and, more importantly, allowing the Leonardo to natively emulate USB Human Interface Devices (HID) like keyboards and mice.
Hardware & Architecture Showdown (2026 Baseline)
| Feature | Arduino Uno R3 | Arduino Leonardo |
|---|---|---|
| Primary Microcontroller | ATmega328P | ATmega32U4 |
| USB Interface | ATmega16U2 (Serial Bridge) | Native USB (Integrated) |
| Native HID Capability | No (Requires complex workarounds) | Yes (Native Keyboard/Mouse emulation) |
| Average Retail Price | ~$27.00 | ~$24.50 |
| Digital I/O Pins | 14 | 20 |
| Hardware Serial Ports | 1 (Shared with USB bridge) | 1 (Dedicated, independent of USB) |
Environment Setup: Navigating the IDE 2.x Quirks
Setting up both boards in the modern Arduino IDE 2.3.x is straightforward, but the Leonardo introduces a unique bootloader mechanism that catches many first-time users off guard.
The 1200bps Bootloader Reset Trick
On the Uno, opening the serial port toggles the DTR (Data Terminal Ready) line, which physically resets the ATmega328P via a 0.1µF capacitor, triggering the bootloader. The Leonardo cannot do this because its USB stack is handled by the main application code. If your code crashes or monopolizes the USB stack, the IDE cannot send a reset signal.
To solve this, the Leonardo's firmware listens for the serial port being opened at exactly 1200 baud. When it detects this specific speed, it forces a hardware reset and stays in bootloader mode for about 8 seconds. Expert Tip: If your Leonardo ever 'disappears' from your PC's device manager due to a faulty sketch, simply double-tap the physical reset button on the board to manually trigger the bootloader and re-establish the COM port.
First Project: The USB Macro Keypad (HID Emulation)
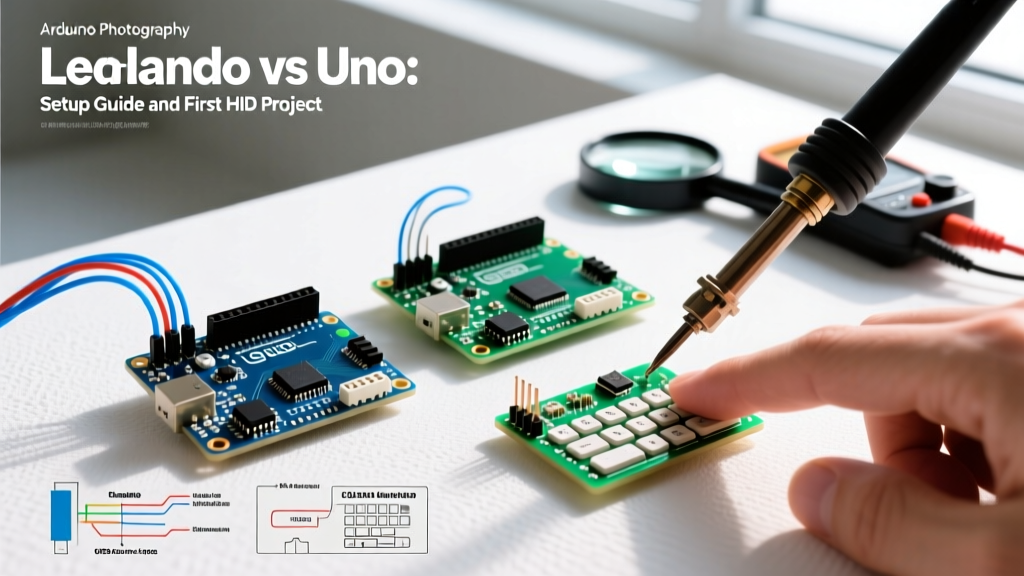
To truly test the Arduino Leonardo vs Uno divide, we will build a USB Macro Button. This project reads a physical button press and injects a keyboard shortcut (e.g., Ctrl+Shift+Esc to open Windows Task Manager) directly into the host OS.
CRITICAL EXPERT WARNING: The HID Lockout Failure Mode
When writing HID code for the Leonardo, a common fatal error is placingKeyboard.press()inside theloop()without a corresponding release or delay. This will flood your operating system with thousands of keystrokes per second, freezing your PC's input stack and making it impossible to use your mouse or keyboard to fix the issue. Always include a safety delay in yoursetup()function to give yourself time to upload a blank sketch if things go wrong.
Step 1: Wiring the Button
We will use the microcontroller's internal pull-up resistors to save components.
- Connect one leg of a tactile pushbutton to Digital Pin 2.
- Connect the other leg to GND.
- No external resistors are required.
Step 2: The Leonardo Native HID Code
According to the Arduino Keyboard Library Reference, the ATmega32U4 can map directly to standard USB HID scancodes. Upload the following code to your Leonardo:
#include 'Keyboard.h'

const int buttonPin = 2;
int previousButtonState = HIGH;

void setup() {
  // CRITICAL SAFETY DELAY: Gives you 5 seconds to release the button
  // or upload a fix before the board takes over your keyboard.
  delay(5000);

  pinMode(buttonPin, INPUT_PULLUP);
  Keyboard.begin();
}

void loop() {
  int buttonState = digitalRead(buttonPin);

  // Check for state change (Button pressed, pulled to GND)
  if ((buttonState != previousButtonState) && (buttonState == LOW)) {
    // Inject Ctrl + Shift + Escape (Windows Task Manager)
    Keyboard.press(KEY_LEFT_CTRL);
    Keyboard.press(KEY_LEFT_SHIFT);
    Keyboard.press(KEY_ESC);
    delay(100); // Debounce and ensure OS registers the combo
    Keyboard.releaseAll();
  }

  previousButtonState = buttonState;
  delay(50); // Basic software debouncing
}
Why the Uno Fails This Project
If you attempt to compile this exact code on an Arduino Uno R3, the IDE will throw a fatal error: 'Keyboard' not found. Does your sketch include the line '#include <Keyboard.h>'?
Because the Uno's ATmega328P lacks native USB HID descriptors, the Keyboard library is explicitly blocked from compiling for it. To achieve similar functionality on an Uno, you would have to reflash the ATmega16U2 bridge chip with custom HID firmware (like HoodLoader2) or use a software-based serial workaround, both of which are fragile and unsuitable for a beginner's first project. If you only own an Uno, your first project must be restricted to Serial Monitor outputs or standard GPIO hardware control.
Advanced Edge Cases: Serial Port Conflicts
Another major divergence in the Arduino Leonardo vs Uno comparison is how they handle hardware serial debugging. On the Uno, Serial.print() sends data over the USB cable, but it also outputs on Pins 0 (RX) and 1 (TX). If you connect external sensors to Pins 0 and 1, they will interfere with USB communication, causing upload failures.
The Leonardo separates these functions. Serial.print() routes exclusively to the USB virtual COM port, while Serial1.print() routes to the physical hardware pins (0 and 1). This makes the Leonardo vastly superior for projects requiring both PC debugging and external UART modules (like GPS receivers or secondary microcontrollers).
Final Verdict: Choosing Your Platform
For standard electronics learning, sensor reading, and motor control, the Uno R3 (or the modern Uno R4 Minima) remains the gold standard due to its massive shield compatibility and ruggedness against USB stack crashes. However, if your project roadmap includes custom macro pads, gaming peripherals, accessibility switches, or automated PC control, the Leonardo is an absolute requirement. Understanding these architectural boundaries ensures you select the right silicon for your specific application, saving hours of frustrating workarounds.
For further reading on board architectures, consult the Arduino Leonardo Official Documentation to explore the full pinout and memory constraints of the ATmega32U4.