
The Hidden Fire Hazard: Why Paint in Electrical Outlet Slots is Dangerous
Encountering paint in electrical outlet slots is one of the most common, yet frequently ignored, post-renovation wiring scenarios. Whether caused by a careless roller stroke, a sloppy cut-in job, or overspray from an airless paint sprayer, dried latex, acrylic, or oil-based paint acts as a dielectric insulator. According to the National Fire Protection Association (NFPA), high-resistance connections and compromised wiring devices are a leading cause of residential electrical fires.
When paint infiltrates the brass or nickel-plated steel contact blades of a standard 15A or 20A receptacle, it prevents the plug prongs from seating fully. This creates a microscopic air gap and severe contact resistance. Furthermore, modern Tamper-Resistant (TR) receptacles feature internal spring-loaded shutters. Paint seepage gums up these mechanical shutters, forcing homeowners to aggressively pry plugs into the slots, which permanently deforms the internal yoke and compromises the structural integrity of the device.
The Physics of High-Resistance Connections
To understand why this scenario demands immediate remediation, we must look at the physics of electrical resistance. A standard coat of interior acrylic latex paint dries to a thickness of roughly 1.5 to 3 mils. While seemingly negligible, this layer introduces a contact resistance ranging from 0.05 to over 0.5 ohms, depending on the paint's chemical composition and the surface area of the prong contact.
Using Joule's first law (P = I²R), we can calculate the exact thermal danger:
- Scenario: A 1500W space heater drawing 12.5 Amps is plugged into a painted receptacle.
- Added Resistance: 0.2 ohms due to dried paint on the hot blade.
- Heat Generation: 12.5² × 0.2 = 31.25 Watts of localized thermal energy.
Generating 31 watts of heat inside a confined, enclosed plastic wall box is catastrophic. While the polycarbonate and nylon faceplates used in premium receptacles (like the Leviton T5262-W) have melting points exceeding 450°F, structural deformation and embrittlement begin around 250°F. This heat degrades the wire insulation, leading to arc faults, melted prongs, and eventual ignition.
Diagnostic Protocol: Identifying Paint-Induced Voltage Drop
Before tearing into the drywall or aggressively scraping the slots, you must quantify the damage. Relying on visual inspection is insufficient, as paint often wicks deep into the slot via capillary action. Use the following diagnostic workflow:
- Baseline Voltage Check: Use a True-RMS multimeter (e.g., Fluke 117) to measure the voltage at the main panel's breaker terminal. Note the exact reading (typically 120V to 124V).
- Under-Load Receptacle Test: Plug a high-draw device (like a hair dryer or heat gun) into the suspect outlet. Measure the voltage directly at the receptacle's hot and neutral slots using the multimeter probes.
- Calculate Voltage Drop: If the voltage drops by more than 3% (roughly 3.6V) under load compared to the panel baseline, you have a high-resistance connection. Paint is the primary culprit in recently painted rooms.
- Thermal Imaging: For absolute certainty, scan the receptacle with a thermal camera (such as the FLIR C5) after running the load for 10 minutes. A delta-T (temperature differential) greater than 10°C above ambient room temperature confirms dangerous resistive heating.
Expert Warning: Never use metal tools like paperclips, flathead screwdrivers, or dental picks to scrape inside a live receptacle slot. Even with the breaker off, metal scraping can leave behind conductive micro-filings that cause short circuits when power is restored. Always treat the device as compromised.
Remediation: Clean vs. Replace Decision Matrix
When addressing paint in electrical outlet cavities, electricians face a binary choice: attempt to clean the contacts or replace the device entirely. The National Electrical Code (NEC) mandates that all wiring devices must be free of foreign substances that impair their function (NEC Article 110.12 Mechanical Execution of Work). Below is a professional decision matrix to guide your remediation strategy.
| Factor | Mechanical Cleaning (Solvents/Picks) | Full Receptacle Replacement |
|---|---|---|
| Time Required | 15 - 25 minutes per outlet | 10 - 15 minutes per outlet |
| Material Cost | $2.00 (Isopropyl alcohol, wooden skewers) | $3.15 - $6.00 (New TR Receptacle) |
| TR Shutter Restoration | Poor (Solvents rarely unbind dried internal springs) | Perfect (Factory-new mechanical tolerances) |
| UL Safety Rating | Voided (Chemicals degrade nylon housings) | Maintained (Factory UL 498 Certified) |
| Verdict | Only for minor faceplate overspray | Mandatory for paint inside the slots |
Step-by-Step Receptacle Replacement (The Safest Route)
Because the internal contact tension is permanently altered when a plug is forced through dried paint, replacement is the only code-compliant and fire-safe solution for slot infiltration. Here is the professional workflow for swapping out a compromised 15A or 20A receptacle.
1. Lockout and Verification
Navigate to your main electrical panel and switch off the corresponding breaker. Use a non-contact voltage tester (NCVT), such as the Klein Tools NCVT-2, to verify the absence of voltage. Test the top and bottom slots of the receptacle, as well as the hot wires in the back of the box, to ensure no back-fed circuits or multi-wire branch circuits (MWBC) are present.
2. Extract and Inspect the Yoke
Remove the 6-32 mounting screws securing the device yoke to the drywall box. Gently pull the receptacle forward. Inspect the insulation on the hot (black/red) and neutral (white) wires. If the heat generated by the painted connection has caused the wire insulation to become brittle, crack, or show scorch marks, you must strip the wire back to clean copper and apply a new layer of 3M Super 33+ electrical tape or use a heat-shrink tube over the damaged section.
3. Terminate Using the Side Clamps
When wiring the new receptacle (e.g., an Eaton TRGF15W or Leviton T5262-W), avoid using the push-in backstab connectors. Backstab connections rely on a single, small spring clip that is highly susceptible to thermal expansion and failure. Instead, strip 5/8-inch of insulation from your 14 AWG or 12 AWG solid copper wires, form a tight shepherd's hook, and loop them clockwise around the brass and silver terminal screws. Torque the screws firmly to ensure a gas-tight connection that resists future oxidation.
4. Secure and Test
Push the wires neatly into the back of the box using a folded accordion technique to prevent pinching. Mount the new receptacle, ensuring the yoke sits flush against the drywall or plaster ring. Install a new, clean faceplate. Restore power and test with a GFCI/Receptacle tester to confirm correct wiring polarity and proper TR shutter operation.
Mechanical Cleaning: When Replacement Isn't an Option
If you are dealing with a historic property where original, period-accurate receptacles must be preserved, or if the paint is strictly limited to the exterior plastic faceplate and the very lip of the slot, careful cleaning is permissible. According to the U.S. Consumer Product Safety Commission (CPSC), maintaining the integrity of electrical enclosures is vital for preventing shock hazards.
- For Faceplates: Remove the faceplate entirely. Soak it in warm water with a mild dish detergent. Use a plastic-bristle brush to agitate the paint. Avoid harsh chemical paint strippers, which will cloud and weaken the polycarbonate plastic.
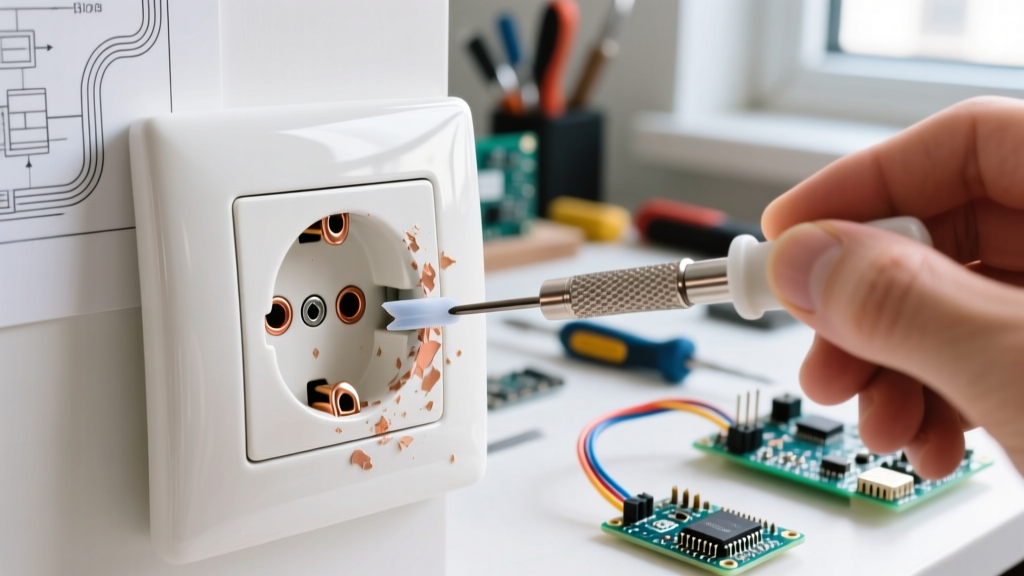
- For Slot Lips: With the power OFF, use a wooden toothpick or a bamboo skewer dipped in 99% isopropyl alcohol to gently dissolve and lift the paint from the outer edges of the TR shutters. The wood prevents accidental shorting, and the high-purity alcohol evaporates rapidly without leaving conductive residue.
- Drying Time: Allow a minimum of 30 minutes for complete alcohol evaporation before restoring power to the circuit.
Proactive Protection: Best Practices for Painters
Preventing paint in electrical outlet slots is vastly superior to remediation. Professional painting contractors should implement the following masking protocols:
- Pre-Masked Outlet Covers: Products like the Trimaco Paint-Saver plastic outlet covers slip over the receptacle and expand behind the faceplate, providing a 100% seal against overspray and roller spatters without requiring tape.
- High-Quality FrogTape: If using painter's tape, apply it only to the exterior edges of the installed faceplate, never pressing tape into the receptacle slots themselves.
- Airless Sprayer Shielding: When using high-velocity airless sprayers (e.g., Graco Magnum X5), use a rigid plastic shield to deflect atomized paint particles away from electrical boxes.
Frequently Asked Questions
Can I just plug and unplug a device to 'scrape' the paint off the internal contacts?
No. Forcing a plug through dried paint damages the Tamper-Resistant (TR) shutters and bends the internal brass contact springs. This reduces the clamping force on the plug prongs, leading to arcing and heat generation even after the paint is fractured.
Does homeowners insurance cover fires caused by painted outlets?
Insurance adjusters frequently investigate the origin of electrical fires. If a forensic investigation reveals that a fire originated from a high-resistance connection caused by contractor negligence (like paint in the slots), the insurance company may subrogate the claim against the painting contractor's liability insurance. However, if the homeowner knowingly ignored a visible hazard, coverage disputes can arise.
Are smart receptacles more susceptible to paint damage?
Yes. Smart receptacles (like the Leviton Decora Smart Wi-Fi Outlet) contain sensitive internal logic boards and relays. The heat generated by a painted, high-resistance connection can easily fry the internal microprocessor, resulting in a $25 to $40 device failure, compared to a $3 failure for a standard mechanical receptacle.