
The Modern Standard: Why the 4-Prong Electric Dryer Plug Outlet is Mandatory
If you are upgrading your laundry room or wiring a new home in 2026, installing a modern electric dryer plug outlet is a non-negotiable requirement. Historically, dryers utilized 3-prong NEMA 10-30R receptacles, which combined the neutral and ground paths into a single conductor. However, this design posed a severe shock hazard if the neutral wire failed, causing the dryer's metal chassis to become energized at 120 volts. Today, the National Electrical Code (NEC Article 250.140) mandates the use of a 4-prong NEMA 14-30R receptacle for all new installations, separating the neutral and equipment grounding conductors.
According to the National Fire Protection Association (NFPA), electrical failures and malfunctions are a leading cause of appliance fires. Properly terminating your 240V receptacle with exact torque specifications and correct wire routing mitigates these risks. This guide provides a master-level, step-by-step installation workflow for a 30-amp, 4-prong electric dryer plug outlet.
Tools and Materials Checklist
Before opening your electrical panel, gather the precise components required for a code-compliant installation. Do not substitute 10 AWG wire with 12 AWG, and never use a 50-amp NEMA 14-50R receptacle on a 30-amp breaker.
| Item | Specification / Model | Estimated Cost (2026) |
|---|---|---|
| Receptacle | Leviton 278-S00 (NEMA 14-30R, 30A/125-250V) | $14.00 - $18.00 |
| Branch Circuit Wire | 10/3 NM-B (Romex) with Ground, Copper | $1.60 - $2.10 / ft |
| Circuit Breaker | 30A Double-Pole (e.g., Square D HOM230CP) | $22.00 - $30.00 |
| Electrical Box | 1-Gang Deep Metallic or Non-Metallic (min 22 cu in) | $3.00 - $6.00 |
| Torque Screwdriver | Klein Tools 69014 (or equivalent, 10-35 in-lb range) | $45.00 - $60.00 |
| Wire Strippers | Klein Tools 11057 (10-18 AWG) | $25.00 |
Phase 1: Panel Preparation and Cable Routing
Step 1: De-energize and Verify
Locate your main service panel and switch off the main breaker to ensure complete safety while installing the new 30A double-pole breaker. Use a non-contact voltage tester (NCVT) and a multimeter (like the Fluke 117) to verify zero voltage across the bus bars. The Electrical Safety Foundation International (ESFI) strongly emphasizes testing before touching any panel components, as upstream utility faults can occasionally leave panels energized even when the main is off.
Step 2: Install the Breaker and Route the 10/3 NM-B
Snap the 30A double-pole breaker into the panel bus stabs. Route your 10/3 NM-B cable from the panel to the laundry room outlet location. Secure the cable with appropriate staples within 12 inches of the panel and every 4.5 feet along the run, per NEC 334.30. Leave at least 18 inches of slack at the outlet box location for termination.
Phase 2: Terminating the Electric Dryer Plug Outlet
Step 3: Strip the Cable and Prepare Conductors
Carefully strip the outer yellow jacket of the 10/3 NM-B cable using a cable ripper, exposing the inner conductors. You must leave exactly 1/4 inch of the outer sheathing inside the electrical box to protect the wires from the box's metal edges. Strip 3/4 inch of insulation from the black (Hot 1), red (Hot 2), and white (Neutral) conductors. Leave the bare copper ground wire intact but trim it to a manageable length, ensuring it reaches the grounding terminal without excessive coiling.
Step 4: Wire the NEMA 14-30R Receptacle
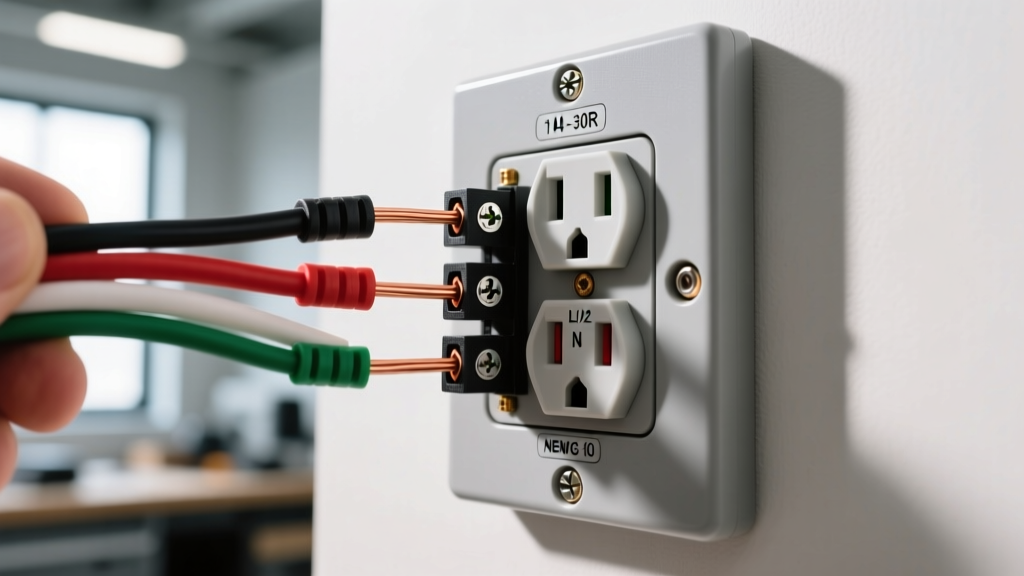
The Leviton 278-S00 receptacle features four distinct terminal screws. Proper phase alignment is critical for modern dryers with sensitive logic boards.
- X Terminal (Brass/Black): Connect the Black wire (Hot 1, 120V Leg A).
- Y Terminal (Brass/Black): Connect the Red wire (Hot 2, 120V Leg B).
- W Terminal (Silver/White): Connect the White wire (Neutral). This carries the 120V return current for the dryer's timer, logic board, and interior light.
- G Terminal (Green): Connect the Bare Copper wire (Equipment Ground). If using a metal box, you must also run a ground pigtail from the receptacle's ground screw to the box's grounding clip or 10-32 ground screw.
CRITICAL E-E-A-T PRO TIP: NEC 110.14(D) requires that terminations be torqued to the manufacturer's specifications. For the Leviton 278-S00 with 10 AWG copper wire, the required torque is 14 in-lbs (1.58 N-m). Use a calibrated torque screwdriver. Hand-tightening leads to thermal expansion/contraction cycles that loosen the connection over time, resulting in arcing, melted receptacles, and potential fires.
Step 5: Secure and Test
Fold the wires neatly into the back of the deep gang box, ensuring no bare ground wire touches the hot terminal screws. Secure the receptacle to the box using the provided 6-32 mounting screws. Install a 4-prong dryer receptacle cover plate. Restore power at the main panel and test the outlet using a specialized 240V receptacle tester or a multimeter. You should read 240V between X and Y, and 120V between X and W, and Y and W.
Troubleshooting Common Installation Edge Cases
Even with a perfect installation, you may encounter edge cases when plugging in the appliance. Here is how to diagnose them:
- Dryer Tumbles but Produces No Heat: This indicates the dryer is receiving 120V (powering the motor) but not the full 240V (required for the heating element). Check your panel to ensure both poles of the double-pole breaker are fully seated and that neither the black nor red wire is loose at the receptacle terminals.
- Timer/Control Board Fails to Advance: The dryer's logic controls run on 120V, utilizing the neutral wire. If the white neutral wire is loose at the 'W' terminal on your electric dryer plug outlet, the control board will starve for power, even if the heating element gets 240V.
- GFCI/AFCI Nuisance Tripping: If your 30A breaker is a dual-function (DF) AFCI/GFCI model, older dryers with degrading heating elements or moisture buildup may cause nuisance trips. Ensure the dryer's internal wiring is sound, as the branch circuit is operating exactly as designed by tripping on a ground fault.
Frequently Asked Questions (2026 Code Updates)
Can I use a 3-prong to 4-prong adapter cord instead of changing the outlet?
No. Adapter cords that claim to convert a 3-prong NEMA 10-30R wall outlet to a 4-prong dryer plug are dangerous and violate NEC code. They attempt to bond the neutral and ground at the plug, which bypasses the safety mechanism of the separated 4-wire system. You must upgrade the physical electric dryer plug outlet in the wall to a NEMA 14-30R.
What if my home only has older 10/2 cable with no ground?
If you are performing a renovation or adding a new circuit, you must pull new 10/3 NM-B cable with a dedicated ground. The NEC only permits the use of ungrounded 3-prong NEMA 10-30R receptacles for existing installations that were compliant at the time of their original installation. You cannot install a new 3-prong outlet in 2026. For more on grounding requirements, refer to the Consumer Product Safety Commission (CPSC) electrical safety guidelines.
Is it safe to use aluminum wire for a 30A dryer circuit?
While 8 AWG aluminum wire (8/3 SER or NM-B equivalent) can technically carry 30 amps, copper 10/3 NM-B is the industry standard for residential dryer circuits due to its superior conductivity, smaller bending radius, and resistance to oxidation. If you must use aluminum, ensure the receptacle is explicitly marked 'CO/ALR' and apply anti-oxidant paste to the terminals, adjusting your torque settings to the manufacturer's aluminum specifications.