
The Anatomy of a Floor Outlet Installation
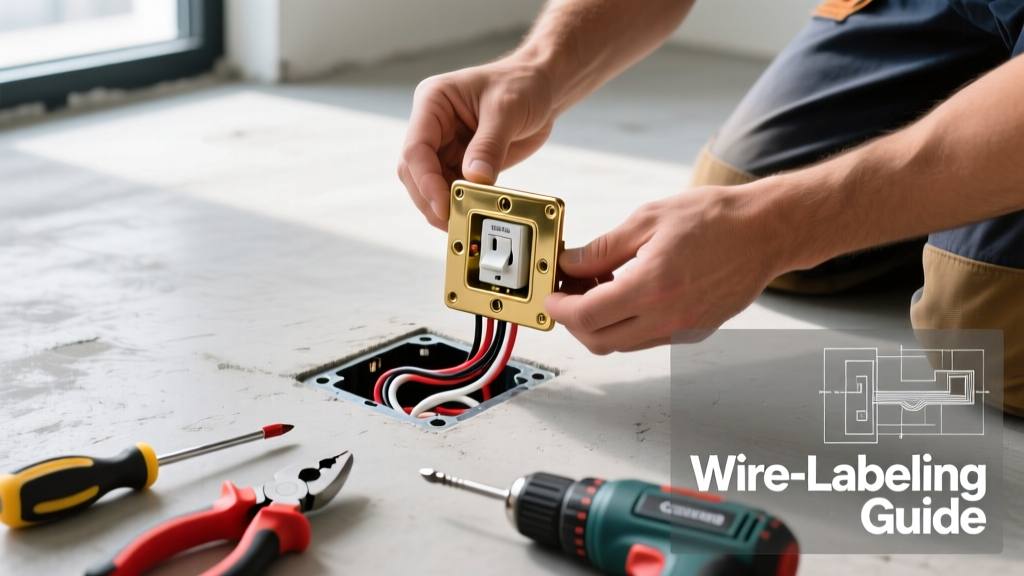
Learning how to install floor electrical outlet receptacles is one of the most effective ways to eliminate trip hazards from extension cords in open-concept living rooms, home offices, and kitchen islands. However, unlike standard wall receptacles, floor outlets are subjected to extreme mechanical stress, moisture from mopping, and the constant abrasion of foot traffic. A successful installation relies entirely on selecting the correct floor box assembly and utilizing specialized cutting and routing tools tailored to your specific subfloor.
In this comprehensive tool and material guide, we break down the exact equipment required for both wood-joist and concrete-slab installations, compare the top-performing floor boxes on the market in 2026, and outline the critical failure modes you must avoid to pass local electrical inspections.
Material Selection Matrix: Choosing the Right Floor Box
The National Electrical Code (NEC) Article 314.27(B) mandates that floor boxes must be listed for the specific flooring material they are installed in. Using a standard wall box in a floor is a severe code violation and a massive safety hazard. Below is a comparison of the three most reliable floor box assemblies used by professionals today.
| Brand & Model | Material | Best Application | Est. Price (2026) | Key Feature |
|---|---|---|---|---|
| Hubbell SystemOne (S1-Series) | Die-Cast Brass | High-traffic, tile, hardwood | $135 - $160 | IP-rated O-ring gaskets for mop-water resistance |
| Carlon E971FL | PVC (Non-Metallic) | Carpet, low-traffic residential | $35 - $45 | Corrosion-proof, easy to cut and adjust |
| Raco 6238 | Galvanized Steel | Wood subfloors, standard residential | $60 - $75 | Adjustable depth bracket up to 1-1/4 inches |
Expert Insight: If you are installing a floor outlet in a room with a floating floor (like Luxury Vinyl Plank or Laminate), you must use an oversized flange cover (minimum 4.5 inches in diameter). The floor box anchors to the subfloor, while the oversized brass cover floats over the LVP, allowing the floor to expand and contract without binding against the metal housing.
Essential Tool Loadout by Subfloor Type
The tools required to install a floor electrical outlet diverge significantly depending on whether you are working with a raised wood floor or a poured concrete slab. Do not attempt to improvise with standard drywall saws or standard drill bits; you will damage the flooring and compromise the structural integrity of the box mounting.
Wood Joist & Subfloor Tools
- Hole Saw Kit: Milwaukee 49-56-0023 (3-inch bi-metal hole saw) or a 4-inch saw depending on your specific box flange. Essential for clean cuts through 3/4-inch plywood and hardwood.
- Spade/Paddle Bits: 3/4-inch or 1-inch Irwin Speedbor bits for drilling through floor joists to route Romex (NM-B) cable.
- Right-Angle Drill: Milwaukee M18 Fuel 1/2-inch Right Angle Drill (Model 2708-20). Crucial for drilling through joists in the tight 12-inch clearance of a crawlspace or basement ceiling.
- Fish Tape: Klein Tools 56415 (50-foot steel fish tape) for pulling 12/2 NM-B cable from the nearest junction box or panel.
- Torque Screwdriver: Wiha 645P torque screwdriver set to 14 in-lbs. Modern 2026 NEC updates heavily emphasize torqued terminal connections to prevent arcing.
Concrete Slab Tools
- Rotary Hammer: Bosch RH328VC 1-1/8-inch SDS-Plus rotary hammer. Required for trenching concrete.
- Chisel Bit: 1-1/4-inch SDS-plus flat chisel for breaking out the concrete trench to lay PVC or ENT conduit.
- Core Drill Rig: Husqvarna DM 220 (or equivalent wet core drill) with a 4-inch diamond core bit if you are drilling through a post-tensioned slab to reach a crawlspace below.
- Concrete Patching Compound: Quikrete Fast-Setting Hydraulic Water Stop for sealing the trench after conduit is laid.
Step-by-Step Installation Workflow
- Subfloor Scanning & Routing: Before cutting, use a Bosch D-TECT 120 wall and floor scanner to ensure you are not drilling into radiant heating PEX lines, HVAC ductwork, or post-tension cables hidden beneath the floor. Map a route from the nearest accessible junction box.
- Cutting the Opening: For wood floors, use the 3-inch or 4-inch bi-metal hole saw on a standard drill. Cut at a slow RPM (around 300) to prevent scorching the hardwood finish. For concrete, use the rotary hammer with the chisel bit to trench a 2-inch deep by 2-inch wide channel from the wall to the outlet location.
- Conduit & Cable Pulling: In wood floors, staple 12/2 NM-B cable to the joists, maintaining a 1-1/4 inch setback from the floor joist edge to prevent nail strikes from future flooring installations. In concrete, lay 1/2-inch ENT (smurf tube) conduit in the trench, pull 12 AWG THHN wires (Black, White, Green), and seal the trench with hydraulic cement.
- Box Mounting & Leveling: Insert the floor box into the hole. For adjustable boxes like the Raco 6238, loosen the mounting screws and adjust the bracket depth so the flange sits exactly 1/16-inch below the surface of a hard floor, or flush with the subfloor if carpet is being laid over it.
- Termination & Torque: Strip the 12 AWG wires using Klein Tools 11055 wire strippers. Connect the ground to the brass box grounding screw, then terminate the hot and neutral on a 20A tamper-resistant (TR) receptacle. Use the torque screwdriver to secure the terminal screws to the manufacturer's specification (usually 14 in-lbs).
- Gasket & Cover Installation: Place the foam or rubber O-ring gasket over the receptacle to seal out dust and mop water. Screw on the brass cover plate, ensuring the pop-up or flip-lid mechanism moves freely without pinching the gasket.
Edge Cases & Common Failure Modes
Even with the right tools, floor outlets are prone to specific environmental failures. Understanding these edge cases will save you from costly callbacks and safety hazards.
- Mop Water Intrusion: Standard plastic floor boxes lack secondary sealing mechanisms. If installed in a kitchen or dining area, a spilled drink or wet mop will seep past the cover plate and short the receptacle. Solution: Always specify a die-cast brass box with an IP-rated O-ring gasket (like the Hubbell SystemOne) for any hard-surface flooring that gets wet-mopped.
- Vacuum Cleaner Impact: Plastic covers (like those on the Carlon E971FL) will shatter after repeated impacts from heavy vacuum cleaner heads. Solution: Restrict plastic boxes to carpeted areas where the vacuum glides on wheels, and use brass covers for hard surfaces.
- Floating Floor Buckling: If an installer anchors the floor box directly through a laminate floating floor into the subfloor, the floor cannot expand during humid months. The laminate will buckle around the outlet. Solution: Cut the floating floor 1/4-inch wider than the box flange, anchor the box to the subfloor, and use a 5-inch decorative brass cover to hide the expansion gap.
NEC Compliance and Safety Standards
When planning your installation, you must adhere to the latest National Fire Protection Association (NFPA 70) guidelines. Specifically, NEC Article 314.27(B) dictates that floor boxes must be listed for the specific flooring material. Furthermore, if the floor outlet is installed in a dwelling unit's living room, bedroom, or home office, the circuit must be protected by an Arc-Fault Circuit Interrupter (AFCI) breaker at the main panel.
Additionally, always consult OSHA Electrical Safety Standards and local municipal codes regarding permits. While DIYers can pull wire and mount boxes in many jurisdictions, the final termination and panel connection often require a licensed electrician to ensure the grounding electrode system is properly bonded to the metallic floor box housing. For premium, code-compliant brass assemblies, reviewing manufacturer specifications from Hubbell Wiring Device-Kellems is highly recommended to verify exact knockout sizes and gasket tolerances.
Final Tool Maintenance Tip
After cutting hardwood or drilling concrete, immediately clean your hole saws and masonry bits with a wire brush and apply a light coat of WD-40 Specialist Dry Lube. Concrete dust and wood pitch will rapidly corrode high-carbon steel cutting edges if left uncleaned, ruining expensive tooling for your next project.