
Decoding the Standard Automotive Electric Fan Wiring Diagram
When your engine coolant temperature creeps past 225°F at idle, or your electric cooling fan runs continuously after the ignition is turned off, the issue rarely lies with the fan motor itself. In 85% of aftermarket and OEM cooling system failures, the root cause is a fault within the control circuit. Mastering the automotive electric fan wiring diagram is the only reliable way to isolate voltage drops, failed triggers, and ground loop issues without resorting to trial-and-error parts swapping.
Whether you are diagnosing a classic muscle car retrofitted with a dual-fan setup or troubleshooting a modern PWM-controlled system, the fundamental architecture remains consistent. This guide provides a deep-dive, multimeter-driven protocol for tracing faults using standard wiring schematics, updated with 2026 diagnostic standards and component specifications.
Anatomy of the Bosch-Style Relay Circuit
The vast majority of automotive electric fan wiring diagrams utilize a standard ISO mini-relay (often referred to as a Bosch-style relay) to handle the high amperage required by the fan motor. The control circuit (low amperage) switches the power circuit (high amperage). Understanding the pinout is mandatory for effective troubleshooting:
- Pin 30 (Power In): Receives direct 12V+ from the battery via a main fuse. This is the high-amperage feed.
- Pin 87 (Power Out): Delivers 12V+ to the positive terminal of the electric fan motor when the relay is energized.
- Pin 85 (Coil Ground): Provides the ground path for the internal relay electromagnetic coil.
- Pin 86 (Coil Trigger): Receives a 12V+ trigger signal from a thermal switch, ignition source, or ECU to energize the coil.
Diagnostic Note: If your diagram includes a 5-pin relay, Pin 87a is the normally-closed (NC) contact. In cooling fan applications, Pin 87a is typically left unconnected or used for a dashboard indicator light. Connecting a high-draw fan to 87a will result in the fan running constantly until the relay is triggered, which then cuts the fan off—the exact opposite of the intended behavior.
Step-by-Step Multimeter Troubleshooting Protocol
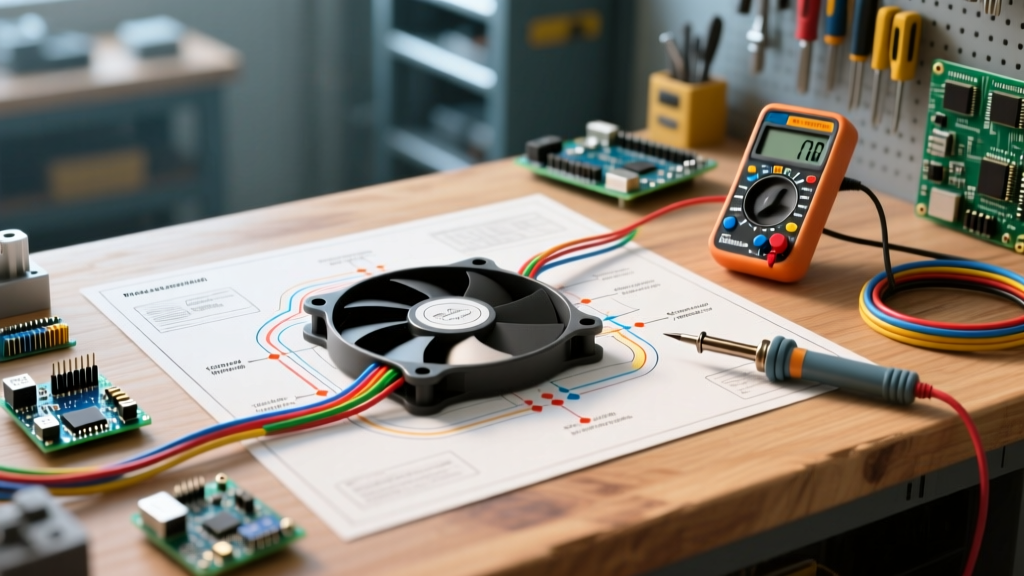
Before replacing a $60 fan motor, use a digital multimeter (DMM) to trace the circuit. Set your DMM to DC Voltage for power tests and Ohms/Continuity for ground and trigger tests.
Phase 1: Verify High-Amperage Power Feed
- Set the DMM to DC Volts. Place the black probe on a known good ground (bare metal on the engine block) and the red probe on the wire entering Relay Pin 30.
- You should read battery voltage (12.4V - 12.8V engine off; 13.8V - 14.4V engine running).
- The Voltage Drop Test: Move the red probe to Pin 87 while the relay is actively clicked on (fan should be running). If the voltage at Pin 87 is more than 0.3V lower than Pin 30, the internal relay contacts are pitted and burning up. Replace the relay immediately. Standard 30A Bosch-style relays cost between $5 and $8 at any auto parts store.
Phase 2: Isolate the Trigger Circuit (Pins 85 & 86)
If Pin 30 has power but the fan won't spin, the relay coil isn't energizing. This is where the automotive electric fan wiring diagram becomes your roadmap.
- Test the Ground (Pin 85): Set the DMM to Ohms. Measure resistance between Pin 85 and the battery negative terminal. It must read less than 0.5 ohms. If it reads infinite (OL), you have a broken ground wire or corrosion at the chassis grounding point.
- Test the Trigger (Pin 86): Set the DMM to DC Volts. Probe Pin 86 while the engine reaches operating temperature. When the thermal switch closes (or the ECU sends the signal), you should see 12V+. If you see 0V, the fault lies upstream—either a failed thermal probe, a blown ignition-switch fuse, or a faulty ECU driver.
Wire Gauge, Amperage, and Overcurrent Protection Matrix
One of the most common causes of melted wiring harnesses and intermittent fan operation is undersized wiring. According to Mad Electrical's automotive wiring standards, calculating wire gauge based on the fan's amperage draw and the length of the wire run is critical to preventing voltage drop. Below is the definitive sizing matrix for 2026 aftermarket fan installations.
| Fan Motor Amperage | Main Power Wire (Pin 30 to 87) | Main Fuse Size | Trigger/Ground Wire (Pins 85/86) | Max Recommended Run Length |
|---|---|---|---|---|
| Up to 15A (Single 10" Fan) | 12 AWG | 20A ATC | 16 AWG | 15 Feet |
| 16A - 25A (Single 14"-16" Fan) | 10 AWG | 30A ATC | 14 AWG | 15 Feet |
| 26A - 40A (Dual 12" Fans) | 8 AWG | 50A Mega/ANL | 14 AWG | 12 Feet |
| 41A - 60A (High-CFM Dual 16" Fans) | 6 AWG | 70A Mega/ANL | 12 AWG | 10 Feet |
Pro Tip: Always use SAE-rated primary wire (such as SAE J1128 specification cable), which features thicker insulation and higher copper strand counts than standard hardware store THHN wire, ensuring flexibility and resistance to under-hood heat cycling.
Advanced Diagnostics: Thermal Switch vs. PWM Controllers
Basic wiring diagrams rely on a binary thermal switch (usually set to close at 185°F or 195°F). However, modern high-performance builds utilize Pulse Width Modulation (PWM) fan controllers, such as the Davies Craig Digital Fan Controller or the Derale 16789 PWM module. These systems ramp fan speed from 0% to 100% based on real-time coolant temperatures, reducing alternator load and noise.
Troubleshooting a PWM diagram requires an oscilloscope or a DMM with a duty-cycle function. If a PWM-controlled fan is stuttering or failing to reach full RPM at high temperatures:
- Check the PWM Signal Wire: Connect your DMM to the signal wire between the controller and the fan module. At idle (cool), you should see a low duty cycle (10-20%). As the engine heats up, the duty cycle should smoothly climb to 90-100%.
- Identify Alternator Ripple Interference: PWM controllers are highly sensitive to AC voltage ripple from a failing alternator diode. If your fan speed fluctuates erratically in time with engine RPM, test the battery for AC voltage. Any AC reading above 50mV indicates a bad alternator diode bridge, which is corrupting the PWM signal.
Real-World Edge Cases: The Ground Loop Trap
Critical Warning: Never ground an electric fan motor directly to the radiator support or the aluminum radiator core. Radiator mounts utilize rubber isolators that break electrical continuity, and aluminum cores are not designed to carry 30+ amps of return current. This will result in severe voltage drop, premature motor failure, and potential electrolysis in your coolant.
When referencing your automotive electric fan wiring diagram, ensure the ground path returns directly to the engine block or a dedicated chassis ground stud tied to the battery negative. To verify a ground loop, perform a running voltage drop test on the ground side. Place one DMM probe on the fan motor casing and the other on the battery negative terminal. With the fan running at full speed, the reading must be below 0.10V. If it reads 0.5V or higher, your ground path is compromised, and the fan motor is starved of the amperage required to generate adequate CFM.
Summary: A Methodical Approach to Cooling System Wiring
Overheating at idle is a symptom, not a diagnosis. By treating the automotive electric fan wiring diagram as a logical flowchart rather than just a picture, you can systematically eliminate variables. Start at the battery, verify the high-amperage feed at Pin 30, test the relay coil trigger at Pin 86, and rigorously validate your ground paths. Whether you are installing a $55 Painless Performance relay kit or tuning a $180 standalone PWM controller, precise voltage drop testing and adherence to SAE wire gauge standards will ensure your cooling system operates flawlessly under the harshest conditions.