
Understanding the HB Tool Soldering Gun Architecture
When transitioning from delicate printed circuit board (PCB) work to heavy-duty electrical, automotive, or marine wiring, standard 40W to 60W ceramic soldering stations fall short. They simply lack the thermal mass recovery required to heat thick copper strands. This is where an HB tool soldering gun becomes indispensable. Typically designed as a 150W/250W dual-trigger transformer-based unit, the HB tool soldering gun operates on a fundamentally different physical principle than your standard soldering iron.
Instead of a resistive ceramic heating element, a soldering gun utilizes a step-down transformer. The primary coil connects to your mains voltage, while the secondary coil consists of a single, thick loop of copper that acts as the tip. This configuration steps down the voltage to a fraction of a volt (usually around 0.5V) but pushes massive amperage (often exceeding 300 Amps) through the tip. The electrical resistance of the copper loop generates instantaneous, high-volume heat. Priced between $45 and $65 in 2026, these tools offer unmatched thermal punch for heavy-gauge applications, provided you understand their unique operational quirks.
Soldering Gun vs. Ceramic Station: Application Matrix
Choosing the right tool prevents damaged components and unreliable joints. Below is a functional comparison to help you decide when to reach for the HB tool soldering gun versus a precision station.
| Feature | HB Tool Soldering Gun (150W/250W) | Ceramic Soldering Station (60W) |
|---|---|---|
| Heat-Up Time | Instantaneous (1-2 seconds) | Slow (20-45 seconds) |
| Thermal Recovery | Exceptional on high-mass joints | Struggles above 14 AWG wire |
| Tip Magnetism | High (AC magnetic field present) | None |
| Best Use Case | 4 AWG to 14 AWG lugs, auto wiring | PCBs, SMD, 16 AWG to 30 AWG |
| Tip Material | Solid copper loop (replaceable) | Iron-plated copper core |
Critical Warning: Never use an HB tool soldering gun on active PCBs, hall-effect sensors, or near magnetic storage. The high-current AC loop generates a localized magnetic field that can erase data, trigger unintended logic states, or physically shift sensitive micro-components.
Essential Materials for Heavy-Gauge Connections
Heavy-duty soldering requires specific consumables. Using thin, electronics-grade solder on an 8 AWG battery cable will result in a cold, starved joint because the solder melts before the core wire reaches flow temperature.
- Solder Diameter: For 14 AWG to 10 AWG wire, use 0.062-inch (1.5mm) diameter solder. For 8 AWG to 4 AWG, step up to 0.125-inch (3.2mm) thick solder. This ensures you can feed enough volume into the joint in under five seconds.
- Alloy Selection: Traditional 60/40 Sn/Pb (Tin/Lead) remains the gold standard for high-vibration automotive and marine environments due to its lower melting point (183°C) and superior wetting characteristics. However, as of 2026, many commercial automotive sectors mandate lead-free SAC305 (Sn96.5/Ag3.0/Cu0.5), which melts at 217°C–220°C. If using SAC305, you must utilize the 250W trigger setting exclusively and extend your dwell time by 1-2 seconds.
- Flux Core: Always use thick rosin-core (RMA) solder for electrical connections. Never use acid-core plumbing solder on electrical wiring; the residual acid will cause galvanic corrosion and eventual open circuits. For extra heavy lugs, supplement with a separate jar of tacky rosin flux paste.
Step-by-Step Technique: Soldering 8 AWG to 4 AWG Lugs
Creating a reliable, high-current connection requires a disciplined sequence. According to the National Electrical Code (NEC), soldered connections must not rely solely on the solder for mechanical strength. Always crimp the lug first.
- Mechanical Crimp and Strip: Strip the wire insulation back exactly to the depth of the lug barrel. Use a heavy-duty hex-crimp tool to mechanically secure the copper strands to the lug. The solder is strictly for environmental sealing and electrical conductivity enhancement, not structural support.
- Apply Supplemental Flux: Using a small brush, apply a thin layer of rosin paste to the exposed wire strands at the entrance of the lug barrel. This breaks down surface oxides and promotes capillary action.
- Heat Sinking (Crucial): Heavy-gauge wires act as massive heat sinks, but the insulation (especially PVC and XLPE) will melt and shrink back if overheated. Clamp a large aluminum alligator clip or a damp cotton rag around the wire, exactly 1 inch behind the lug barrel, to absorb excess thermal transfer.
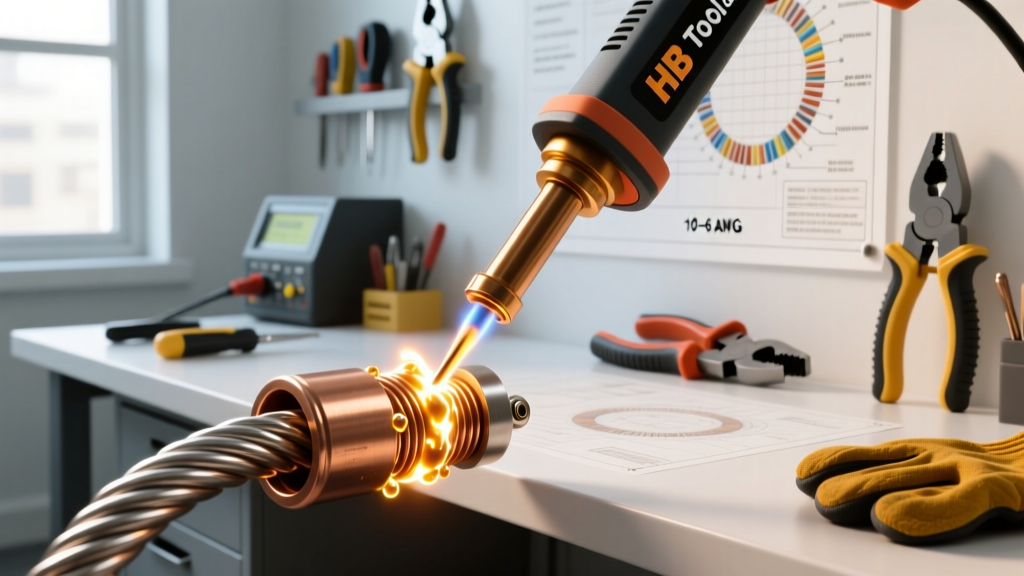
- The 250W Trigger Pull: Squeeze the HB tool soldering gun trigger fully to engage the 250W high-heat mode. Press the flat, broad side of the copper loop tip directly against the thickest part of the lug barrel—not the wire itself. Hold for 3 to 4 seconds.
- Feed the Solder: Touch your thick 0.125-inch solder to the wire side of the lug barrel, opposite the gun tip. If the lug is properly heated, capillary action will instantly draw the molten solder deep into the stranded wire core. Feed until you see a slight fillet of solder emerge at the wire entrance.
- Controlled Cool Down: Remove the solder, then remove the gun. Hold the wire completely still for 5 to 7 seconds. Never blow on the joint to cool it; rapid cooling causes crystalline fractures in the solder matrix, resulting in a brittle, high-resistance joint.
Failure Modes and Troubleshooting Edge Cases
Even experienced technicians encounter issues when pushing high wattage into dense copper. Here is how to diagnose and correct common heavy-duty soldering failures.
The 'Cold' or Grainy Joint
Symptom: The solder forms a ball on the outside of the lug but looks dull, gray, and grainy. It fails to wick inside the barrel.
Cause: The tip was applied to the thin wire strands instead of the thick lug barrel, or the dwell time was too short. The outer solder melted, but the inner copper mass never reached the 183°C flow threshold.
Fix: Re-flux the joint. Apply the 250W gun tip directly to the center mass of the lug barrel for a full 5 seconds before introducing the solder wire.
Insulation Meltback and 'Cauliflower' Flux
Symptom: The wire insulation shrinks back, exposing bare copper, and the flux turns into a hard, black, crusty residue.
Cause: Dwell time exceeded 8 seconds, causing the rosin flux to carbonize and the insulation to reach its thermal degradation point.
Fix: You must mechanically clean the blackened flux using isopropyl alcohol (99%) and a stiff brass brush. Carbonized flux becomes mildly conductive and hygroscopic over time. Always use a heat sink clip to protect the insulation boundary.
Marine and Automotive Environmental Considerations
In marine and off-road automotive applications, connections are subjected to severe thermal cycling and saltwater immersion. While solder seals out moisture, pure soldered joints without proper over-molding can suffer from work-hardening and fatigue cracking due to engine vibration. To meet rigorous industry standards, such as those outlined in the IPC J-STD-001 guidelines for high-reliability environments, a soldered heavy-gauge connection must always be sealed post-soldering. Once the joint has cooled and been cleaned with isopropyl alcohol, apply a layer of marine-grade adhesive-lined heat shrink tubing. The inner meltable adhesive wall flows into the solder crevices, creating a completely waterproof, strain-relieved seal that prevents galvanic corrosion.
Maintenance: Caring for Solid Copper Loop Tips
Unlike iron-plated tips found on ceramic stations, the replaceable loop tips on an HB tool soldering gun are made of solid, high-conductivity copper. Because copper readily alloys with tin and oxidizes rapidly at high temperatures, these tips require specific maintenance.
- Never Leave it Tinned and Hot: Because the gun heats instantly, you should only pull the trigger when you are ready to solder. Leaving the tip hot and tinned while resting in a stand will cause the tin to eat into the copper (leaching), rapidly pitting and destroying the tip.
- Dressing the Tip: If the tip becomes pitted, blackened, or misshapen, let it cool completely. Remove the tip screws and take the loop out. Use a fine-cut mill bastard file to gently dress the working surfaces flat, removing the oxidized copper and old solder alloy. Reinstall the tip, pull the trigger for 2 seconds, and immediately plunge it into thick rosin-core solder to re-tin the fresh copper surface before oxides can form.
- Safety First: Dressing tips and handling 60/40 solder exposes you to lead dust and fumes. Always utilize a localized fume extractor and follow the OSHA Lead Safety Guidelines regarding hand washing and workspace ventilation to prevent heavy metal accumulation.
Mastering the HB tool soldering gun requires respecting its raw thermal output and understanding the physics of high-mass copper joints. By pairing the 250W transformer punch with proper mechanical crimping, heavy-diameter rosin-core solder, and disciplined heat-sinking techniques, you can fabricate heavy-duty electrical connections that will outlast the equipment they power.