
The Architecture of the Craftsman Soldering Gun
When tackling heavy-duty electrical, automotive, and plumbing projects, standard 60W ceramic-core soldering irons simply lack the thermal mass recovery required to flow solder on thick copper. This is where the Craftsman soldering gun earns its place on the workbench. Unlike temperature-controlled stations that use resistive heating elements, the Craftsman gun relies on a step-down transformer architecture. This design delivers massive instantaneous current directly to the tip, allowing it to bridge the heat-sink gap of thick wires and heavy lugs.
In this 2026 feature deep dive, we dissect the internal mechanics, compare the dominant 140W and 200W+ models, and outline the exact metallurgical failure modes you need to watch for. Whether you are soldering 4 AWG battery cables or assembling stained glass, understanding the limits and capabilities of this tool is critical for professional-grade results.
Transformer Physics: How the 'Gun' Actually Heats
The core of any Craftsman soldering gun is a heavy iron-core transformer. When you pull the trigger, 120V AC mains power is fed into the primary coil. The secondary coil consists of a single, massive turn of heavy-gauge copper tubing or wire that terminates at the soldering tip. Because the secondary has vastly fewer turns than the primary, the voltage drops to a fraction of a volt (typically between 0.25V and 1.0V AC), but the current spikes dramatically to 150 to 300 Amps.
The heating element is the tip itself. Due to the electrical resistance of the copper tip and the I²R (current squared times resistance) heating law, the tip heats to 700°F–900°F in under five seconds. This rapid thermal delivery is why transformer guns are indispensable for high-thermal-mass joints, but it is also why they are entirely unsuitable for delicate printed circuit boards (PCBs).
Expert Warning: The magnetic field generated by the transformer core, combined with the high AC current flowing through the tip, can induce voltages in sensitive semiconductor junctions. Never use a transformer-based Craftsman soldering gun on live PCBs, MOSFETs, or microcontrollers. Stick to resistive, ESD-safe stations for electronics, aligning with IPC J-STD-001 standards for electronic assemblies.
Model Comparison: 140W vs. 200W+ Heavy-Duty
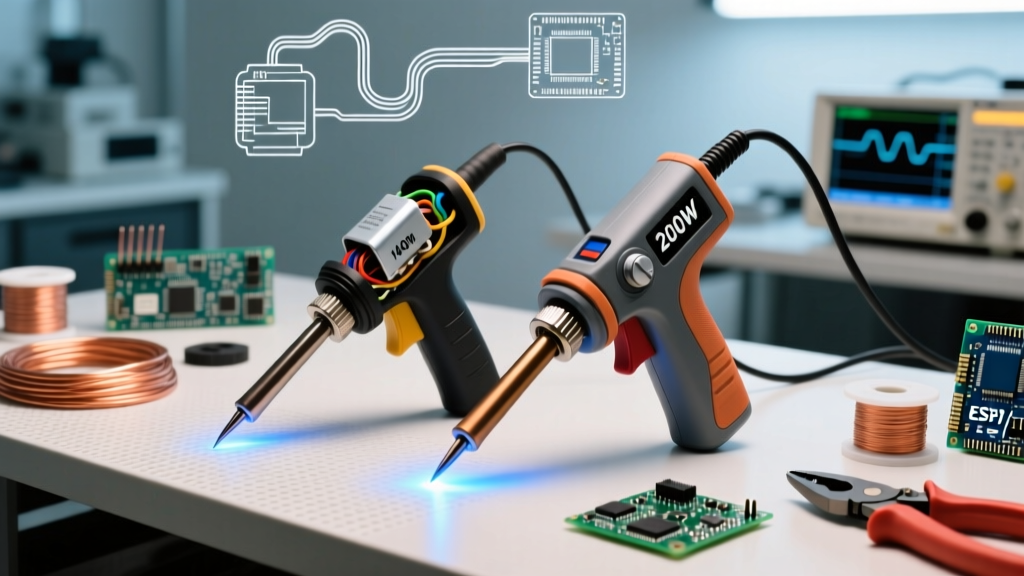
Craftsman has historically offered two main tiers of transformer guns. The mid-range 100W/140W dual-wattage models (often seen under part numbers like the CMHT50133 series) and the heavy-duty 200W/268W professional models. Below is a breakdown of their specifications and ideal use cases as of 2026.
| Feature | Craftsman 140W Dual-Gun | Craftsman 200W/268W Heavy-Duty |
|---|---|---|
| Wattage Settings | 100W (Low) / 140W (High) | 200W (Low) / 268W (High) |
| Tip Material | Heavy Copper Wire Loop | Thick Copper Spade / Chisel |
| Heat-Up Time | ~4.5 Seconds | ~3.0 Seconds |
| Max Wire Gauge | 6 AWG to 8 AWG | 2 AWG to 4/0 AWG |
| Built-in Light | LED Spotlight (Modern) | Dual LED Worklights |
| Avg. Price (2026) | $45 - $60 USD | $75 - $95 USD |
The Dual-Trigger Mechanism Explained
Most Craftsman guns feature a dual-action trigger. Squeezing the trigger halfway engages the lower wattage setting, while a full squeeze engages the maximum wattage. Internally, the trigger switch routes power to different taps on the primary coil. Engaging the high-wattage tap utilizes the full primary winding, maximizing magnetic flux and secondary current. This allows the user to 'feather' the heat—using 140W to pre-heat a heavy lug, then pulling to 200W+ to melt the 60/40 Sn/Pb solder wire once the flux activates.
Real-World Applications & Edge Cases
Where the Craftsman Gun Excels
- Automotive & Marine Wiring: Soldering large ring terminals to 4 AWG battery cables. The high amperage overcomes the heat-sinking effect of the copper strands.
- Stained Glass Assembly: Flowing 60/40 solder over copper foil tape. The broad, flat spade tips on the 200W models lay down smooth, continuous beads without cooling down.
- Heavy Plumbing & Roofing: Sweating 3/4-inch or 1-inch copper pipes (where permitted by local codes) using 95/5 tin-antimony or silver-bearing plumbing solder.
- RC Battery Tabs: Soldering heavy silicone wires to large lithium-polymer battery balance leads and XT90/AS150 connectors.
Where It Fails (and Causes Damage)
Attempting to use a Craftsman soldering gun on 24 AWG hookup wire or through-hole PCB components will result in catastrophic failure. The massive thermal transfer will instantly melt the plastic insulation on thin wires, cause pad delamination on fiberglass PCBs, and potentially destroy sensitive components via thermal shock.
Known Failure Modes & Troubleshooting
Transformer guns are remarkably durable, but they are not immune to physics and metallurgy. Understanding these failure modes will save you from unnecessary replacements.
1. Tip Pitting and Copper Dissolution
The most common issue is 'pitting,' where the copper tip develops deep, jagged craters. This is not melting; it is a metallurgical reaction. Molten tin actively dissolves copper to form copper-tin intermetallic compounds (Cu6Sn5). If you leave the gun energized while resting it in a puddle of molten solder, the tip will dissolve rapidly.
The Fix: Regularly dress the tip with a fine-grit mill bastard file while it is cold to remove pits, then immediately re-tin it upon heating. Never file a hot tip, as this exposes raw copper to rapid oxidation.
2. Switch Arcing and Carbon Buildup
The internal trigger switch handles the full inductive load of the transformer primary coil. Over years of use, the mechanical contacts arc, creating carbon buildup. This increases contact resistance, causing the switch to overheat and eventually fail to deliver full wattage.
The Fix: If the gun struggles to reach peak heat despite a full trigger pull, the switch assembly likely needs replacement. Spraying contact cleaner is rarely a permanent fix for inductive pitting; replacing the $5 micro-switch or rocker assembly is the correct repair.
3. Transformer Thermal Saturation
These tools are designed for intermittent duty cycles. The internal transformer core and primary windings will overheat if the trigger is held continuously for more than 60 to 90 seconds. Modern Craftsman models include a thermal cutoff fuse buried deep in the primary winding. If you trip this fuse by leaving the gun on while fetching a wire stripper, the tool becomes permanently dead unless you are skilled enough to disassemble the winding and replace the thermal fuse.
Step-by-Step: Proper Tinning and Maintenance
To maximize the lifespan of your Craftsman gun tip and ensure optimal thermal transfer, follow this exact maintenance protocol:
- Cold Preparation: Ensure the gun is unplugged. Inspect the tip for dark oxidation or pitting. If pitted, use a flat file to gently reshape the working faces until bare, bright copper is exposed.
- Flux Application: Coat the freshly filed cold tip in a generous layer of high-activity rosin paste flux (RA or RMA). This prevents instant oxidation when power is applied.
- Initial Heat-Up: Plug in the gun and pull the trigger to the low wattage setting. Hold it for 3–4 seconds.
- The Tinning Phase: While the tip is heating but before it reaches maximum temperature, press a thick wire of 60/40 Sn/Pb solder directly against the working faces. The solder should melt and flow smoothly across the copper via capillary action.
- Wipe and Protect: Wipe the excess solder on a damp cellulose sponge or brass wool, leaving a shiny, mirrored coating. This tinned layer acts as a sacrificial barrier, protecting the underlying copper from dissolving into your workpiece.
Safety Protocols: Lead and Thermal Hazards
Heavy-duty soldering frequently involves 60/40 (tin/lead) or 63/37 eutectic solders because of their superior wetting properties and lower melting points compared to lead-free alternatives. The mechanical action of filing a pitted tip, combined with the heat of soldering, generates lead dust and fumes. Always adhere to OSHA's guidelines on lead exposure by utilizing local exhaust ventilation (fume extractors) and washing hands thoroughly before eating or drinking. For comprehensive toxicity data, refer to the CCOHS chemical profiles on lead safety.
Furthermore, the tip of a 200W Craftsman gun can cause instantaneous third-degree burns. Always utilize the integrated steel wire stand and allow the tool to cool completely on a fireproof surface before storage. The transformer core retains heat long after the trigger is released, making proper ventilation of the tool's housing essential for longevity.
Final Verdict: Is the Craftsman Gun Right for You?
The Craftsman soldering gun remains a highly specialized, irreplaceable tool for heavy thermal applications. If your work involves automotive wiring, thick gauge battery cables, or stained glass, the 140W or 200W models offer unmatched thermal recovery and raw power for under $100. However, if your primary focus is Arduino microcontrollers, SMD components, or delicate sensor wiring, leave the gun in the toolbox and invest in a precision ceramic-heater station. Understanding the boundary between heavy-duty thermal mass work and precision electronics is the hallmark of a true DIY expert.