
The Hidden Cost of a Dirty Soldering Iron
Whether you are assembling high-density PCBs or splicing heavy-gauge wiring, the thermal transfer efficiency of your soldering iron is the single most critical variable in your workflow. When you neglect to properly clean a soldering iron, oxidation builds up on the tip, acting as a thermal insulator. This forces you to apply excessive dwell time and mechanical pressure, which ultimately destroys the pad adhesion on your circuit board and degrades the solder joint's metallurgical integrity. According to IPC standards for electronic assemblies, proper wetting and thermal management are non-negotiable for creating reliable, void-free solder joints.
As of 2026, the cost of premium replacement tips has climbed significantly. A genuine Weller RT1 micro-tip for the WXsmart station now retails for roughly $48, while standard Hakko T18 tips hover around $14. Ruining these components through improper cleaning techniques is an expensive mistake. This guide will teach you exactly how to clean a soldering iron using industry-approved methods, preserving your equipment and ensuring flawless solder flow.
The Metallurgy of a Soldering Iron Tip
To understand how to clean a soldering iron, you must first understand its physical anatomy. Modern soldering tips are not solid copper. They are complex, multi-layered engineered components:
- Copper Core: Provides rapid thermal conductivity from the heating element to the work surface.
- Iron Plating: A micro-thin layer of electroplated iron (typically 150 to 250 microns thick) protects the soft copper from dissolving into the molten solder alloy.
- Chrome Sleeve: The non-wetting back portion of the tip that prevents solder from creeping up the shaft.
Oxidation occurs when the iron plating reacts with oxygen at elevated temperatures, forming iron oxide (Fe2O3). This black, crusty layer is a thermal barrier. Furthermore, the aggressive fluxes used in modern SAC305 (lead-free) and Sn63/Pb37 (leaded) solder wires can chemically etch the iron plating if left un-tinned and exposed to heat for prolonged periods.
Routine Maintenance vs. Deep Cleaning
Knowing when to perform a quick wipe versus a deep chemical restoration is essential for tip longevity. Use the following framework to determine your cleaning protocol:
| Protocol | When to Use | Tools Required | Temperature Impact |
|---|---|---|---|
| Routine Cleaning | Before and after every single solder joint. | Brass wool sponge or damp cellulose sponge. | Moderate drop (Sponge) or Minimal drop (Brass). |
| Deep Cleaning | When the tip turns black, refuses to wet, or drops molten solder. | Tip tinner/activator (e.g., Hakko 599B), rosin flux. | Requires reheating to active soldering temperature. |
Step-by-Step: The 'Wipe and Tin' Protocol (Routine)
The most common mistake beginners make is wiping the tip and then setting the iron down. This leaves the bare, hot iron plating exposed to the air, causing instant oxidation. The correct methodology, endorsed by Hakko Technical Support, is the 'Wipe and Tin' method.
1. Choose Your Cleaning Medium
Brass Wire Wool (Recommended): Tools like the Hakko 599B or Chemtronics brass wool cleaners are the industry standard. Brass is softer than the iron plating, meaning it will scrape off oxidation and carbonized flux without scratching the tip. Crucially, brass wool does not drop the tip temperature below the solder alloy's liquidus point, preventing thermal shock.
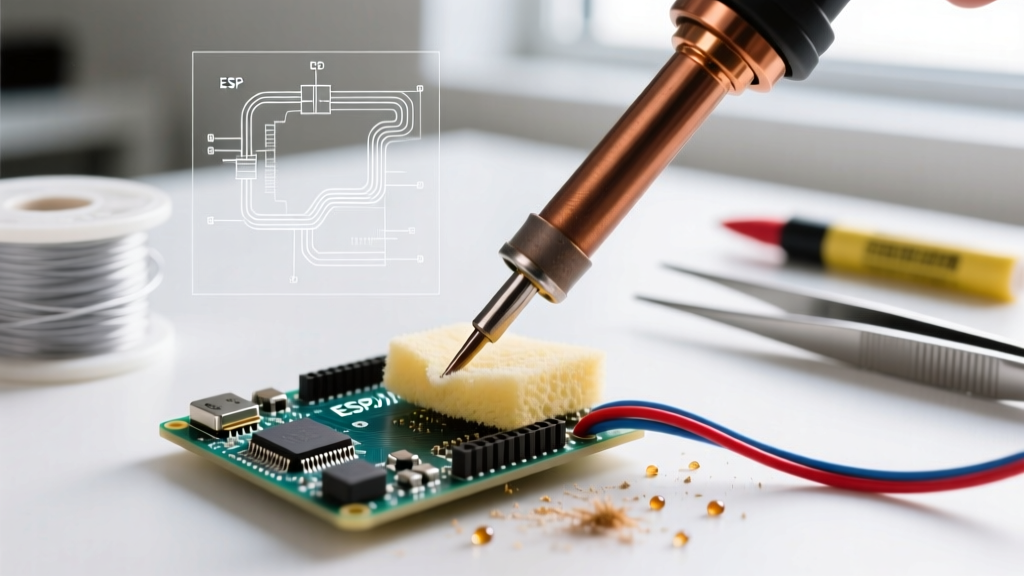
Cellulose Sponge (Alternative): If you must use a sponge, it must be made of natural cellulose, not synthetic polyurethane (which will melt onto the tip). Crucial Rule: Only use distilled water. Tap water contains calcium and magnesium minerals that will bake onto the tip and accelerate corrosion. The sponge should be damp enough to expand, but not so wet that water pools on the surface. A soaking wet sponge will drop a 360°C tip to 150°C in milliseconds, causing micro-fractures in the iron plating.
2. The Execution Sequence
- Apply Fresh Solder: While the tip is at operating temperature (e.g., 350°C for SAC305), feed a small amount of high-quality, flux-cored solder directly onto the working end of the tip.
- Wipe: Gently drag the tip through the brass wool or across the damp sponge in a figure-eight motion. Do not press down hard; let the abrasive action do the work.
- Re-Tin Immediately: Within one second of wiping, apply a fresh coat of solder to the tip. This sacrificial layer of solder acts as an oxygen barrier while the iron sits in the stand.
- Power Down Correctly: When finished, never turn off the station with a bare tip. Always apply a thick, heavy glob of solder to the working end before cutting the power. This thick layer will absorb any oxidation that occurs as the tip cools.
Rescuing Dead Tips: Deep Oxidation Removal
If you inherit a poorly maintained station, or if you accidentally left your iron on at 400°C over the weekend, the tip will be encased in a thick, blue-black crust of iron oxide and carbonized flux. Standard wiping will not remove this. You need a chemical reduction process.
Using a Tip Tinner / Activator
Products like the Chemtronics SW02 Tip Tinner or Hakko FS-100 contain a mixture of mild organic acids, phosphoric compounds, and powdered solder alloy. Here is the exact procedure to salvage a dead tip:
- Set your station to a low temperature, around 250°C to 280°C. High heat will cause the acidic compounds in the tinner to evaporate before they can react with the oxidation.
- Plunge the oxidized tip directly into the tip tinner paste. You will hear a sizzling sound and see light smoke as the flux acids dissolve the iron oxide.
- Withdraw the tip and immediately wipe it on your brass wool.
- Repeat the dip-and-wipe process 3 to 4 times until the shiny iron plating is visible.
- Neutralize and Re-Tin: Tip tinner is highly corrosive. Once the tip is clean, you must immediately apply a large amount of standard rosin-core (RMA) solder wire to flush out the acidic residue. Wipe and re-tin normally.
Critical Failure Modes: What NEVER to Do
Based on warranty rejection data from major manufacturers like Weller Tools, the following practices will instantly void your tip's lifespan and potentially damage the heating element:
WARNING: NEVER use mechanical abrasives on a soldering iron tip. Using sandpaper, emery cloth, a Dremel tool, or a metal file will instantly strip the 150-micron iron plating. Once the soft copper core is exposed, it will dissolve into the molten solder within minutes, creating a pitted, concave crater that is impossible to use and will contaminate your PCB pads with copper ions.
- Never use synthetic sponges: They melt and fuse to the iron plating.
- Never quench the tip in water: Rapid thermal contraction will shatter the iron plating, leading to flaking and copper exposure.
- Never use the iron as a pry tool: Bending component leads with the hot tip will crack the ceramic heating element inside the station and chip the tip's iron layer.
- Never run the station at maximum heat unnecessarily: Running a lead-free profile at 400°C when 350°C is sufficient will double the oxidation rate and degrade the flux before it can clean the joint.
Troubleshooting Matrix: Soldering Iron Issues
Use this diagnostic table to identify and resolve common thermal transfer and wetting issues.
| Symptom | Probable Cause | Corrective Action |
|---|---|---|
| Solder balls up and rolls off the tip. | Severe oxidation or carbonized flux buildup. | Use tip tinner at 250°C, wipe on brass, re-tin with RMA solder. |
| Tip turns black immediately after wiping. | Temperature set too high; wiping without re-tinning. | Lower temp by 30°C; always apply fresh solder immediately after wiping. |
| Pitting or cratering on the working surface. | Copper core exposed due to abrasive cleaning or flux erosion. | Tip is destroyed. Discard and replace. Review cleaning methodology. |
| Solder sticks to the tip but won't flow to the pad. | Cold joint; tip size too small for the thermal mass of the ground plane. | Switch to a chisel or bevel tip with higher thermal mass; do not just increase temperature. |
Final Thoughts on Thermal Hygiene
Learning how to clean a soldering iron is not just about aesthetics; it is a fundamental requirement for reliable electronics manufacturing. By respecting the metallurgy of the iron plating, utilizing brass wool over wet sponges, and employing chemical tip tinner only when absolutely necessary, you can extend the life of a premium soldering tip from a few weeks to several months of daily use. Treat your soldering station as a precision scientific instrument, and it will reward you with flawless, IPC-compliant joints every time you pick it up.