
The Low-Voltage Safety Myth: Why Solderless Connections Fail
When DIYers search for how to cut LED strip lights without soldering, the primary motivation is usually convenience. Soldering requires a hot iron, flux, and a steady hand, whereas solderless connectors promise a 'plug-and-play' experience. However, from an electrical safety perspective, avoiding solder introduces distinct thermal and mechanical risks that are frequently overlooked in standard tutorials.
Because LED strips operate at low voltages (typically 12V or 24V DC), there is a pervasive myth that they are inherently safe from fire hazards. While the voltage is low enough to prevent lethal electric shock, the amperage can be substantial. A standard 5-meter roll of high-density 24V 5050 RGBW LED strip can draw up to 96 Watts, equating to 4 Amps of continuous current. According to Joule's first law (P = I²R), even a minor increase in resistance at a poor solderless connection will generate localized heat. If a cheap clip-on connector introduces just 0.5 ohms of contact resistance, it will dissipate 8 Watts of heat in a space smaller than a fingernail—easily enough to melt ABS plastic housings and ignite surrounding dust or insulation.
Expert Insight: Low voltage does not mean low risk. The National Fire Protection Association (NFPA 70) strictly regulates low-voltage lighting systems under Article 411, emphasizing that conductor connections must be mechanically secure and electrically conductive to prevent thermal runaway.
Step-by-Step: Safely Cutting and Prepping LED Strips
If you are committed to using solderless connectors, the safety of your installation relies entirely on the precision of your cut and the preparation of the copper pads. A jagged cut or residual silicone coating will guarantee high resistance and eventual failure.
- Locate the Designated Cut Marks: Never cut through the middle of an SMD component or a resistor. Only cut exactly on the transverse copper pads, usually marked with a scissor icon. Cutting even 1mm off-center will expose the inner trace layer, leading to micro-arcing when the connector teeth make contact.
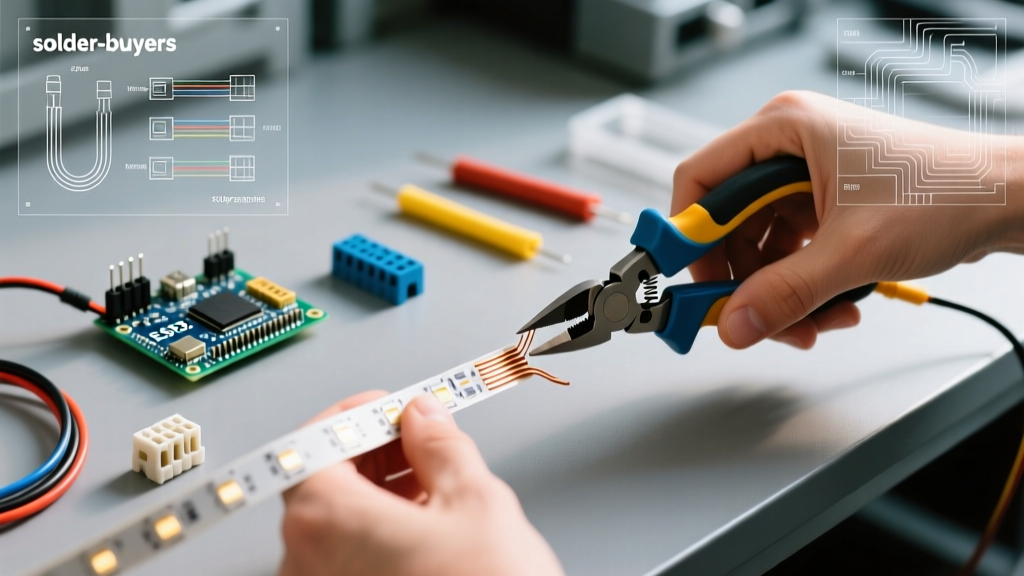
- Use Precision Snips, Not Scissors: Standard household scissors apply uneven lateral pressure, which can delaminate the flexible printed circuit board (FPCB) from its copper traces. Use flush-cutting precision snips (like the Hakko CHP-170) to ensure a perfectly perpendicular, clean shear.
- Remove IP65/IP67 Silicone Coatings: If you are using weatherproof strips, the silicone or epoxy coating acts as a dielectric insulator. You must carefully shave the silicone off the copper contact pads using a Swann-Morton No. 11 precision scalpel. Do not use a heat gun to melt the silicone; this causes 'silicone creep,' where the melting compound flows back over the pads and creates an invisible, high-resistance barrier.
- Clean the Copper Pads: Oxidized copper increases resistance. Wipe the exposed pads with 99% isopropyl alcohol and a lint-free swab. For heavily oxidized strips (common in inventory stored for over a year), lightly scuff the pads with a fiberglass scratch pen until bright copper is visible.
Solderless Connector Matrix: Evaluating Safety and Reliability
Not all solderless connectors are created equal. The market is flooded with generic options, but they rely on entirely different mechanical principles to maintain electrical continuity. Below is a safety and performance comparison of the three primary connector types available in 2026.
| Connector Type | Mechanism | Max Safe Amperage | Thermal Cycling Resistance | Safety Rating |
|---|---|---|---|---|
| Hippo Buckle (Clip-On) | Spring-tension metal clips | 2 Amps | Poor (Springs relax under heat) | Low |
| IDC (Punch-Down) | Insulation Displacement Contact | 4 Amps | Moderate (Can sever wire strands) | Medium |
| Screw-Terminal Block | Compression via set-screws | 6 Amps | Excellent (Mechanical lock) | High |
For permanent, high-wattage installations, screw-terminal block connectors are the only solderless option recommended by safety professionals. While they require you to strip the insulation off your jumper wires (typically 18AWG to 20AWG), the physical compression of the screw against the tinned wire creates a gas-tight seal that rivals a basic solder joint in terms of thermal stability.
Critical Safety Hazards to Mitigate
When bypassing solder, you must actively engineer solutions for the following failure modes:
- Galvanic Corrosion: Many budget solderless connectors use nickel-plated or tin-plated contacts pressing against bare copper. In humid environments (like kitchens or bathrooms), this dissimilar metal pairing creates a micro-battery effect, leading to galvanic corrosion. Mitigation: Apply a tiny dab of dielectric grease (like MG Chemicals 8463) to the copper pads before inserting them into the connector to block moisture and oxygen.
- Mechanical Stress and Wire Pull: Solder creates a rigid, unified bond. Solderless connectors rely on friction. If the LED strip is mounted on a surface that experiences vibration (e.g., inside an RV, under a stair tread, or behind a TV mounted on an articulating arm), the constant micro-movements will slowly back the strip out of the connector. Mitigation: Always use a 3D-printed or aluminum L-bracket to physically anchor the connector housing to the extrusion channel, ensuring zero tension is transferred to the electrical contacts.
- Voltage Drop and Flickering: High-resistance solderless connections act as unintended resistors. On a 12V system, a 1.5V drop across a bad connector will leave the first LED module receiving only 10.5V, causing visible color shifting (especially in RGB strips where red, green, and blue diodes have different forward voltage thresholds) and severe flickering.
When You MUST Abandon Solderless Methods
While learning how to cut LED strip lights without soldering is a valuable skill for temporary setups or low-draw accent lighting, there are strict scenarios where soldering is non-negotiable for safety and compliance. According to testing standards outlined by UL Solutions for LED equipment, permanent architectural lighting requires robust, vibration-resistant terminations.
Always solder if:
- The total continuous draw exceeds 4 Amps per connection point.
- The installation is outdoors, in high-humidity zones, or subject to wide thermal cycling (e.g., unheated garages where temperatures swing from 20°F to 100°F).
- You are making 'jumper' connections between strips in an aluminum extrusion channel where the connector cannot be visually inspected after the diffuser cover is snapped into place.
- You are using COB (Chip-on-Board) LED strips. COB strips have incredibly dense, microscopic copper pads that are easily crushed or misaligned by the thick metal teeth of solderless connectors, resulting in immediate dead zones.
Frequently Asked Questions (Safety Focus)
Can I use solderless connectors on wet-rated IP68 LED strips?
No. IP68 strips are encased in a thick, extruded silicone or polyurethane sleeve. Solderless connectors cannot penetrate this sleeve to reach the copper pads without compromising the waterproof seal. Attempting to carve away the IP68 coating destroys the strip's ingress protection rating. For IP68 installations, you must cut the strip, solder the wires, and then re-seal the joint using heat-shrink tubing lined with marine-grade adhesive sealant.
Do I need a special power supply if I use multiple solderless connectors?
The power supply doesn't change, but your wire gauge must. Because solderless connectors introduce cumulative resistance, running multiple daisy-chained segments using 22AWG jumper wires will result in severe voltage drop. Upgrade your interconnect wiring to 18AWG or 16AWG silicone-jacketed wire to minimize resistance and prevent the wires themselves from becoming heating elements. The U.S. Department of Energy emphasizes that system efficiency in solid-state lighting is heavily dependent on minimizing conductor losses.
Is it safe to use hot glue to secure a loose solderless connector?
Absolutely not. Standard hot melt glue operates at application temperatures around 250°F to 380°F. Applying this directly to a plastic solderless connector housing can warp the internal geometry, reducing the spring tension on the contact clips. Furthermore, hot glue is not a structural adhesive and will peel off the polyimide backing of the LED strip over time. Use cyanoacrylate (super glue) with an activator, or better yet, mechanical mounting brackets.
Final Verdict: Convenience vs. Long-Term Safety
Understanding how to cut LED strip lights without soldering empowers you to complete weekend projects quickly and without specialized tools. However, as an electrical DIYer, you must weigh the upfront convenience against the long-term thermodynamic realities of your circuit. Solderless connectors are excellent for prototyping, temporary event lighting, and low-wattage (under 2 Amp) indoor applications. But for permanent, high-density, or high-wattage architectural installations, taking the extra 10 minutes to properly flux and solder your connections remains the undisputed gold standard for electrical safety and longevity.