
Why Upgrade to PID Control for Your Line Follower Robot?
Building a line follower robot Arduino project is a rite of passage for robotics enthusiasts. However, most beginner tutorials rely on 'bang-bang' control logic, where the robot simply turns hard left or right when a sensor detects the line. This results in a jerky, oscillating motion that is incredibly slow on curves and prone to derailing on sharp angles.
To achieve the smooth, high-speed tracking seen in competitive robotics, we must implement Proportional-Integral-Derivative (PID) control. PID calculates an error value as the difference between a desired setpoint (the center of the line) and a measured process variable (the sensor array reading). By continuously adjusting the motor speeds based on this error, your robot will glide along the track with mathematical precision.
In this 2026 updated guide, we will walk through the exact hardware selection, mechanical assembly, wiring, and PID tuning required to build a competition-grade line follower.
Bill of Materials (BOM) and Hardware Selection
Component selection dictates the physical limits of your robot. While the classic L298N motor driver is still found in many legacy kits, it suffers from a massive 2V voltage drop due to its bipolar transistor design. For this build, we are using the TB6612FNG, a MOSFET-based driver with a negligible 0.5V drop, allowing your motors to receive nearly the full battery voltage.
| Component | Specific Model / Specs | Est. Cost (2026) | Why This Part? |
|---|---|---|---|
| Microcontroller | Arduino Nano (ATmega328P) | $12.00 | Compact footprint, breadboard friendly, ample I/O. |
| Motor Driver | TB6612FNG Dual H-Bridge | $4.50 | High efficiency, 1.2A continuous current, PWM up to 100kHz. |
| Sensors | 5-Channel TCRT5000 IR Array | $8.00 | Analog outputs allow precise centroid calculation of the line. |
| Motors | N20 Gear Motors (300 RPM, 6V) | $14.00 | High torque-to-size ratio. See Pololu's micro metal gearmotor specs for torque curves. |
| Power | 2S LiPo Battery (7.4V, 1000mAh) | $18.00 | High discharge rate (25C) prevents voltage sag during sharp turns. |
| Chassis | Custom 3D Printed PLA/PETG | $10.00 | Allows exact sensor placement and low center of gravity. |
Total Estimated Build Cost: ~$66.50
Step 1: Mechanical Assembly and Sensor Placement
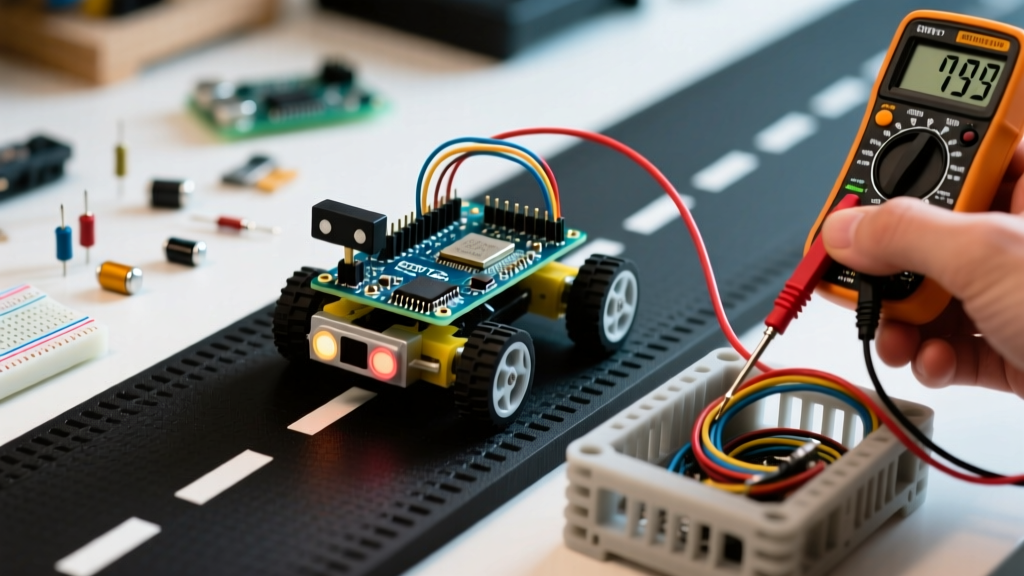
The most common point of failure in a line follower robot Arduino build is improper sensor height. The TCRT5000 infrared reflective sensors have a very narrow focal point.
- The 3mm Rule: The IR phototransistors must be positioned exactly 2mm to 4mm above the track surface. Any higher, and ambient room lighting (especially the 120Hz flicker from modern LED panels) will introduce severe noise into your analog readings.
- Sensor Array Geometry: Mount the 5-channel array in a slight curve or straight line directly in front of the drive wheels. The total width of the sensor array should be roughly 1.5 times the width of the track line (typically 20mm to 30mm wide).
- Center of Gravity: Mount the 2S LiPo battery as low and as close to the drive axle as possible. This maximizes traction on the drive wheels and prevents the robot from lifting its front sensors during hard deceleration.
Step 2: Wiring the TB6612FNG and Sensor Array
Wiring the TB6612FNG requires careful attention to the PWM pins. The Arduino Nano's default PWM frequency is roughly 490Hz, which can cause an audible whine from the motors. We will change this in the code later, but ensure you use pins that share the same timer for synchronized PWM output.
Pinout Mapping
| TB6612FNG Pin | Arduino Nano Pin | Notes |
|---|---|---|
| PWMA | D9 (Timer 1) | Left Motor PWM |
| AIN1 / AIN2 | D7 / D8 | Left Motor Direction |
| PWMB | D10 (Timer 1) | Right Motor PWM |
| BIN1 / BIN2 | D11 / D12 | Right Motor Direction |
| STBY | 5V (VCC) | Always active |
| AO1 / AO2 | Left Motor Terminals | Polarity dictates forward/reverse |
| BO1 / BO2 | Right Motor Terminals | Polarity dictates forward/reverse |
Note: For a detailed breakdown of the motor driver wiring and logic truth tables, refer to the SparkFun TB6612FNG Hookup Guide.
Connect the 5 analog sensor outputs to Arduino pins A0 through A4. Ensure you use a common ground between the LiPo battery, the motor driver, and the Arduino Nano to prevent floating logic levels.
Step 3: Implementing the PID Algorithm
Instead of writing a PID loop from scratch, we will use the industry-standard Arduino PID Library by Brett Beauregard. It handles derivative kick, integral windup, and sample time management automatically.
Calculating the Position Error
Before the PID library can work, it needs a single 'Process Variable' (PV). We calculate this by taking a weighted average of the 5 IR sensors.
int sensorValues[5];
int weightedSum = 0;
int totalSum = 0;

for (int i = 0; i < 5; i++) {
  sensorValues[i] = analogRead(A0 + i);
  // Invert if your sensors read HIGH on white and LOW on black
  sensorValues[i] = 1023 - sensorValues[i];
  weightedSum += sensorValues[i] * (i * 100);
  totalSum += sensorValues[i];
}

int position = weightedSum / totalSum; // Ranges from 0 to 400
int error = 200 - position; // Setpoint is 200 (center of array)
The error variable is then fed into the PID controller. If the robot is perfectly centered, the error is 0. If it drifts left, the error becomes positive, and the PID library will output a 'Turn' value to reduce the left motor speed and increase the right motor speed.
Applying the Turn Value to Motors
pid.Compute();

int baseSpeed = 180; // Nominal speed out of 255
int leftMotorSpeed = baseSpeed + turnValue;
int rightMotorSpeed = baseSpeed - turnValue;

// Constrain speeds to valid PWM limits
leftMotorSpeed = constrain(leftMotorSpeed, 0, 255);
rightMotorSpeed = constrain(rightMotorSpeed, 0, 255);

analogWrite(PWMA, leftMotorSpeed);
analogWrite(PWMB, rightMotorSpeed);
Step 4: Tuning the PID Constants (Kp, Ki, Kd)
Tuning is where most builders fail. A line follower is a highly dynamic system. Here is the exact methodology for tuning your constants:
- Zero out Ki and Kd: Set Kp=1, Ki=0, Kd=0. The robot will likely oscillate wildly across the line.
- Increase Kp: Slowly increase Kp until the robot follows the line but oscillates slightly on straightaways. This is your ultimate proportional gain.
- Introduce Kd (The Magic Variable): The Derivative term looks at the rate of change of the error. It acts as a damper, predicting overshoot before it happens. Increase Kd until the oscillations smooth out and the robot takes corners aggressively without flying off the track. For most line followers, Kd will be 5x to 10x higher than Kp.
- Leave Ki at Zero: The Integral term accumulates past errors. In line following, this causes 'integral windup', where the robot continues turning even after it has found the line, leading to massive overshoot on long curves. Keep Ki at 0 unless you are dealing with severe static friction issues.
Pro-Tip: Increase PWM Frequency
The default Arduino PWM frequency (~490Hz) can cause the TB6612FNG to operate inefficiently and generate heat. AddTCCR1B = TCCR1B & B11111000 | B00000001;in yoursetup()function to change Timer 1 (Pins 9 and 10) to 31,250Hz. This pushes the motor whine out of human hearing range and drastically improves low-speed torque response.
Troubleshooting Common Edge Cases
Even with perfect code, real-world physics will introduce variables. Here is how to diagnose the most common failure modes in a line follower robot Arduino build:
1. High-Frequency Jittering on Straight Lines
Cause: Your Kd value is too high, or your IR sensors are picking up 60Hz/120Hz noise from overhead fluorescent or LED lighting.
Fix: First, shield the sensors with a small 3D-printed shroud. If the issue persists, implement a software low-pass filter or moving average on the analog readings, and slightly reduce Kd.
2. Robot Slows Down Too Much on Sharp Corners
Cause: The baseSpeed is too low, or the error calculation is saturating.
Fix: Implement a dynamic base speed. If the absolute value of the error is small (meaning the robot is on a straightaway), increase the baseSpeed to 220. If the error is large (sharp corner), drop the baseSpeed to 120 to maintain traction.
3. Motor Stuttering at Low Speeds
Cause: The N20 motors are not receiving enough voltage to overcome static friction at low PWM duty cycles, exacerbated by the battery voltage sagging under load.
Fix: Ensure your 2S LiPo battery has a high C-rating (minimum 25C). In code, map your minimum motor speed to a value just above the stall threshold (usually around PWM 60-80 for N20 motors) rather than allowing it to drop to 0 during minor corrections.
Conclusion
Transitioning from basic bang-bang logic to a fully tuned PID algorithm transforms a frustrating, jerky toy into a high-performance line follower robot Arduino machine. By selecting efficient MOSFET drivers like the TB6612FNG, strictly controlling your sensor height, and methodically tuning your Kp and Kd constants, you will achieve a robot capable of navigating complex tracks with fluid, high-speed precision.