
Introduction to Tactile Sensing with FSRs
Integrating a force sensor with Arduino is a rite of passage for electronics beginners. Whether you are building a MIDI drum pad, a smart insole, or a robotic gripper, Force Sensing Resistors (FSRs) offer a cheap, ultra-thin, and flexible way to detect physical pressure. However, unlike precise load cells, FSRs are notoriously non-linear and require specific circuit conditioning to yield usable data.
In this 2026 beginner interfacing tutorial, we will focus on the industry-standard Interlink Electronics FSR 402. We will cover the physics of piezoresistive materials, calculate the exact voltage divider required for stable readings, write noise-filtered Arduino code, and explore the real-world edge cases that datasheets often gloss over.
💡 Expert Insight: FSRs are qualitative sensors disguised as quantitative ones. They are exceptional for detecting 'touch', 'squeeze', or 'heavy vs. light' impacts, but they are fundamentally unsuited for precision weight measurement (e.g., measuring exactly 4.52 kg). Treat them as pressure-activated switches with a wide analog transition zone.
Understanding the FSR402: Specs and Physics
The FSR 402 utilizes a polymer thick film (PTF) device that exhibits a decrease in resistance with an increase in force applied to its surface. When no force is applied, the resistance is virtually infinite (typically >1MΩ). As force increases, conductive particles within the polymer matrix are pushed together, creating electrical pathways and dropping the resistance to as low as 200Ω at maximum rated force.
Key FSR 402 Specifications
- Force Sensitivity Range: 0.2 N to 20 N (approx. 20g to 2kg)
- Sensing Area: 0.5 inch (12.7mm) diameter circle
- Thickness: 0.20 mm (ultra-thin, flexible)
- Response Time: < 5 milliseconds
- Standby Resistance: > 1 MΩ (unloaded)
Hardware Requirements & 2026 Budget
Building this circuit requires minimal components. Below is a realistic bill of materials (BOM) based on early 2026 retail pricing from major hobbyist distributors.
| Component | Model / Specification | Est. Price (2026) | Purpose |
|---|---|---|---|
| Force Sensor | Interlink FSR 402 (0.5" round) | $8.50 | Primary tactile input |
| Microcontroller | Arduino Uno R4 Minima | $20.00 | 14-bit ADC processing |
| Pull-Down Resistor | 10kΩ 1/4W Carbon Film | $0.10 | Voltage divider network |
| Prototyping | Breadboard & Male-to-Male Jumpers | $5.00 | Circuit assembly |
Total Estimated Cost: ~$33.60
Wiring the Circuit: The Voltage Divider
Microcontrollers cannot read resistance directly; they read voltage. To convert the FSR's variable resistance into a variable voltage, we must use a voltage divider circuit. This requires a fixed pull-down resistor.
Calculating the Optimal Pull-Down Resistor
Choosing the wrong resistor will compress your usable data range. The optimal pull-down resistor ($R_{pd}$) is the geometric mean of the sensor's minimum and maximum resistance:
R_pd = √(R_min × R_max)
For the FSR 402, $R_{min}$ is ~200Ω (max force) and $R_{max}$ is ~150,000Ω (lightest detectable touch, ignoring the infinite unloaded state). √(200 × 150,000) ≈ 5,477Ω. A standard 10kΩ resistor is the closest E12 series value and provides an excellent balance for 5V logic systems.
Step-by-Step Wiring
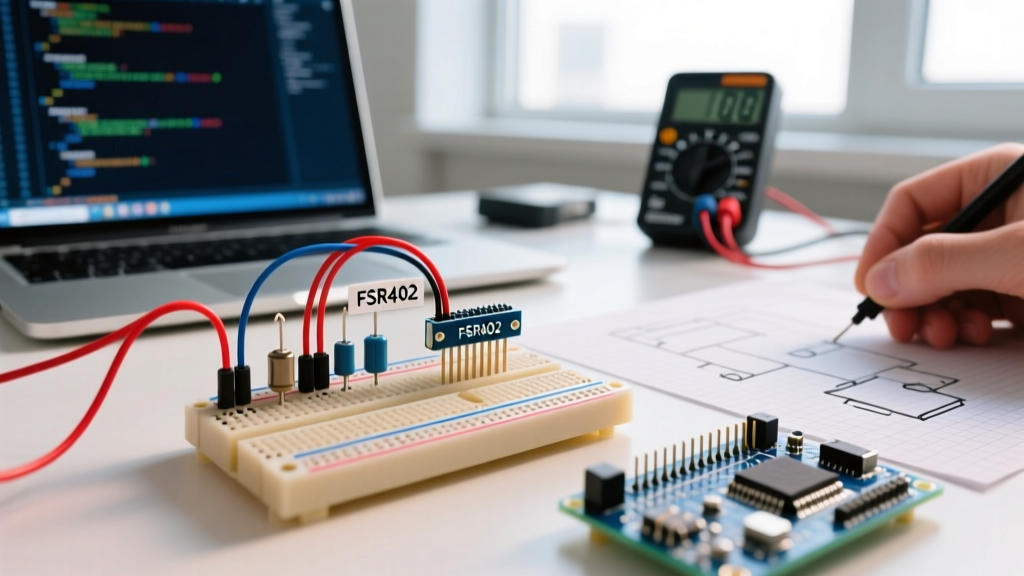
- Connect FSR Pin 1 to the Arduino 5V pin.
- Connect FSR Pin 2 to a breadboard row.
- Connect one leg of the 10kΩ resistor to the same breadboard row as FSR Pin 2.
- Connect the other leg of the 10kΩ resistor to Arduino GND.
- Run a jumper wire from the FSR Pin 2 / Resistor junction to Arduino Analog Pin A0.
As you squeeze the sensor, its resistance drops, allowing more current to flow through the 10kΩ resistor to ground, which raises the voltage at the A0 junction from near 0V up to approximately 4.16V.
Arduino Code: Reading and Filtering the Data
Raw analog readings from FSRs are often noisy, especially near the zero-force threshold. The following C++ code implements a 'deadzone' to ignore electrical noise and maps the 14-bit ADC value (using the Uno R4's 14-bit resolution, though it defaults to 10-bit for backward compatibility; we will force 14-bit for higher fidelity) into a usable 0-100 percentage scale.
// FSR402 Interfacing Code for Arduino Uno R4
// Configured for 14-bit ADC resolution

const int fsrPin = A0;
const int deadzoneThreshold = 250; // Filters out resting electrical noise

void setup() {
  Serial.begin(115200);
  // Set analog read resolution to 14 bits (0 - 16383) on Uno R4
  analogReadResolution(14);
  Serial.println("FSR 402 Initialization Complete...");
}

void loop() {
  int rawADC = analogRead(fsrPin);

  // Apply deadzone to prevent jitter when sensor is untouched
  if (rawADC < deadzoneThreshold) {
    rawADC = 0;
  }

  // Map the 14-bit value (0-16383) to a 0-100% force scale
  // Note: Max practical reading with 10k resistor on 5V is ~13500
  int forcePercent = map(rawADC, 0, 13500, 0, 100);
  forcePercent = constrain(forcePercent, 0, 100);

  Serial.print("Raw ADC: ");
  Serial.print(rawADC);
  Serial.print(" | Force Estimate: ");
  Serial.print(forcePercent);
  Serial.println("%");

  delay(50); // 20Hz sampling rate is sufficient for human interaction
}
For a deeper understanding of how the microcontroller samples this voltage, refer to the official Arduino analogRead() documentation, which details ADC sampling times and reference voltages.
Real-World Edge Cases & Failure Modes
Beginners often assume FSRs behave like perfect springs. They do not. When designing a commercial or robust DIY product, you must account for the following physical limitations inherent to piezoresistive polymers:
1. Hysteresis and Creep
If you apply 5 N of force to the FSR 402, note the ADC reading, and then release the force, the resistance will not immediately return to >1MΩ. It will 'creep' back to baseline over several seconds. Furthermore, if you hold a constant 5 N force for 60 seconds, the resistance will slowly drift downward (creep under load). Solution: Never use FSRs for continuous static weight monitoring. Use them for dynamic, transient events (taps, squeezes, impacts).
2. Mechanical Degradation (The Tail Bend)
The most common cause of FSR failure in beginner projects is snapping the conductive traces inside the flexible tail. The sensing area is durable, but the tail is fragile. Solution: Never bend the tail within 2mm of the transition zone. Use Kapton tape or a 3D-printed strain-relief clamp to secure the tail to your enclosure before routing it to your breadboard.
3. Temperature Drift
Polymer thick films are sensitive to ambient temperature. A sensor calibrated at room temperature (22°C) will exhibit a lower baseline resistance at 40°C, which the Arduino will interpret as 'light pressure'. If your project operates outdoors or inside a heated enclosure, you must implement a software zeroing routine upon startup.
Troubleshooting Common Beginner Mistakes
- Floating Pin Readings (Random Numbers 0-16383): You forgot the 10kΩ pull-down resistor. Without it, the analog pin is 'floating' and acting as an antenna for ambient electromagnetic interference.
- Maxed Out Readings (Always 16383): Your wiring is reversed, or you are shorting the 5V directly to A0. Double-check the voltage divider junction.
- Sensor Feels 'Crunchy' or Inconsistent: You are pressing on the edge of the sensor rather than the center. The FSR 402 requires force to be applied evenly across the active 0.5-inch circular area. Use a silicone or rubber pad on top of the sensor to distribute point-loads evenly.
Conclusion and Next Steps
Interfacing a force sensor with Arduino is highly rewarding once you understand the underlying analog conditioning. By using a mathematically sound voltage divider and implementing software deadzones, you can transform the FSR 402 into a reliable input device for musical instruments, gaming peripherals, and accessibility switches.
For further reading on best practices for mechanical integration and multi-point array designs, review SparkFun's Force Sensitive Resistor Hookup Guide and the Adafruit FSR Overview. Both resources provide excellent visual diagrams for advanced matrix wiring techniques.