
The Evolution of Climate Monitoring in DIY Electronics
Building a reliable temp and humidity sensor Arduino setup is a rite of passage for electronics hobbyists, but the landscape of environmental sensors has shifted dramatically as we move through 2026. The once-ubiquitous DHT11 is now effectively obsolete for serious projects due to its poor ±5% RH accuracy and 1-degree Celsius resolution. Today, the battle for the best DIY climate sensor comes down to two distinct architectures: the 1-Wire DHT22 (AM2302) and the I2C-based SHT31-D.
Whether you are building a smart greenhouse, a reptile enclosure monitor, or a homebrew fermentation chamber, choosing the right sensor dictates your wiring complexity, code structure, and ultimate data reliability. This guide provides a deep-dive comparison, exact wiring schematics, and production-ready C++ code for both platforms.
Sensor Showdown: 2026 Market Specifications
Before soldering a single pin, it is crucial to understand the hardware limitations and pricing of the current market leaders. While the DHT22 remains the hobbyist standard, I2C sensors like the SHT31 and AHT20 have dropped in price, making them viable for budget-conscious precision projects.
| Sensor Model | Interface | Temp Accuracy | RH Accuracy | Avg. Price (2026) | Best Use Case |
|---|---|---|---|---|---|
| DHT11 | Proprietary 1-Wire | ±2.0°C | ±5.0% | $1.50 | Legacy/Educational only |
| DHT22 (AM2302) | Proprietary 1-Wire | ±0.5°C | ±2.0% | $2.50 | Basic indoor monitoring |
| SHT31-D | I2C | ±0.2°C | ±2.0% | $4.50 | Agri-tech, incubators, labs |
| AHT20 | I2C | ±0.3°C | ±2.0% | $1.80 | Budget I2C alternatives |
Deep Dive 1: Wiring the DHT22 (AM2302) 1-Wire Protocol
The DHT22 utilizes a proprietary single-bus communication protocol. It is not compatible with the Dallas/Maxim 1-Wire standard used by DS18B20 temperature sensors. The communication relies on strict microsecond-level timing, which can be problematic on faster, multi-core microcontrollers like the ESP32 if not handled correctly by the library.
Pinout and Pull-Up Resistor Requirements
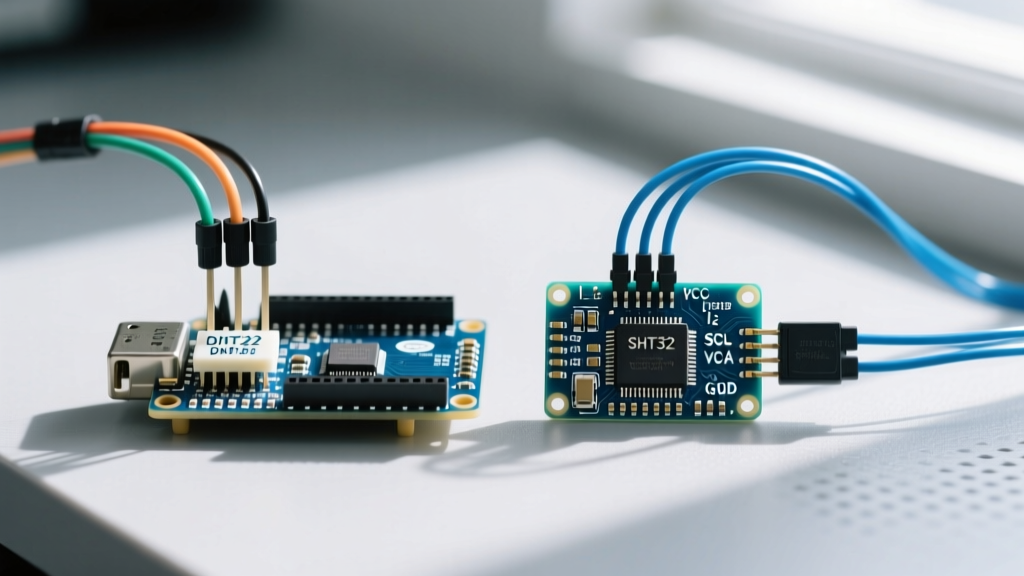
The DHT22 typically comes on a 3-pin or 4-pin breakout board. If you are using the bare 4-pin component:
- Pin 1 (VCC): Connect to 3.3V or 5V (3.3V recommended for modern MCUs).
- Pin 2 (Data): Connect to your digital GPIO pin. Critical: You must place a 4.7kΩ pull-up resistor between VCC and the Data pin. Without this, the data line will float, resulting in intermittent
NaN(Not a Number) readings. - Pin 3 (NC): No connection.
- Pin 4 (GND): Connect to common ground.
Pro-Tip for Long Wire Runs: The DHT22 protocol is highly susceptible to parasitic capacitance. If your wires exceed 1 meter, the signal edges will degrade. For runs up to 20 meters, drop the pull-up resistor to 1kΩ and use shielded twisted-pair cable.
DHT22 Arduino C++ Code
We utilize the Adafruit DHT library, which handles the microsecond timing interrupts required to read the sensor. Note the mandatory 2-second delay; the DHT22 hardware cannot sample faster than 0.5Hz.
#include <DHT.h>

#define DHTPIN 2
#define DHTTYPE DHT22

DHT dht(DHTPIN, DHTTYPE);

void setup() {
  Serial.begin(9600);
  Serial.println("DHT22 Initializing...");
  dht.begin();
}

void loop() {
  // DHT22 requires a minimum 2-second delay between reads
  delay(2000);

  float h = dht.readHumidity();
  float t = dht.readTemperature();

  // Check if any reads failed and exit early (to try again)
  if (isnan(h) || isnan(t)) {
    Serial.println("Failed to read from DHT sensor! Check wiring.");
    return;
  }

  Serial.print("Humidity: "); Serial.print(h);
  Serial.print("% | Temperature: "); Serial.print(t); Serial.println(" °C");
}
Common DHT22 Failure Modes
- Returning
NaN: Usually caused by a missing pull-up resistor, reading faster than the 2-second hardware limit, or using a 5V sensor on a 3.3V logic pin without a level shifter. - System Freezes: The 1-Wire protocol disables interrupts during the read cycle. On an Arduino Uno, this takes about 5ms. If you are running time-critical code (like PWM motor control or audio synthesis), the DHT22 will cause noticeable jitter. Switch to an I2C sensor to avoid this.
Deep Dive 2: Wiring the SHT31-D I2C Precision Sensor
For professional-grade environmental monitoring, the Sensirion SHT31-D is the gold standard. By utilizing the I2C bus, it offloads timing constraints to the hardware TWI/I2C peripheral, freeing up your microcontroller's CPU and allowing for much longer, more reliable wire runs.
I2C Bus Configuration and Addressing
The SHT31-D breakout boards (like those from Adafruit or SparkFun) include the necessary 10kΩ I2C pull-up resistors on the PCB, simplifying wiring.
- VIN: 3V to 5V DC.
- GND: Common ground.
- SCL / SDA: Connect to the dedicated I2C pins on your MCU (A5/A4 on Uno, GPIO 22/21 on ESP32).
- ADDR Pin: Tying this to GND sets the I2C address to
0x44. Tying it to VIN shifts the address to0x45, allowing two sensors on the same bus.
SHT31 Arduino C++ Code
Using the Adafruit SHT31 library, the code is significantly cleaner and non-blocking compared to the DHT22.
#include <Wire.h>
#include <Adafruit_SHT31.h>

Adafruit_SHT31 sht31 = Adafruit_SHT31();

void setup() {
  Serial.begin(9600);
  Wire.begin();

  if (!sht31.begin(0x44)) {   // Set to 0x45 for alternate i2c addr
    Serial.println("Couldn't find SHT31 on I2C bus!");
    while (1) delay(1);
  }
  Serial.println("SHT31 Found and Initialized.");
}

void loop() {
  float t = sht31.readTemperature();
  float h = sht31.readHumidity();

  if (!isnan(t) && !isnan(h)) {
    Serial.print("Temp: "); Serial.print(t); Serial.print(" °C");
    Serial.print(" | Hum: "); Serial.print(h); Serial.println("%");
  } else {
    Serial.println("I2C Read Error. Check connections.");
  }

  delay(1000); // I2C can handle faster polling, but 1s is sufficient
}
Expert Calibration: The Saturated Salt Method
Out of the box, budget sensors can drift by 3-5% RH. If your temp and humidity sensor Arduino project requires precision (e.g., cigar humidors, mushroom fruiting chambers, or incubators), you must calibrate it. According to the official Sensirion documentation, the most reliable DIY calibration method is the saturated salt solution test.
- Mix distilled water and pure sodium chloride (table salt) in a sealed Tupperware container until no more salt dissolves (a slushy consistency).
- Place your sensor inside the sealed container, ensuring it does not touch the saltwater directly.
- Leave it at a stable room temperature (approx. 25°C) for 12 to 24 hours.
- Physics dictates that the air inside will stabilize at exactly 75.3% RH. Note the offset reported by your Arduino and apply this delta in your code.
Enclosures: Preventing Solar Radiation Errors
A common mistake in outdoor deployments is mounting the sensor in direct sunlight or inside a sealed, unventilated black box. Solar radiation can cause the sensor's internal heating element to report temperatures 10°C to 15°C higher than the actual ambient air. For outdoor deployments, you must house your sensor inside a Stevenson Screen (a louvered radiation shield). If you are 3D printing your own enclosure, use ASA or PETG filament; standard PLA will warp and deform under UV exposure and summer heat, potentially crushing the delicate sensor membrane.
Authoritative References
- Adafruit Learning System: DHT Humidity & Temperature Sensors - Comprehensive guide on 1-Wire timing and pull-up requirements.
- Sensirion SHT31-D Datasheet & Product Page - Official specifications on I2C addressing, repeatability, and calibration standards.
- SparkFun: I2C Communication Protocol Guide - Deep dive into I2C bus capacitance, pull-up resistor calculations, and troubleshooting bus lockups.