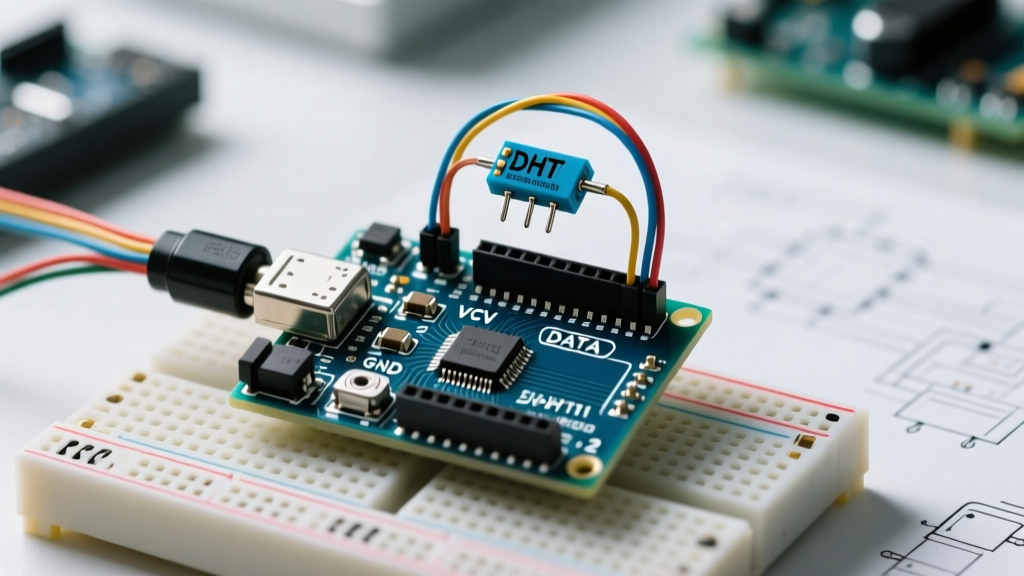

Introduction to the DHT11 Ecosystem
When building entry-level environmental monitoring systems, few components are as ubiquitous as the DHT11. Frequently searched by our global maker community using the Spanish term sensor de temperatura arduino dht11, this low-cost capacitive humidity and thermistor-based temperature sensor has become a rite of passage for microcontroller enthusiasts. Despite its age and the emergence of more advanced I2C alternatives, the DHT11 remains highly relevant in 2026 for educational kits, basic HVAC prototyping, and low-budget agricultural nodes where extreme precision is not required.
However, integrating this sensor is rarely as simple as plugging in a jumper wire and calling a function. The DHT11 relies on a strict, custom single-bus serial protocol that demands precise microsecond timing. In this comprehensive integration tutorial, we will bypass the basic fluff and dive deep into the hardware realities, single-wire protocol mechanics, C++ implementation, and advanced troubleshooting techniques to eliminate the dreaded "NaN" (Not a Number) errors that plague beginners.
Technical Specifications and 2026 Sourcing Realities
Before writing a single line of code, it is critical to understand the physical limitations of the silicon. The DHT11 contains a resistive-type humidity measurement component and an NTC (Negative Temperature Coefficient) thermistor, connected to an internal 8-bit microcontroller that handles the analog-to-digital conversion and serial output.
| Parameter | DHT11 Specifications | Engineering Notes |
|---|---|---|
| Temperature Range | 0°C to 50°C | Useless for sub-zero or high-heat industrial applications. |
| Temperature Accuracy | ±2.0°C | Requires software offset calibration for reliable baselines. |
| Humidity Range | 20% to 90% RH | Condensation (>90% RH) can permanently damage the polymer. |
| Humidity Accuracy | ±5.0% RH | Adequate for room comfort, poor for greenhouse control. |
| Sampling Rate | 1 Hz (1 reading/sec) | Hardware-enforced. Polling faster causes bus lockups. |
| Operating Voltage | 3.3V to 5.5V DC | Tolerant of 5V Arduino Uno and 3.3V ESP32 logic levels. |
Market Pricing (2026): As of early 2026, bare DHT11 sensors (the blue plastic housing with 4 pins) typically cost between $1.10 and $1.50 in bulk. The PCB-mounted modules (which include a built-in 4.7kΩ pull-up resistor and a filtering capacitor) range from $2.80 to $3.50. For prototyping, we strongly recommend the PCB module to eliminate breadboard parasitic capacitance issues.
The Single-Bus Protocol: Microsecond Timing Explained
Unlike I2C or SPI sensors, the DHT11 single-bus protocol requires the microcontroller (MCU) and the sensor to share a single data line, switching pin modes dynamically. Understanding this timing is the key to debugging failed integrations.
- MCU Start Signal: The Arduino pulls the data line LOW for at least 18 milliseconds, then HIGH for 20-40 microseconds.
- Sensor Response: The DHT11 detects the start signal, pulls the line LOW for 80 microseconds, then HIGH for 80 microseconds.
- Data Transmission: The sensor transmits 40 bits of data (8-bit humidity integer, 8-bit humidity decimal, 8-bit temp integer, 8-bit temp decimal, and 8-bit checksum). A logical '0' is represented by 50µs LOW followed by 26µs HIGH. A logical '1' is 50µs LOW followed by 70µs HIGH.
Critical Timing Constraint: Because the MCU must measure pulse widths in microseconds, interrupts on the Arduino (such as those triggered by Wi-Fi stacks on the ESP8266/ESP32 or servo timers) can disrupt the reading. The Adafruit DHT Library handles this by temporarily disabling interrupts during the 5-millisecond read window.
Hardware Wiring: Bare Component vs. PCB Module
Wiring errors are the primary cause of DHT11 failure. The sensor has four pins, but only three are used.
- Pin 1 (VCC): Connect to 5V (or 3.3V for ESP32).
- Pin 2 (DATA): Connect to your chosen digital GPIO (e.g., Pin 2 on Arduino Uno).
- Pin 3 (NC): No Connection. Leave floating.
- Pin 4 (GND): Connect to system ground.
The Pull-Up Resistor Rule
If you are using the bare blue sensor, you must connect a 4.7kΩ pull-up resistor between VCC and the DATA pin. The internal microcontroller of the DHT11 uses an open-drain output; without the pull-up, the data line will never return to a HIGH state, and your Arduino will read endless zeros. If you are using the PCB module, this resistor is already populated on the board (usually an SMD 103 or 472 resistor).
Arduino C++ Implementation
For reliable code, avoid writing your own bit-banging routine unless you are working on a custom RTOS. The industry standard is the Adafruit Unified Sensor ecosystem. Install the DHT sensor library and Adafruit Unified Sensor via the Arduino IDE Library Manager.
#include <DHT.h>

#define DHTPIN 2          // Digital pin connected to the DHT sensor
#define DHTTYPE DHT11     // Define sensor type

DHT dht(DHTPIN, DHTTYPE);

// Variables to store previous readings for error smoothing
float lastValidTemp = 0.0;
float lastValidHum = 0.0;

void setup() {
  Serial.begin(115200);
  dht.begin();
  Serial.println(F("DHT11 Initialization Complete."));
}

void loop() {
  // CRITICAL: Wait a minimum of 1 second between reads (1Hz limit)
  delay(2000);

  float h = dht.readHumidity();
  float t = dht.readTemperature();

  // Check if any reads failed and early-exit to try again
  if (isnan(h) || isnan(t)) {
    Serial.println(F("Failed to read from DHT sensor! Using last known state."));
    h = lastValidHum;
    t = lastValidTemp;
  } else {
    lastValidTemp = t;
    lastValidHum = h;
  }

  // Compute heat index (Fahrenheit)
  float hif = dht.computeHeatIndex(t, h, false);

  Serial.print(F("Humidity: "));
  Serial.print(h);
  Serial.print(F("% | Temperature: "));
  Serial.print(t);
  Serial.print(F("°C | Heat Index: "));
  Serial.print(hif);
  Serial.println(F("°F"));
}
Advanced Troubleshooting: Eliminating "NaN" Errors
Encountering "NaN" (Not a Number) in your serial monitor means the checksum failed or the MCU missed the microsecond timing edges. Here is how to diagnose the root cause based on Arduino hardware reference standards:
1. Parasitic Capacitance on Long Cable Runs
The single-bus protocol is highly susceptible to wire capacitance. If your DATA wire exceeds 2 meters (approx. 6.5 feet), the capacitance of the copper slows down the rising edge of the 5V signal. The 70µs pulse for a logical '1' stretches, causing the MCU to misinterpret the bitstream.
Fix: Lower the pull-up resistor value. Drop from 4.7kΩ to 2.2kΩ or even 1kΩ to provide more current, pulling the line HIGH faster against the parasitic capacitance. For runs over 10 meters, abandon the DHT11 and use an I2C sensor like the BME280.
2. Power Supply Ripple and Brownouts
The DHT11 draws up to 2.5mA during a conversion. If your Arduino is powered via a weak USB port or a long, thin power cable, this sudden current draw causes a voltage drop (brownout) on the VCC rail, resetting the sensor's internal MCU mid-transmission.
Fix: Place a 100µF electrolytic capacitor directly across the VCC and GND pins of the DHT11 module to act as a local energy reservoir.
3. Logic Level Mismatches (ESP32 vs. Arduino Uno)
While the DHT11 operates from 3.3V to 5.5V, the logic HIGH threshold scales with VCC. If you power the DHT11 with 5V, it expects a data line HIGH signal to be near 5V. If you connect this to an ESP32 (which outputs 3.3V logic), the DHT11 might not recognize the MCU's start signal.
Fix: Power the DHT11 with 3.3V when using 3.3V microcontrollers, or use a bidirectional logic level shifter.
Environmental Calibration Techniques
Out of the box, DHT11 sensors often exhibit a +1.5°C offset and a -4% RH offset due to manufacturing tolerances and the heat generated by the internal 8-bit MCU. To calibrate your specific unit:
- Temperature (Ice Bath Test): Seal the sensor in a waterproof plastic bag, ensuring no condensation can reach the polymer. Submerge it in a stirred glass of ice water. The equilibrium temperature is exactly 0.0°C. Record the sensor's output and apply a software offset in your C++ code.
- Humidity (Saturated Salt Solution): Place the sensor in an airtight container alongside a small cup of saturated table salt (NaCl) and water slurry. At room temperature (20°C-25°C), this environment creates a highly stable reference humidity of exactly 75.3% RH. Allow 4 hours for the chamber to equalibrate, then adjust your software offset accordingly.
When to Upgrade: Moving Beyond the DHT11
The sensor de temperatura arduino dht11 is an excellent educational tool, but its 1Hz sampling rate and ±2.0°C accuracy make it unsuitable for modern smart-home HVAC integration or precision incubators. If your project requires sub-second latency, I2C bus compatibility, or barometric pressure readings, it is time to upgrade to the Bosch BME280 or the Sensirion SHT40. These modern alternatives eliminate the single-bus timing headaches entirely, offering hardware-level stability and vastly superior resolution for only $2 to $3 more per unit in today's component market.