
Navigating the Arduino Wireless Ecosystem
Establishing reliable Arduino to Arduino wireless communication is a rite of passage for embedded systems engineers and advanced makers. Whether you are building a distributed environmental sensor network, a remote-controlled rover, or a telemetry link for a high-altitude balloon, tethering two microcontrollers via physical UART or I2C wires quickly becomes impractical. However, the sheer volume of transceiver modules on the market—each with distinct logic levels, protocols, and frequency bands—creates a compatibility minefield.
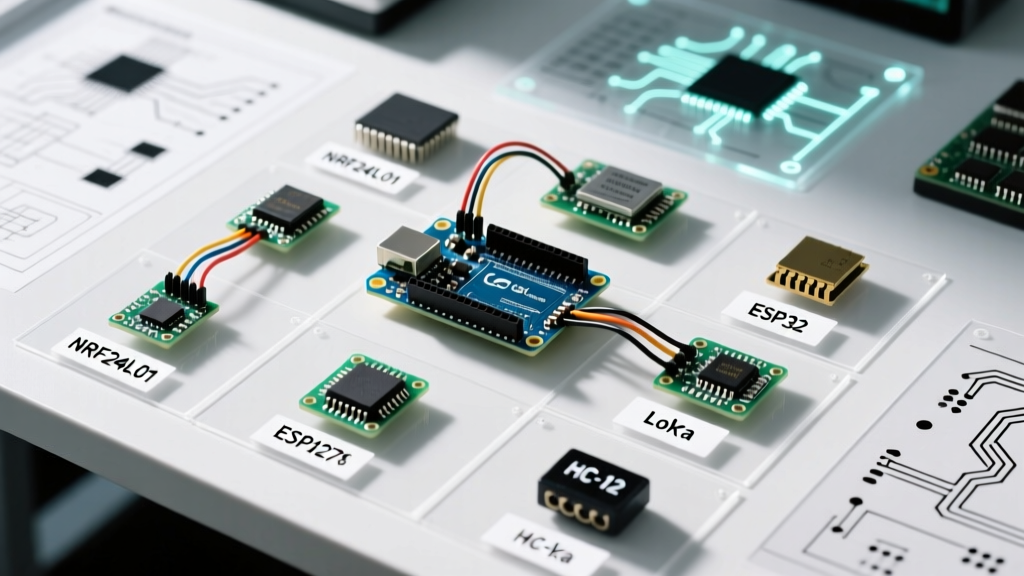
In this comprehensive compatibility guide, we dissect the four dominant wireless architectures available in 2026 for inter-Arduino communication: the 2.4GHz NRF24L01+, the 433MHz HC-12 UART bridge, Sub-GHz LoRa (SX1278), and Espressif's native ESP-NOW. We will evaluate hardware compatibility, logic level requirements, and real-world edge cases to ensure your next wireless deployment succeeds on the first upload.
Core Compatibility Matrix: Module vs. Board
Before wiring a single jumper, you must match the transceiver's logic level and interface to your specific microcontroller. Feeding 5V logic into a 3.3V SPI peripheral is the most common cause of immediate silicon death in maker projects.
| Wireless Module | Logic Level | Interface | Best Suited For | Avg. Cost (2026) |
|---|---|---|---|---|
| NRF24L01+ (PA+LNA) | 3.3V (5V tolerant SPI) | SPI | High-speed, short-range telemetry | $3.50 - $5.00 |
| HC-12 (SI4438) | 3.3V / 5V | UART (Serial) | Simple point-to-point bridging | $4.00 - $6.50 |
| SX1278 LoRa | 3.3V Strict | SPI | Long-range, low-bandwidth IoT | $6.00 - $9.00 |
| ESP-NOW (ESP32) | 3.3V Strict | Native Wi-Fi MAC | Mesh networks, low latency | $4.00 - $7.00 (per MCU) |
Expert Insight: If you are using a classic 5V Arduino Uno R3 or Mega2560, you must use a bi-directional logic level converter (like the BSS138-based SparkFun BOB-12009) for the SX1278 LoRa module. While the NRF24L01+ datasheet claims 5V tolerance on its SPI pins, cheap clone boards often lack proper clamping diodes, leading to degraded receiver sensitivity over time.
Deep Dive: Module Specifications & Edge Cases
1. NRF24L01+ (2.4GHz Transceiver)
The Nordic Semiconductor NRF24L01+ remains the undisputed king of low-cost, short-range Arduino to Arduino wireless communication. Operating in the globally unlicensed 2.4GHz ISM band, it offers data rates up to 2Mbps across 125 selectable channels.
- Compatibility Note: The standard 8-pin DIP module is highly susceptible to power supply noise. The onboard 3.3V LDO on cheap adapter bases often fails to supply the 130mA peak current required during transmission bursts.
- Actionable Fix: Always solder a 10µF to 47µF tantalum capacitor directly across the VCC and GND pins of the module. Alternatively, purchase the dedicated NRF24L01+ base adapter board (featuring an AMS1117-3.3 LDO and bulk capacitors) for roughly $2.50.
- Library Recommendation: Use the
RF24library by TMRh20. Avoid the legacy Mirf library, which lacks support for automatic acknowledgment (AutoACK) and dynamic payloads.
2. HC-12 (433MHz UART Serial Bridge)
For makers who want to avoid the complexities of SPI state machines, the HC-12 module acts as a transparent serial bridge. It utilizes the Silicon Labs SI4463 transceiver, operating in the 433MHz ISM band. Because lower frequencies penetrate foliage and concrete significantly better than 2.4GHz signals, the HC-12 easily achieves 1,000 meters line-of-sight at its lowest data rate (FU3 mode).
- Configuration Edge Case: Out of the box, the HC-12 operates at 9600 baud over the air and 9600 baud via the hardware UART. To change channels or transmission power, you must pull the
SETpin LOW before applying power to enter AT command mode. - Interference Warning: The 433MHz band is heavily congested by cheap wireless weather stations, tire pressure monitors, and garage door openers. Always implement a software CRC (Cyclic Redundancy Check) or use a unique preamble header in your payload to prevent your Arduino from acting on corrupted noise packets.
3. LoRa SX1278 (Sub-GHz Long Range)
When your project requires kilometer-scale range on a milliwatt power budget, Semtech's LoRa modulation is mandatory. The SX1278 (433MHz) and SX1276 (868/915MHz) modules interface via SPI but require precise interrupt handling.
- Wiring Criticality: The
DIO0pin on the SX1278 module must be connected to a hardware interrupt pin on your Arduino (e.g., Pin 2 or Pin 3 on an Uno). If you attempt to poll the DIO0 pin via a software loop, you will experience severe packet loss due to missed RX-done interrupts. - Regulatory Compliance: Ensure you select the correct frequency band for your region. The 915MHz band is standard for North America, while 868MHz is mandated in the EU. The LoRa Alliance provides strict duty-cycle guidelines that you must enforce in your firmware to remain legally compliant.
4. ESP-NOW (Native Wi-Fi MAC Layer)
ESP-NOW bypasses the traditional Wi-Fi routing layer, allowing ESP8266 and ESP32 microcontrollers to communicate directly via MAC addresses. This results in latency as low as 5 milliseconds, making it ideal for wireless robotics and real-time control.
- Peer Registration: Unlike broadcast UDP, ESP-NOW requires explicit MAC address registration. You must call
esp_now_add_peer()with the exact MAC address of the receiving Arduino/ESP32. - Payload Limits: The strict payload limit for unencrypted ESP-NOW packets is 250 bytes. If your telemetry array exceeds this, you must implement a custom fragmentation and reassembly protocol in your application layer.
- Further Reading: Consult the official Espressif ESP-NOW API Reference for advanced Wi-Fi coexistence strategies, ensuring ESP-NOW doesn't starve your concurrent HTTP server tasks.
Power Consumption & Antenna Tuning Profile
Battery-powered Arduino deployments live and die by their sleep current. Below is a comparative analysis of the power profiles for each module during active transmission and deep sleep.
| Module | TX Current (Peak) | RX Current | Deep Sleep / Power Down | Antenna Type |
|---|---|---|---|---|
| NRF24L01+ (Base) | 115 mA | 12.5 mA | 900 nA | Onboard PCB Trace (Omnidirectional) |
| NRF24L01+ (PA+LNA) | 130 mA | 45 mA | 900 nA | SMA Connector (Requires 2.4GHz Whip) |
| HC-12 | 100 mA | 8 mA | 22 µA (Sleep Mode 8) | Helical Spring Coil |
| SX1278 LoRa | 120 mA (20dBm) | 11.5 mA | 0.2 µA | U.FL or SMA (Tuned to 433MHz) |
| ESP32 (ESP-NOW) | 160 mA | 80 mA | 10 µA (Modem Sleep) | Onboard PCB Antenna |
Real-World Failure Modes & Troubleshooting
Even with perfect wiring, environmental and electrical factors will disrupt Arduino to Arduino wireless communication. Here is how to diagnose the most common field failures:
- SPI Clock Degradation (NRF24L01 & LoRa): If you are using standard 20cm female-to-female Dupont jumper wires for your SPI bus, signal ringing will cause initialization failures. Solution: Keep SPI traces under 10cm, or lower the SPI clock speed in your library initialization (e.g.,
SPI.setClockDivider(SPI_CLOCK_DIV4)). - Ground Loop Isolation: When testing two Arduinos connected to separate laptop USB ports, slight differences in ground potential can cause erratic behavior if a wired ground reference is accidentally shared alongside wireless testing. Solution: Rely purely on the wireless link; do not tie the GND pins of the two separate physical nodes together.
- Antenna Detuning via Human Proximity: The helical spring antennas on 433MHz HC-12 modules are highly sensitive to dielectric loading. Simply wrapping your hand around the module can shift the resonant frequency, dropping range by 80%. Solution: Mount the antenna perpendicular to the ground plane and enclose the project in non-conductive ABS or PLA plastic, keeping human hands away during range testing.
- ESP-NOW Channel Mismatch: ESP-NOW defaults to Wi-Fi Channel 1. If your receiver ESP32 connects to a local 2.4GHz router on Channel 6, it will silently drop ESP-NOW packets. Solution: Hardcode both the sender and receiver to use the same explicit Wi-Fi channel using
WiFi.channel(1)before initializing the ESP-NOW stack.
Final Verdict: Choosing Your Protocol
There is no universal "best" module for Arduino to Arduino wireless communication; the optimal choice is strictly dictated by your environmental constraints and data requirements.
Choose the NRF24L01+ if you need high-throughput sensor arrays indoors under 50 meters. Opt for the HC-12 if you require a simple, code-agnostic serial bridge through light building materials. Deploy SX1278 LoRa for agricultural or municipal IoT where nodes are separated by kilometers of terrain. Finally, leverage ESP-NOW when sub-10ms latency and mesh-routing capabilities are required for kinetic or robotic applications. By respecting the logic-level boundaries and power transient requirements outlined in this guide, your wireless architecture will remain robust, scalable, and interference-resistant.