
The Problem with Traditional Arduino Irrigation Tutorials
If you search for guides on how to make a smart irrigation system with Arduino, you will find thousands of results featuring the Arduino Uno, cheap resistive soil sensors, and blocking delay() functions. While these tutorials are fine for a weekend desk experiment, they fail catastrophically in real-world garden environments. Resistive sensors corrode within two weeks, blocking code prevents the integration of weather APIs, and updating the code requires dragging a laptop into the mud.
As a maker or engineer, your goal shouldn't just be to make it work once; it should be to build a reliable, maintainable system. This guide shifts the focus from basic wiring to workflow optimization. We will use the ESP32 (an Arduino-compatible microcontroller) to enable Over-The-Air (OTA) updates, implement non-blocking state machines, and select industrial-grade components to ensure your system survives the 2026 growing season and beyond.
Phase 1: Hardware Selection & The "Test Jig" Strategy
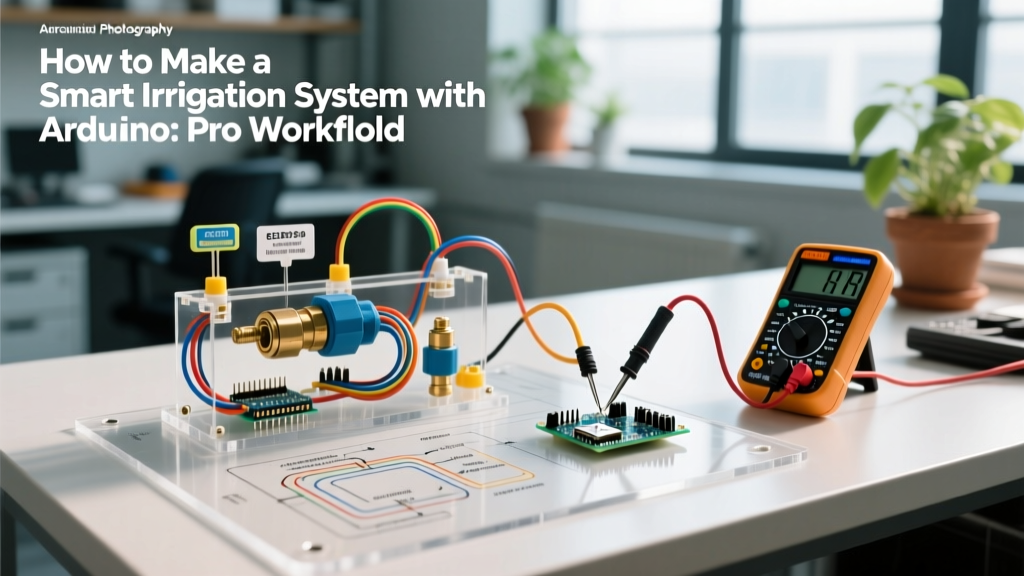
Optimizing your hardware workflow means avoiding the trap of soldering directly to a perfboard before the logic is proven. Instead, build a modular test jig using JST-SM connectors. This allows you to swap sensors and relays without desoldering.
The Optimized Bill of Materials (BOM)
- Microcontroller: ESP32 DevKitC V4 (~$6). Chosen over the Uno for built-in WiFi, dual-core processing, and OTA capabilities.
- Power Supply: 12V 2A Switching Power Brick (~$8) paired with an LM2596 Buck Converter (~$2) to step down to 5V for the ESP32 and sensors.
- Relay Module: 4-Channel 5V Optocoupler Isolated Relay (~$4). The optocoupler is critical to prevent back-EMF voltage spikes from the water pump from frying your ESP32.
- Water Pump: 12V Diaphragm Pump (60 PSI, ~$25). Diaphragm pumps can run dry without immediate damage, unlike centrifugal pumps.
Workflow Pro-Tip: Never power a relay coil directly from the ESP32's 3.3V or 5V pins. The inrush current when the relay engages will cause a brownout, resetting your microcontroller. Always use a dedicated buck converter and a common ground.
Phase 2: Sensor Selection Matrix
The most common point of failure in DIY irrigation is the soil moisture sensor. Choosing the right sensor dictates your maintenance workflow. Here is a comparison of the three most common options available to makers.
| Sensor Type | Model / Example | Lifespan in Soil | Accuracy | Cost (Approx.) | Workflow Verdict |
|---|---|---|---|---|---|
| Resistive | Generic LM393 Module | 1 - 3 Weeks | Poor (Drifts heavily) | $1.50 | Avoid. Electrolysis destroys the probes rapidly. |
| Capacitive | Gravity: Analog Capacitive (v1.2) | 1 - 2 Years | Good | $5.00 | Recommended. Requires conformal coating on the top PCB. |
| FDR / TDR | Industrial RS485 FDR | 10+ Years | Excellent | $35.00+ | Pro-Tier. Requires RS485-to-TTL adapter (MAX485) for ESP32. |
For 90% of optimized DIY builds, the Capacitive v1.2 is the sweet spot. However, to optimize its lifespan, you must coat the exposed circuitry at the top of the sensor with MG Chemicals 419D acrylic conformal coating or hot glue before burying it. This prevents moisture from wicking up the traces and shorting the analog output.
Phase 3: Non-Blocking Software Architecture
Watering a garden takes time. If your code uses delay(60000) to keep a valve open for a minute, the ESP32 is entirely blind to button presses, weather API updates, or manual overrides during that minute. To optimize your coding workflow, you must adopt a Finite State Machine (FSM) driven by millis().
The BlinkWithoutDelay Paradigm
The foundation of non-blocking Arduino code is tracking elapsed time without halting the processor. According to the official Arduino BlinkWithoutDelay documentation, you store the previous timestamp and compare it to the current millis() value. For an irrigation system, your states might look like this:
- STATE_IDLE: Polling soil moisture every 30 minutes.
- STATE_EVALUATE: Comparing moisture against thresholds and checking local weather APIs.
- STATE_WATERING: Triggering the relay and monitoring for flow-sensor anomalies.
- STATE_COOLDOWN: Waiting for water to percolate before taking a new moisture reading.
By structuring your code this way, the main loop() executes thousands of times per second, allowing you to host an asynchronous web server (via ESPAsyncWebServer) to manually override the system from your phone while a watering cycle is actively running.
Phase 4: Power Management & Weatherproofing
An optimized deployment workflow anticipates environmental failures. The EPA's WaterSense guidelines emphasize that smart irrigation controllers must be housed in weatherproof enclosures to maintain long-term efficiency and prevent electrical hazards.
Enclosure Prep Workflow
- Enclosure: Use an IP65-rated ABS junction box (e.g., 150x100x70mm).
- Cable Glands: Drill holes and install PG7 or PG9 nylon cable glands. Never run bare wires through a drilled hole; capillary action will pull water directly into your enclosure.
- Internal Mounting: Do not use double-sided tape to mount the ESP32 or relays. Use 3D-printed DIN rail mounts or brass standoffs. Tape degrades in high summer heat, leading to short circuits.
- Desiccant Packs: Place two silica gel packets inside the enclosure to absorb trapped ambient humidity before sealing the lid.
Phase 5: Deployment & OTA Debugging
The ultimate workflow optimization is eliminating the need to physically connect to the device once it is deployed in the garden. By integrating ArduinoOTA into your ESP32 sketch, you can push code updates wirelessly from your IDE.
As detailed in comprehensive guides like Random Nerd Tutorials' ESP32 OTA Programming guide, adding the OTA library requires less than 15 lines of code. However, it fundamentally changes your maintenance workflow. If you need to tweak the soil moisture threshold from 450 to 480 ADC units, you simply compile and upload over WiFi. No unscrewing enclosures, no mud on your laptop.
Implementing a Watchdog Timer (WDT)
WiFi connections in outdoor environments are unstable. If the ESP32 hangs while trying to reconnect to a distant router, the irrigation system could fail to water, or worse, get stuck in the STATE_WATERING state and flood your garden. Always enable the hardware Watchdog Timer:
#include <esp_task_wdt.h>

void setup() {
  esp_task_wdt_init(10, true); // 10 second timeout, panic on timeout
  esp_task_wdt_add(NULL);
}

void loop() {
  esp_task_wdt_reset(); // Reset the timer in the main loop
  // ... your FSM logic here ...
}
Common Edge Cases & Failure Modes
Even with an optimized workflow, edge cases will arise. Here is how to troubleshoot the most common issues encountered in the field:
1. The "False Dry" Reading After Watering
The Issue: The system waters for 5 minutes, stops, and immediately reads the soil as "dry" again, triggering an infinite watering loop.
The Fix: Soil takes time to absorb water and change its dielectric constant. Implement a mandatory 30-minute STATE_COOLDOWN after the pump turns off before the ESP32 is allowed to poll the capacitive sensor again.
2. ADC Non-Linearity on the ESP32
The Issue: The ESP32's Analog-to-Digital Converter (ADC) is notoriously non-linear, especially near the 3.3V rails. Your sensor might read 3100 when completely dry, but jump erratically.
The Fix: Do not rely on raw ADC values. In your setup workflow, take 100 readings in dry air, and 100 readings submerged in water. Map these averages using the map() function to a 0-100% scale. Furthermore, use the analogReadMilliVolts() function (available in newer ESP32 Arduino cores) instead of analogRead() for hardware-calibrated voltage readings.
3. Pump Back-EMF Spikes
The Issue: The ESP32 randomly reboots exactly when the water pump turns off.
The Fix: When an inductive load (like a pump motor) is switched off, the collapsing magnetic field generates a massive reverse voltage spike. Install a 1N4007 flyback diode in reverse parallel across the pump's terminals to safely route this spike back into the motor coil.
Conclusion
Learning how to make a smart irrigation system with Arduino is less about copying a wiring diagram and more about establishing a robust engineering workflow. By upgrading to an ESP32 for OTA capabilities, utilizing capacitive sensors with proper waterproofing, and writing non-blocking state-machine code, you transition from building a fragile science fair project to deploying a resilient, set-and-forget agricultural tool. Optimize your workflow, respect the hardware's limitations, and your system will keep your garden thriving for years to come.