
Why Upgrade Your Electric Dryer Outlet?
If your home was built before 1996, your laundry room likely features a 3-prong NEMA 10-30R receptacle. While the National Electrical Code (NEC) grandfathered these legacy installations, upgrading your electric dryer outlet to a modern 4-prong NEMA 14-30R is a critical safety improvement. The transition from a 3-wire to a 4-wire system separates the equipment ground from the current-carrying neutral, drastically reducing the risk of lethal chassis electrification in the event of a neutral fault.
According to the U.S. Fire Administration, electrical failures and improper grounding are leading factors in residential dryer fires. This comprehensive 2026 upgrade guide details the exact tools, NEC code requirements, and step-by-step procedures required to replace a legacy 3-prong electric dryer outlet with a code-compliant 4-prong receptacle.
Understanding the Code: 3-Prong vs. 4-Prong Outlets
Before 1996, the NEC allowed the dryer's metal frame to be bonded to the neutral wire. This meant the neutral wire carried both the 120V unbalanced return current and served as the safety ground. If that neutral wire broke or developed high resistance, the dryer chassis could become energized at 120V. The modern 4-wire system eliminates this hazard.
| Feature | NEMA 10-30R (3-Prong Legacy) | NEMA 14-30R (4-Prong Modern) |
|---|---|---|
| Wire Configuration | 2 Hots, 1 Neutral (No dedicated ground) | 2 Hots, 1 Neutral, 1 Equipment Ground |
| Chassis Bonding | Bonded to Neutral at dryer terminal block | Bonded to dedicated Ground wire only |
| NEC Status (2026) | Legacy only (permitted in existing installs) | Mandatory for all new construction & upgrades |
| Safety Risk | High (chassis energization if neutral fails) | Low (fault current safely clears via ground) |
Tools and Materials for the Dryer Outlet Replacement
Do not compromise on component quality for a 240V/30A circuit. Cheap receptacles can suffer from terminal loosening and thermal runaway. Here is the professional-grade bill of materials (BOM) for this upgrade:
- Receptacle: Leviton 278-S00 NEMA 14-30R (Approx. $14.50)
- Dryer Cord: 4-Prong 30-Amp Cord, 14-30P plug, 6ft (Approx. $28.00)
- Ground Wire: 10 AWG THHN Green stranded copper (Approx. $0.75/ft)
- Multimeter: Fluke 117 True-RMS Multimeter for CAT III 600V verification
- Torque Screwdriver: Klein Tools 69010 (calibrated to 14 in-lbs)
- Wire Strippers: Klein Tools 11063W (10-14 AWG precision stripper)
Total DIY Material Cost: $55 - $75 | Professional Electrician Labor (2 hours): $180 - $280
Step-by-Step Electric Dryer Outlet Upgrade Procedure
Phase 1: Preparation and Safety Lockout
- Locate the 30-amp double-pole breaker (typically a Square D HOM230 or Eaton BR230) in your main service panel.
- Switch the breaker to the OFF position and apply a physical lockout/tagout device.
- Remove the old dryer cord from the wall.
- Use your Fluke 117 multimeter to test the old receptacle. Measure L1 to L2 (should read 0V), L1 to Neutral (0V), and L2 to Neutral (0V). Never assume a breaker is off without testing.
Phase 2: Removing the Old 3-Prong Receptacle
Unscrew the center mounting screw and pull the NEMA 10-30R out of the junction box. You will see three wires: Red (Hot 1), Black (Hot 2), and White (Neutral). Note the absence of a dedicated ground wire. If your home uses flexible metal conduit (FMC) or rigid metal conduit (RMC), the conduit may serve as a ground path per NEC Article 250.118. However, for guaranteed low-impedance fault clearing in 2026, pulling a dedicated 10 AWG ground wire is the absolute best practice.
Phase 3: Pulling the New Ground Wire
If you do not have a continuous metal conduit ground path, you must run a new ground wire to the main panel.
- Use a fish tape to pull a 10 AWG green THHN wire from the dryer junction box back to the main service panel.
- Terminate the green wire to the panel's dedicated equipment grounding bar (not the neutral bar, unless it is a main service disconnect where they are bonded).
- Route the wire neatly, securing it with cable staples every 4.5 feet as per NEC 334.30.
Phase 4: Wiring the New NEMA 14-30R Receptacle
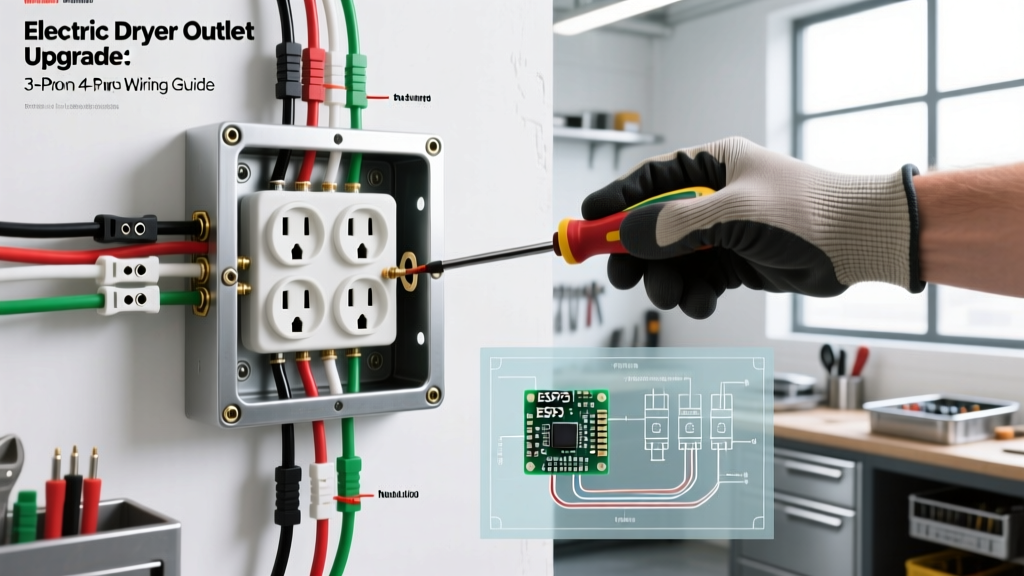
Strip exactly 3/4 inch of insulation from all four conductors using your precision strippers. Connect the wires to the Leviton 278-S00 receptacle as follows:
- X Terminal (Brass): Red Hot Wire (L1)
- Y Terminal (Brass): Black Hot Wire (L2)
- W Terminal (Silver): White Neutral Wire
- G Terminal (Green): Green/Bare Equipment Ground Wire
CRITICAL E-E-A-T TIP: Do not just tighten the screws by feel. Use a torque screwdriver set to 14 in-lbs (Leviton's specification for 10 AWG wire). Under-torqued 240V terminals are the #1 cause of receptacle melt-downs and electrical fires due to micro-arcing and thermal expansion.
Push the receptacle into the deep junction box, secure it with the mounting strap, and install the faceplate. Turn the breaker back on and verify 240V across X and Y, and 120V from X to W and Y to W.
Upgrading the Dryer Cord: The Bonding Strap Hazard
Upgrading the wall outlet is only half the job. You must also change the dryer's power cord to a 4-prong NEMA 14-30P cord and, most importantly, remove the neutral-to-chassis bonding strap on the dryer's terminal block.
On a 3-wire system, a copper strap or heavy green wire connects the center Neutral terminal to the metal frame. On a 4-wire system, this strap must be removed. If you leave the bonding strap in place while using a 4-prong cord, you will create a parallel neutral path. This will cause return current to flow on the ground wire, potentially tripping GFCI/AFCI breakers upstream and creating a severe shock hazard if the neutral wire ever disconnects.
- Remove the dryer's rear access panel.
- Locate the 3-terminal block (L1, Neutral, L2).
- Disconnect the bonding strap from the center Neutral terminal and fold it back or remove it entirely. Store it in the dryer's manual pouch for future reference.
- Connect the new 4-prong cord: Red to L1, White to Neutral, Black to L2, and Green to the dedicated chassis ground screw (usually painted green or marked with a ground symbol).
Troubleshooting Common Failure Modes
Even with a flawless installation, edge cases occur. Use this diagnostic matrix if the dryer fails to operate correctly after the outlet upgrade.
| Symptom | Probable Cause | Multimeter Diagnostic |
|---|---|---|
| Dryer runs, tumbles, but produces zero heat. | Loss of one 120V leg (L1 or L2) or blown thermal fuse. | Test receptacle X-Y. If reading is 120V instead of 240V, a hot leg is open. Check breaker and wire connections. |
| Dryer is completely dead (no lights, no motor). | Loss of Neutral (120V control circuit dead) or both hots tripped. | Test X-W and Y-W. If 0V on both, neutral is open. Check the silver W terminal on the receptacle. |
| Breaker trips immediately upon plugging in. | Neutral bonded to ground at dryer (parallel path) or shorted cord. | Disconnect cord. Test continuity between Neutral blade and Ground pin on the cord plug. Should be OPEN (infinite). If closed, bonding strap is still attached. |
| Receptacle faceplate is hot to the touch after 20 mins. | Loose terminal connections causing high-resistance arcing. | Turn off power immediately. Remove faceplate and check for melted insulation. Re-torque all terminals to 14 in-lbs. |
Frequently Asked Questions
Can I just use an adapter plug instead of replacing the outlet?
No. Using a 3-prong to 4-prong cheater adapter is a severe violation of the NEC and voids your home insurance. Adapters do not provide a legitimate low-impedance ground path and are a primary cause of dryer-related electrical fires.
What if my junction box is too shallow for the 14-30R?
NEMA 14-30R receptacles have a deep yoke and require a minimum box depth of 2.25 inches. If your existing box is a shallow 1.5-inch pancake box, you must install a surface-mount extension ring or replace the box with a deep masonry/steel box to accommodate the thick 10 AWG wires without violating NEC box fill calculations (Article 314.16).
Does the CPSC recommend annual inspections for 240V outlets?
While the CPSC does not mandate annual inspections for private residences, they strongly recommend visually inspecting 240V receptacles for scorch marks, loose plugs, and thermal damage every few years. If the plug falls out of the receptacle under its own weight, the internal tension contacts have fatigued and the receptacle must be replaced immediately.