
Engineering the Commercial Auto Electrical Wiring Harness
Commercial fleets, heavy machinery, and custom upfit work trucks demand absolute reliability. When a Power Take-Off (PTO) circuit, snowplow controller, or auxiliary lighting system fails on a job site, the cost of downtime routinely exceeds $150 per hour in lost productivity. Building a robust auto electrical wiring harness for these environments goes far beyond consumer automotive DIY projects. It requires strict adherence to SAE standards, precise crimping methodologies, and advanced abrasion mitigation.
As of 2026, the integration of high-draw electric PTOs, advanced telematics, and high-voltage auxiliary systems in Class 4 through Class 8 trucks means harnesses must handle higher continuous currents while resisting extreme thermal cycling, high-frequency vibration, and chemical exposure. This guide details the professional engineering, material selection, and assembly protocols required for commercial-grade harness fabrication.
Core Material Selection: Insulation and Conductor Specs
Consumer vehicles often use standard PVC-insulated wire, which becomes brittle at low temperatures and melts under high engine bay heat. Commercial harness fabrication strictly utilizes Cross-Linked Polyethylene (XLPE) insulation. According to the SAE International standards, XLPE provides superior thermal and chemical resistance.
Wire Insulation Comparison Matrix
| Type | Insulation Thickness | Max Temp Rating | Best Commercial Application |
|---|---|---|---|
| TXL (Thin Wall) | 0.016 inches | 125°C (257°F) | Interior cab routing, telematics, low-draw sensor networks where weight and flexibility are priorities. |
| GXL (General Wall) | 0.022 inches | 125°C (257°F) | Standard chassis routing, auxiliary lighting, and general-purpose commercial upfits. The industry default. |
| SXL (Special Wall) | 0.032 inches | 125°C (257°F) | High-heat engine bay zones, exhaust proximity routing, and heavy abrasion environments (e.g., dump truck hydraulics). |
For high-current applications like electric winches or PTO solenoids, 8 AWG or 6 AWG SXL wire is mandatory. For standard ECU and relay control circuits, 16 AWG to 14 AWG TXL is sufficient and keeps the harness bundle diameter manageable.
Connector Ecosystem: Sealing Out the Elements
Standard blade terminals and push-on spade connectors have no place in a commercial exterior harness. Moisture ingress leads to galvanic corrosion, increasing resistance and causing voltage drops that trigger false ECU fault codes. Commercial harnesses rely on environmentally sealed, multi-pin connector systems.
- TE Connectivity DEUTSCH DT Series: The gold standard for heavy-duty equipment. Rated for 13 amps continuous per contact, featuring an IP68 environmental seal and rugged thermoplastic housings. Ideal for high-vibration chassis connections.
- DEUTSCH DTM Series: A smaller form factor rated for 7.5 amps. Used extensively for sensor arrays, CAN bus extensions, and low-draw LED marker lighting.
- Aptiv Weather-Pack: Rated up to 20 amps with robust silicone seals. While slightly bulkier than the DT series, they are highly cost-effective for high-draw auxiliary circuits like work lights and beacon strobes.
Pro Tip: Always use the correct extraction tool for DEUTSCH connectors. Forcing a pin out with a paperclip or screwdriver will compromise the internal retaining tang, leading to terminal push-back—a leading cause of intermittent failures in heavy machinery.
Crimp Tooling and Terminal Architecture
The reliability of an auto electrical wiring harness is entirely dependent on the quality of the crimp. A poor crimp creates micro-gaps where oxygen and moisture initiate oxidation, eventually leading to thermal runaway and melted housings.
Open Barrel vs. Closed Barrel Crimps
Commercial harness manufacturers predominantly use open barrel (F-crimp) terminals. Unlike closed barrel terminals that require stripping and inserting the wire into a tube, open barrel terminals feature a wire grip and an insulation grip. When compressed with a precision ratcheting tool (such as the TE Connectivity AMP crimpers), the wire grip forms a cold-weld connection, while the insulation grip absorbs mechanical vibration, preventing the copper strands from fatiguing and snapping at the termination point.
Cost Reality: A professional-grade, calibrated open-barrel crimping setup costs between $400 and $850. While expensive, it is non-negotiable for commercial fleet upfitters to ensure IPC-compliant terminations.
Routing, Looming, and Abrasion Mitigation
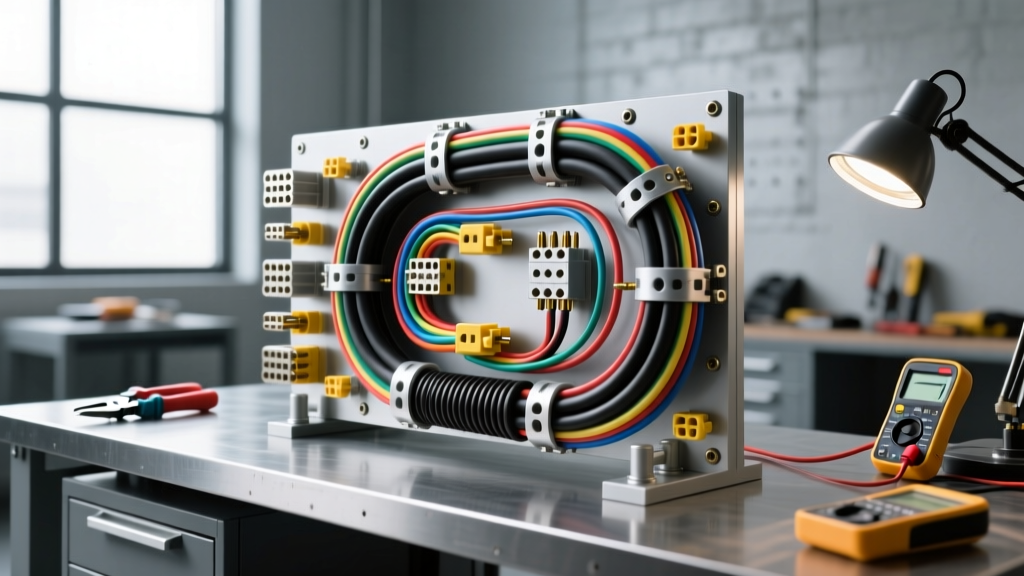
Vibration is the silent killer of commercial wiring. A harness zip-tied too tightly against a steel chassis rail will saw through standard split-loom within months. Follow this step-by-step protocol for chassis routing:
- Primary Wrapping: Wrap the harness bundle in Tesa 51036 PET cloth tape. This tape operates from -40°C to +150°C, provides excellent abrasion resistance, and dampens the 'rattle' of wires vibrating against plastic interior trim.
- Secondary Sleeving: For sections exposed to road debris or moving suspension components, slide the taped bundle into Techflex F6 fiberglass sleeving or heavy-duty nylon braided sleeving.
- Chassis Attachment: Use rubber-cushioned Adel clamps (P-clamps) spaced no more than 12 inches apart. Never use standard nylon zip-ties directly against sharp metal edges without an edge-clip protector.
- Firewall Pass-Through: Drill a clean hole, deburr the edges, and install a rigid rubber grommet. Secure the harness with a clamp within 2 inches of the grommet on both sides to prevent the wire from sliding back and forth through the grommet during vehicle articulation.
Circuit Protection and Power Distribution
Commercial vehicles require centralized, weather-sealed power distribution. Instead of tapping into the factory fuse box (which often lacks the spare amperage for commercial upfits), install a standalone Marinco or Blue Sea Systems heavy-duty fuse block in the engine bay.
Use MAXI or MEGA fuses for high-draw circuits (40A to 150A) and standard ATO/ATC fuses for branch circuits. Always place the fuse as close to the power source (battery or alternator stud) as physically possible—ideally within 7 inches. This ensures that if the main feed wire chafes against the chassis, the circuit is interrupted before it can start an electrical fire.
Testing and Validation Protocols
Before a commercial harness is energized or handed over to a fleet manager, it must undergo rigorous validation. The IPC-A-620 standard for cable and wire harness assemblies outlines the accepted criteria for Class 3 (High Performance) electronic assemblies, which is the benchmark for heavy-duty commercial vehicles.
The Millivolt Drop Test
Do not rely solely on a standard continuity beep from a multimeter. A single strand of 14 AWG wire will trigger a continuity beep, but it will melt under a 15-amp load. You must perform a voltage drop test under load.
- Acceptable Threshold: A maximum voltage drop of 3% (0.36V on a 12V system) from the power source to the load, and another 3% on the ground return path.
- Procedure: Energize the circuit (e.g., turn on a 55W halogen work light). Place your multimeter's red probe on the battery positive terminal and the black probe on the load's positive terminal. Record the millivolt reading. Repeat for the ground side.
Common Failure Modes in the Field
Even well-designed harnesses fail if edge cases are ignored. Be aware of these three common commercial failure modes:
- Capillary Wicking: If a wire is cut and stripped in a humid environment, moisture can wick up inside the insulation jacket via capillary action, corroding the terminal from the inside out. Solution: Use adhesive-lined, dual-wall heat shrink (3M FP-301 or equivalent) with a minimum 3:1 shrink ratio to create a watertight environmental seal at every splice and terminal.
- Galvanic Corrosion: Mating copper terminals to aluminum busbars or chassis grounds without a dielectric interface creates a battery effect, rapidly destroying the connection. Solution: Apply a conductive anti-oxidant paste or a high-quality dielectric grease like MG Chemicals 8463 to all ground ring terminals.
- Relay Coil Flyback: Switching off heavy inductive loads (like hydraulic solenoids or large contactors) sends a massive voltage spike back through the control circuit, frying solid-state switches and ECU drivers. Solution: Always install a flyback diode (e.g., 1N4007) across the relay coil terminals, with the cathode facing the positive feed.
Summary of Commercial Upfit Economics
Designing and fabricating a custom auto electrical wiring harness for a commercial fleet vehicle is an investment in operational continuity. As of 2026, a fully engineered, IPC-compliant custom harness for a complex Class 6 work truck upfit (integrating PTO controls, beacon lighting, and inverter feeds) typically costs between $1,200 and $3,500 in materials and specialized labor. While this represents a higher upfront cost than basic aftermarket kits, the elimination of electrical downtime and the extension of the vehicle's service life yield a massive return on investment for fleet operators.
For further reading on heavy-duty connector ecosystems and automated crimping technologies, refer to the TE Connectivity automotive engineering resources.