
The 2026 Shift: Residential Water Heaters in RVs and Skoolies
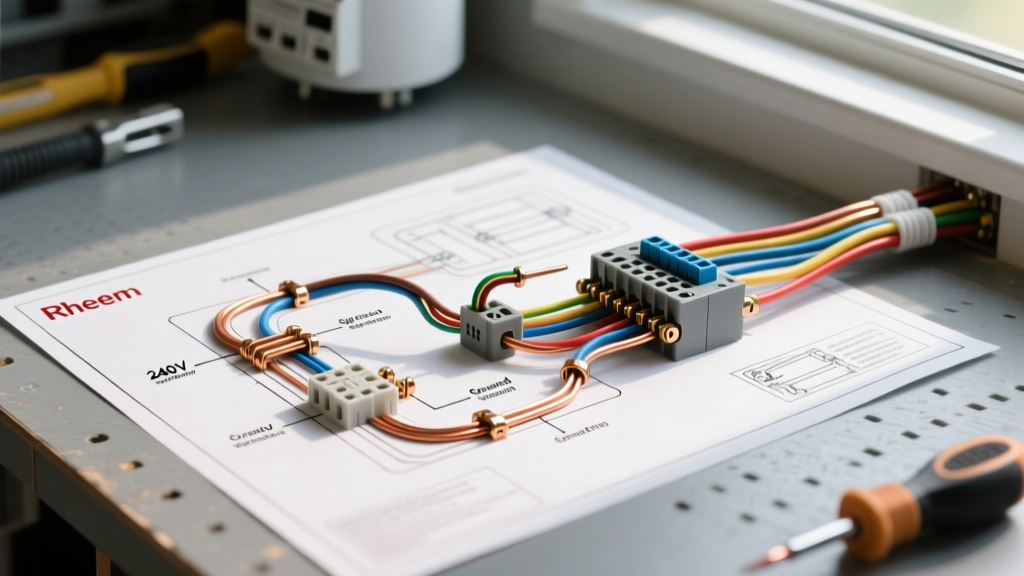
Upgrading an RV, skoolie, or expedition vehicle with a residential water heater is a major trend in the 2026 vanlife and motorhome conversion community. Standard 6-gallon RV water heaters simply cannot keep up with the demands of full-time boondocking or large families. Consequently, many builders are turning to compact residential tanks. However, integrating a standard residential unit into a mobile DC/AC electrical architecture requires a precise wiring diagram for Rheem electric water heater applications, specifically adapted for the unique constraints of a vehicle chassis.
Rheem electric models, such as the Marathon and Performance lines, are highly sought after for their durability and insulation. But unlike 120V RV-specific appliances, these residential units demand 240V split-phase power to operate their high-wattage heating elements. This guide provides a comprehensive, vehicle-specific wiring blueprint to safely integrate these units into your RVs main distribution panel or off-grid inverter setup.
The 240V Vehicle Dilemma: Shore Power vs. Inverter Integration
Before pulling any wire, you must address the power source. A standard 30-amp RV shore power connection only provides a single 120V leg. You cannot run a 240V Rheem water heater on a 30-amp RV pedestal. To successfully wire this appliance, your vehicle must be equipped with one of the following:
- 50-Amp Shore Power Service: Provides two 120V legs (L1 and L2) that are 180 degrees out of phase, yielding 240V when measured across both hot wires.
- Split-Phase Inverter System: For off-grid boondocking, you must use a dual-inverter setup (such as two Victron MultiPlus II units configured in split-phase) or a specialized 240V transformer to step up your 120V inverter output.
Expert Warning: Never attempt to wire a 240V Rheem water heater to a single 120V inverter leg using a step-up transformer without isolating the neutral. Doing so will backfeed your RVs 120V appliances with 240V, causing catastrophic failure and potential fire.
Core Specifications: Rheem Compact Models for Mobile Use
Selecting the correct wire gauge and breaker size is dictated by the specific Rheem model you have installed. In vehicle applications, space is limited, making the 20-gallon and 30-gallon models the most common choices. Below is the reference matrix for the most frequently installed units in 2026 skoolie and Class A builds.
| Rheem Model | Capacity | Element Wattage | Required Breaker | Minimum Wire Gauge |
|---|---|---|---|---|
| Marathon MR2020245 | 20 Gallon | 2000W | 20A Double-Pole | 12 AWG Stranded |
| Performance XE30M06ST45U1 | 30 Gallon | 4500W | 30A Double-Pole | 10 AWG Stranded |
| ProTerra Hybrid (Custom RV) | 50 Gallon | 3500W (Peak) | 30A Double-Pole | 10 AWG Stranded |
For detailed manufacturer specifications and energy factor ratings, always consult the official Rheem water heater documentation before finalizing your panel layout.
Step-by-Step Wiring Diagram Execution
Unlike stationary homes where Romex (solid core NM-B) is standard, vehicle wiring requires THHN/THWN stranded wire routed through flexible conduit to withstand chassis vibration and thermal expansion. Here is the exact sequence for wiring the Rheem unit from the breaker panel to the heating elements.
Step 1: Main Panel to the Junction Box
Run your 10 AWG (or 12 AWG) stranded wire from the RVs main AC distribution panel to the water heaters junction box. You will need three conductors plus a ground:
- L1 (Black): Connects to the first pole of the double-pole breaker.
- L2 (Red or White with black tape): Connects to the second pole of the double-pole breaker.
- Ground (Green or Bare): Connects to the dedicated ground bus bar in the panel.
Note: A neutral wire is NOT required for standard 240V Rheem electric water heaters. The elements operate purely on the 240V potential between L1 and L2.
Step 2: Junction Box to the Upper Thermostat
Remove the access panel on the top heating element of the Rheem tank. Route your conductors through the Romex connector (ensure the clamp is tightened to prevent wire chafing against the metal tank).
- Connect the Black (L1) wire to the top-left terminal on the upper thermostat (marked L1).
- Connect the Red (L2) wire to the top-right terminal on the upper thermostat (marked L3).
- Connect the Ground wire to the green grounding screw located on the tank chassis or junction box.
Step 3: Thermostat to Element Jumpers
The upper thermostat acts as the master switch, routing power to the lower thermostat based on the water temperature gradient. Use the pre-installed jumper wires (or 10 AWG stranded jumpers if replacing):
- Run a jumper from the bottom-left terminal of the upper thermostat to the left terminal of the upper heating element.
- Run a jumper from the bottom-right terminal of the upper thermostat to the right terminal of the upper heating element.
- Run jumper wires from the upper heating element terminals down to the corresponding left and right terminals on the lower thermostat, and subsequently to the lower heating element.
For broader electrical safety standards and grounding requirements in mobile environments, refer to the National Electrical Code (NFPA 70), specifically Article 551 regarding Recreational Vehicles.
Vehicle-Specific Constraints: Vibration and Chassis Grounding
Wiring a Rheem water heater in a vehicle introduces mechanical stresses that do not exist in residential basements. Standard screw terminals on the thermostats can vibrate loose over thousands of miles of travel, leading to arcing, melted wires, or total power loss to the elements.
Mitigation Strategies for Mobile Installs
- Crimp Ferrules: Strip the stranded THHN wire and crimp a copper bootlace ferrule onto the end before inserting it into the thermostat screw terminals. This prevents the screw from fraying the stranded wire and ensures a gas-tight connection.
- Thread Locker: Apply a small drop of blue Loctite to the grounding screw on the tank chassis to prevent it from backing out due to road vibration.
- Flexible Conduit: Never run bare wire behind the tank. Use liquid-tight flexible metallic conduit (LFMC) from the RV wall to the tank junction box to allow for tank expansion and vibration isolation.
NEC Article 551 and Equipment Bonding
According to the U.S. Department of Energys guidelines and NEC Article 551.54, the exposed non-current-carrying metal parts of fixed appliances in an RV must be grounded. The green grounding screw on the Rheem water heater must be bonded to the vehicles main equipment grounding conductor, which ultimately ties back to the shore power inlet ground and the vehicle chassis ground.
Do not rely solely on the water pipes for a ground path. While PEX plumbing is standard in modern RVs, PEX is non-conductive. Therefore, a dedicated copper grounding conductor run back to the AC panel is absolutely mandatory for safety and to ensure the double-pole breaker trips instantly in the event of a short circuit.
Troubleshooting Common RV Water Heater Wiring Faults
Even with a perfect wiring diagram for Rheem electric water heater setups, mobile environments can introduce unique faults. Use this diagnostic matrix if your system fails to heat water:
- Symptom: Breaker trips immediately upon inverter transfer.
Cause: The inverter transfer switch delay is too short, or the 240V split-phase inverters are out of sync. Ensure your Victron or Schneider inverter firmware is updated and configured for a minimum 2-second transfer delay to prevent phase-collision spikes. - Symptom: Water is lukewarm, but elements test fine.
Cause: You have wired the unit to a single 120V leg instead of 240V. The 4500W element is only receiving 1125W of power at 120V. Check the voltage across L1 and L2 at the junction box; it must read 240V. - Symptom: Upper element burned out or melted terminal.
Cause: Dry-firing. If the RV water system was not fully purged of air and the tank was not 100% full of water before the breaker was turned on, the upper element will vaporize in seconds. Always open a hot water faucet and wait for a solid stream of water before energizing the circuit.
Final Commissioning Checklist
Before closing up your RVs interior panels, complete this final verification:
- Verify double-pole breaker is OFF.
- Fill the Rheem tank completely and purge all air from the RV plumbing lines.
- Check for plumbing leaks around the cold water inlet and hot water outlet.
- Use a multimeter to verify 240V at the breaker terminals (L1 to L2).
- Turn the breaker ON and measure the current draw with a clamp meter. A 4500W element should draw approximately 18.75 amps.
- Confirm the ECO (Energy Cut Off) reset button on the upper thermostat is fully depressed and seated.
By adhering strictly to this vehicle-specific wiring diagram and respecting the mechanical realities of mobile electrical systems, your Rheem electric water heater will provide reliable, endless hot water for your off-grid adventures.