
The Core Hazard: Solderless ABS vs. Solderable FR4 Substrates
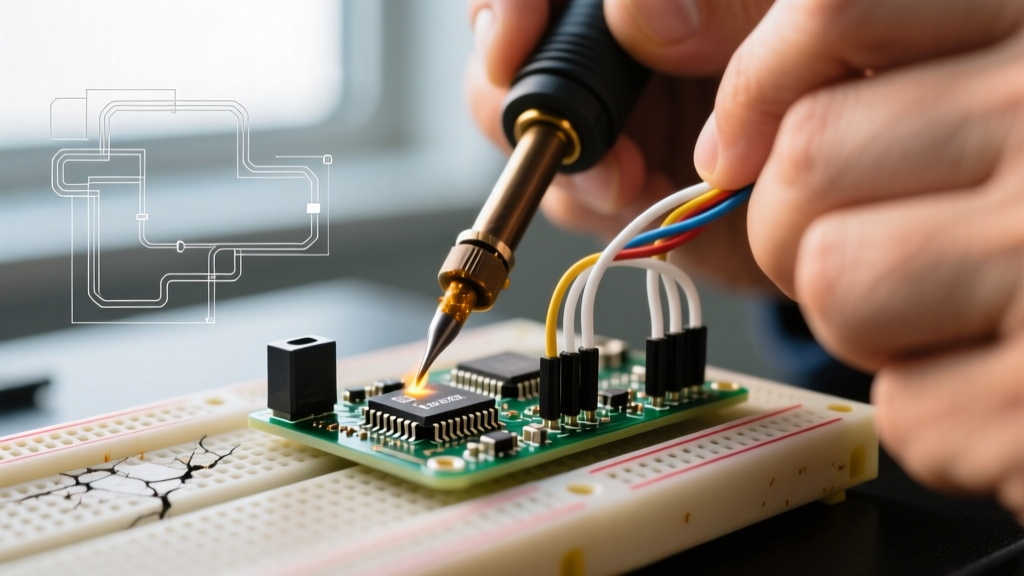
The most critical safety mistake in electronics prototyping is attempting to permanently solder components directly onto a standard, solderless breadboard. Standard solderless breadboards—like the ubiquitous white blocks sold by HiLetgo or Elegoo—are constructed from ABS (Acrylonitrile Butadiene Styrene) or polystyrene plastics. These materials are engineered to hold spring-clip contacts at room temperature, not to withstand the 300°C to 400°C thermal shock of a soldering iron tip.
When a soldering iron contacts ABS plastic, the material doesn't just melt; it thermally degrades. This releases highly toxic volatile organic compounds (VOCs), including styrene gas and, in some cases, hydrogen cyanide. Furthermore, the structural integrity of the board collapses, permanently ruining the internal metal clips and creating an immediate short-circuit hazard. According to guidelines published by NIOSH (National Institute for Occupational Safety and Health), inhaling degraded plastic particulates and rosin flux fumes in unventilated areas is a primary cause of occupational asthma and respiratory irritation in electronics manufacturing.
True breadboard soldering must only be performed on specialized 'solderable breadboards' (also known as perfboards with breadboard layouts). These boards replicate the exact 0.1-inch (2.54mm) pitch and power rail layout of a solderless board but are manufactured from high-temperature FR4 glass-epoxy or phenolic resins, plated with copper and finished with HASL (Hot Air Solder Leveling) or ENIG (Electroless Nickel Immersion Gold).
Material Identification Matrix: Know Your Substrate
Before applying heat, you must identify the substrate material. The table below outlines the thermal limits and safety profiles of common prototyping boards available on the market in 2026.
| Substrate Material | Common Brand/Type | Max Safe Temp (10s) | Degradation Point | Toxicity Risk When Soldered |
|---|---|---|---|---|
| ABS Plastic | Generic Solderless (HiLetgo, Elegoo) | 80°C | ~220°C | HIGH (Styrene, HCN, VOCs) |
| Phenolic Resin | Xprotelab, Vintage Vero Boards | 130°C | ~170°C | MODERATE (Formaldehyde off-gassing) |
| FR4 Glass-Epoxy | BusBoard SBB400, Adafruit Perma-Proto | 260°C | >300°C | LOW (Standard flux fumes only) |
Fume Extraction and Respiratory Safety
Even when using the correct FR4 solderable breadboard, the flux core inside your solder wire generates hazardous fumes. Rosin-based fluxes (R and RMA) emit colophony smoke when heated, a known respiratory sensitizer. The IPC J-STD-001 standard for soldered electrical assemblies mandates strict controls for flux fume exposure to prevent long-term sensitization.
Choosing the Right Fume Extractor
Do not rely on a simple desk fan to blow fumes away; this merely disperses colophony and lead particulates (if using SnPb solder) across your workspace. You need active carbon filtration or external exhaust.
- Entry-Level (Fan + Carbon Filter): The Hakko FA-400 (approx. $85) pulls 35 CFM through a replaceable H100 activated carbon filter. It captures large particulates and reduces VOC odor, but the filter must be replaced every 40-60 hours of active soldering.
- Professional (HEPA + Activated Carbon Boom): The Weller WSA350 (approx. $180) offers 85 CFM with a flexible capture arm. This is the recommended setup for heavy breadboard soldering sessions, as it captures sub-micron flux particulates before they reach your breathing zone.
Expert Tip: Position your fume extractor's capture nozzle exactly 4 to 6 inches from the solder joint. Beyond 8 inches, the capture velocity drops exponentially, allowing thermal updrafts to carry toxic flux smoke directly past your face.
Thermal Management and Trace Delamination
FR4 solderable breadboards, such as the industry-standard BusBoard Prototype Systems SBB400 ($14.95), feature Plated Through-Holes (PTH). PTH barrels act as thermal vias, wicking solder rapidly and reducing the required dwell time. However, excessive heat will still cause the copper pads to delaminate from the glass-epoxy core.
The 3-Second Rule and Iron Calibration
To prevent pad lifting and substrate scorching, strict thermal management is required. Modern smart irons like the Pinecil V2 ($26) or the Weller WE1010 ($115) feature rapid thermal recovery, allowing you to run lower tip temperatures without suffering from cold joints.
- For 63/37 SnPb Eutectic Solder: Set your iron to 300°C - 315°C. The solder melts at 183°C, providing a massive thermal delta for fast wetting.
- For SAC305 Lead-Free Solder: Set your iron to 340°C - 350°C. SAC305 melts at 217°C and has poor wetting characteristics compared to leaded solder.
Apply the iron tip to the component lead and the copper pad simultaneously. Feed the solder wire into the joint (not onto the iron tip). The joint should flow and form a concave fillet within 1.5 to 3 seconds. If the solder does not flow within 3 seconds, remove the iron, allow the board to cool for 10 seconds, apply additional liquid flux, and try again. Never hold the iron on a pad for more than 5 seconds.
Preventing Electrical Shorts on 0.1-Inch Grids
Breadboard layouts feature a dense 0.1-inch (2.54mm) pitch. When soldering adjacent pins—especially on DIP ICs or dense resistor networks—solder bridges are a primary failure mode. Solder bridges on a breadboard layout can short VCC to GND, potentially destroying your microcontroller upon first power-up.
Flux Selection and Cleaning Protocols
The secret to avoiding solder bridges is not a steadier hand; it is high-quality flux. Flux reduces the surface tension of the molten solder, allowing it to cling to the copper pads rather than bridging across the FR4 gap.
- Use No-Clean or Water-Soluble Flux: For prototyping, a no-clean tacky flux like Amtech NC-559-V2-TF is ideal. It provides excellent wetting and leaves a clear, non-conductive residue.
- Desoldering Bridges: If a bridge occurs, do not attempt to drag it away with the iron tip. Apply fresh liquid flux, place a 2.0mm wide copper desoldering braid (e.g., Chemtronics 80-1-5) over the bridge, and press the hot iron directly onto the braid. Capillary action will instantly vacuum the excess solder away.
- Post-Solder Cleaning: While no-clean flux is technically safe to leave on the board, it can trap moisture in humid environments. Clean the finished breadboard using 99% Isopropyl Alcohol (IPA) and an ESD-safe hog-hair brush. Avoid 70% rubbing alcohol, as the 30% water content can induce corrosion on unpowered copper traces.
Step-by-Step Safe Breadboard Soldering Protocol
Follow this exact sequence to ensure maximum safety and joint reliability when transitioning a circuit from a solderless prototype to a permanent FR4 solderable breadboard.
- Workspace Prep: Power on your fume extractor and verify airflow. Ensure your silicone soldering mat is flat to prevent the board from rocking.
- Board Securing: Use a 'Helping Hands' tool or a PCB vise to hold the solderable breadboard at a 15-to-30-degree angle. This prevents molten solder from dripping onto your desk or skin.
- Component Insertion: Insert components into the PTH holes. Bend the leads outward at a 45-degree angle to secure the component mechanically before soldering.
- Flux Application: Brush a small amount of liquid RMA or No-Clean flux over the pads you intend to solder.
- Tinning the Tip: Melt a tiny amount of fresh solder onto your iron tip to create a thermal bridge. Wipe on a damp brass sponge.
- The Joint: Touch the tip to both the lead and the pad. Feed solder into the joint for 1.5 - 3 seconds until a shiny, concave fillet forms.
- Inspection: Inspect the joint under a magnifying lamp. A dull, grainy joint indicates a cold solder joint (usually caused by movement during cooling or insufficient heat). Re-flow with fresh flux if necessary.
- Lead Trimming: Once the board is fully soldered and cooled, use flush cutters (e.g., Hakko CHP-170) to trim the component leads flush to the solder fillet. Wear ANSI Z87.1 safety glasses to prevent copper shrapnel from causing eye injury.
Final Thoughts on Prototyping Safety
Transitioning from temporary solderless prototyping to permanent breadboard soldering is a major milestone in electronics design. By respecting the thermal limits of your substrates, investing in proper FR4 materials, and rigorously managing flux fumes, you protect both your respiratory health and the integrity of your circuits. Always prioritize ventilation and precise temperature control over speed, and your solderable breadboards will provide reliable, short-free service for years to come.