
The Intersection of Custom Electronics and Additive Manufacturing
Building a reliable smart home ecosystem requires more than just off-the-shelf commercial sensors. When executing advanced arduino and 3d printer projects, the synergy between microcontroller programming and custom enclosure design allows you to solve specific environmental monitoring challenges that mass-market products ignore. In 2026, the standard for DIY IoT nodes has shifted heavily toward the ESP32-S3 architecture, leveraging dual-core processing and native AI vector instructions for edge computing, all housed in precision-engineered, 3D-printed enclosures.
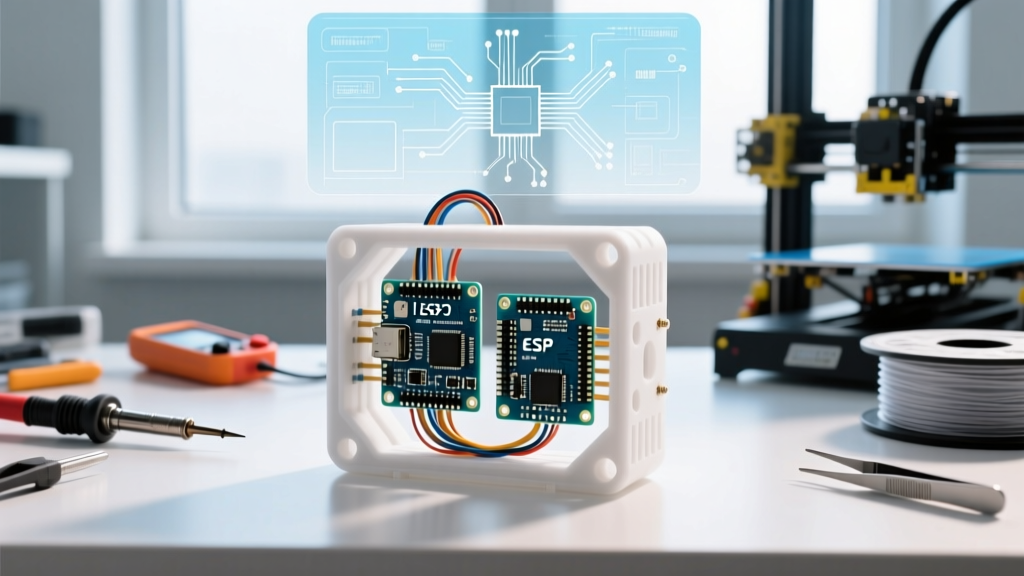
Many makers assume that arduino and 3d printer projects are limited to simple plastic boxes housing messy jumper wires. However, by integrating brass heat-set inserts, snap-fit tolerances, and thermal management channels, you can produce enclosures that rival injection-molded commercial IP65-rated housings. This guide details the complete workflow for building an ESP32-S3 Multi-Sensor IoT Node, covering hardware selection, 3D printing parameters, and MQTT firmware integration.
Project Blueprint: ESP32-S3 Multi-Sensor IoT Node
This project focuses on creating a ceiling-mounted environmental and occupancy sensor. It combines a BME680 (temperature, humidity, VOC, and barometric pressure) with an RCWL-0516 microwave radar module for through-wall human presence detection. The data is transmitted via Wi-Fi to a local Home Assistant instance using the MQTT protocol.
Bill of Materials (BOM) & Cost Breakdown
| Component | Model / Specification | Approx. Cost (2026) |
|---|---|---|
| Microcontroller | Espressif ESP32-S3-DevKitC-1 (N8R8) | $8.50 |
| Environmental Sensor | Bosch BME680 I2C Breakout | $12.00 |
| Occupancy Sensor | RCWL-0516 Microwave Radar | $2.80 |
| Power Supply | Mean Well IRM-03-5 (5V 3W AC-DC) | $7.50 |
| Hardware & Inserts | M3 Brass Heat-Set Inserts (5x4x3mm) | $4.00 |
| Total | $34.80 |
Selecting the Right Filament for IoT Enclosures
The thermal environment inside an IoT enclosure is often overlooked. The ESP32-S3 can generate significant heat, especially when transmitting at maximum 802.11n power (up to +20 dBm). Choosing the wrong filament will result in warping or structural failure over time.
- PLA (Polylactic Acid): Strictly avoid for ceiling-mounted or outdoor IoT nodes. PLA has a glass transition temperature of roughly 60°C. The internal ambient temperature of a sealed enclosure running an ESP32 can easily reach 45°C-50°C, causing PLA to soften and deform under the tension of snap-fits or mounting screws.
- PETG (Polyethylene Terephthalate Glycol): The ideal baseline for indoor arduino and 3d printer projects. With a glass transition temperature around 80°C, it withstands internal component heat easily. It offers excellent layer adhesion, preventing dust ingress. Print at 245°C nozzle / 85°C bed.
- ASA (Acrylonitrile Styrene Acrylate): Mandatory for outdoor nodes or areas with direct UV exposure (e.g., sunrooms, patios). ASA is UV-stable and has a higher heat deflection temperature than PETG. Print at 260°C nozzle / 105°C bed in a well-ventilated area due to styrene off-gassing.
Designing the Enclosure for Thermal Management
When modeling your enclosure in CAD software like Fusion 360 or FreeCAD, thermal management must be integrated into the geometry. The BME680 requires ambient airflow to accurately read room temperature, but you must prevent the heat generated by the ESP32-S3 and the Mean Well power supply from skewing the sensor readings.
Expert Tip: Use a 'labyrinth' or 'Z-baffle' vent design. Instead of cutting straight slats in the enclosure walls, design overlapping internal walls that force air to make 90-degree turns. This allows convective airflow for the BME680 while blocking direct line-of-sight dust accumulation and preventing light from interfering with optical sensors.
CAD Tolerances and Fasteners
Do not use self-tapping screws into 3D printed plastic for projects intended to be mounted permanently. They strip easily during maintenance. Instead, design M3 boss holes with a 4.0mm diameter. Using a soldering iron set to 300°C, press M3 brass heat-set inserts into the bosses. For the lid, design cantilever snap-fits with a 0.2mm interference fit and a 45-degree lead-in angle to ensure a tool-less, rattle-free assembly.
Wiring the ESP32-S3 to BME680 and Radar Sensors
Proper wiring is critical to avoid I2C bus contention and signal noise. The RCWL-0516 radar module is particularly sensitive to voltage ripple, which can cause false-positive occupancy triggers.
- BME680 (I2C): Connect SDA to GPIO8 and SCL to GPIO9 on the ESP32-S3. Use 4.7kΩ pull-up resistors on both lines if your breakout board does not have them populated. Power it from the 3.3V pin.
- RCWL-0516 (Radar): Connect the OUT pin to GPIO4. Power the radar module from the 5V rail of the Mean Well PSU, not the ESP32's onboard 3.3V regulator. The radar draws up to 3mA in standby but spikes during microwave emission. Add a 100µF electrolytic capacitor across the VCC and GND pins of the radar module to smooth out transient voltage drops.
- Antenna Placement: If your ESP32-S3 board features a U.FL connector for an external antenna, route the antenna wire to the top of the enclosure, away from the radar module's microwave field to prevent RF desensitization.
Firmware and MQTT Integration
For firmware, we utilize ESPHome in 2026, as it provides native support for the BME680's gas resistance calculations and seamless MQTT integration. According to the MQTT Protocol Specification, utilizing retained messages ensures that Home Assistant immediately reflects the last known state of the sensor upon a system reboot.
Below is a critical snippet of the ESPHome YAML configuration tailored for this specific hardware matrix:
i2c:
  sda: GPIO8
  scl: GPIO9
  scan: true

sensor:
  - platform: bme680_bsec
    address: 0x76
    temperature:
      name: 'Room Temperature'
      sample_rate: lp
      filters:
        - median: 5
    humidity:
      name: 'Room Humidity'
    iaq:
      name: 'Air Quality Index'

gpio:
  - platform: gpio
    pin:
      number: GPIO4
      mode: INPUT_PULLDOWN
    name: 'Microwave Occupancy'
    device_class: occupancy
    filters:
      - delayed_off: 30s
For deep integration, reference the Home Assistant MQTT Sensor Integration documentation to map the BME680's IAQ (Indoor Air Quality) index to color-coded dashboard badges. Furthermore, consult the Espressif ESP32-S3 Documentation if you decide to compile custom C++ firmware via the ESP-IDF framework to leverage the chip's deep-sleep current consumption (dropping to roughly 10µA for battery-operated variants).
Common Failure Modes and Troubleshooting
Even with precise CAD models and clean soldering, IoT nodes present unique edge cases. Here is how to troubleshoot the most common issues encountered in advanced arduino and 3d printer projects:
- Temperature Drift: If your BME680 reads 2-3°C higher than a reference thermometer, the ESP32's heat is trapped inside the enclosure. Solution: Add a 5V 30x30mm micro-fan controlled by a MOSFET, set to run for 60 seconds every 10 minutes, or increase the Z-baffle vent surface area by 40%.
- Radar False Positives: The RCWL-0516 detects movement through walls and ceilings. If mounted on a ceiling above a hallway, it may trigger when someone walks in the room above. Solution: Solder a 1MΩ resistor to the RCWL-0516's 'R9' pad to reduce the sensing range from 7 meters down to roughly 3 meters, or line the top of the enclosure with copper tape tied to ground to block upward microwave penetration.
- Wi-Fi Drops in Metal-Adjacent Areas: If mounting the node near HVAC ducts or metal beams, signal degradation occurs. Solution: Ensure your 3D printed enclosure does not contain carbon-fiber-infused filament (which is RF-opaque) and utilize an external 2.4GHz dipole antenna routed away from the Mean Well power supply's switching noise.
Conclusion
By treating the 3D printed enclosure not just as a shell, but as an active thermal and RF component, you elevate your builds from hobbyist experiments to permanent smart home infrastructure. Combining the ESP32-S3's robust processing capabilities with precision PETG or ASA printing ensures your IoT nodes remain accurate, durable, and seamlessly integrated into your living space for years to come.