
The Problem with Generic Arduino Car Kits
If you search for a robot car with arduino, you will find thousands of tutorials for line-following toys or ultrasonic obstacle-avoiders that inevitably end up gathering dust in a drawer. While excellent for learning basic H-bridge logic, these kits rarely solve real-world problems. As makers and engineers, we should leverage microcontrollers to gather actionable data from our environment.
One of the most persistent issues in modern, heavily insulated homes and offices is poor Indoor Air Quality (IAQ). According to the EPA Indoor Air Quality guidelines, indoor pollutant levels can be two to five times higher than outdoor levels. Stagnant air pockets, localized VOC off-gassing from new furniture, and HVAC dead zones are invisible to the naked eye. A stationary sensor only tells you about the air in one corner. The solution? A mobile sensor platform.
In this guide, we will design and build an autonomous, floor-mapping robot car with Arduino that sweeps a room in a lawnmower pattern, logging VOCs, CO2 equivalents, temperature, and humidity to an onboard SD card or via ESP-NOW to a central dashboard.
Hardware Selection: Moving Beyond Toy-Grade Components
The most common failure mode in DIY robotics is selecting components based on starter-kit availability rather than physical requirements. We need precision, not just movement.
| Component Category | Standard Kit Part (Avoid) | Problem-Solver Upgrade (Use) | Why It Matters |
|---|---|---|---|
| Drivetrain | TT Yellow Gearmotors | 6V 300RPM N20 JGA25-370 with Magnetic Encoders | TT motors suffer from massive wheel slip and lack feedback. N20 encoders allow for closed-loop PID control and exact dead-reckoning. |
| Motor Driver | L298N Dual H-Bridge | TB6612FNG Dual Motor Driver | The L298N uses BJT transistors, dropping up to 2V as heat. The TB6612FNG uses MOSFETs with a 0.5V drop, preserving battery life and torque. Read the SparkFun TB6612FNG Hookup Guide for wiring specifics. |
| IMU / Navigation | MPU6050 (Raw Accel/Gyro) | BNO055 Absolute Orientation Sensor | Raw sensor fusion via Kalman filters on an Arduino is CPU-intensive and prone to drift. The BNO055 handles sensor fusion onboard, outputting a stable quaternion heading. |
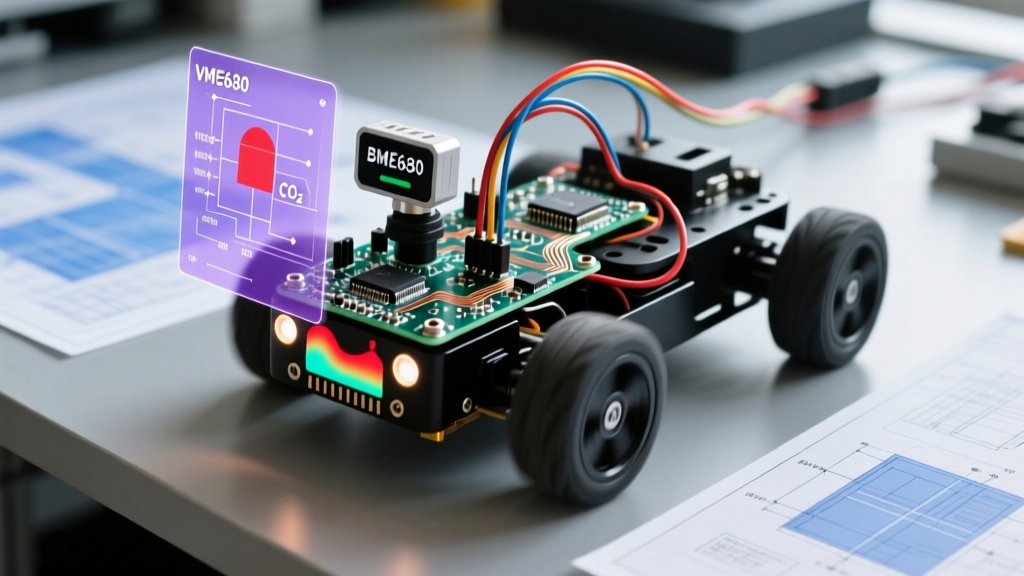
| Air Quality Sensor | MQ-135 Analog Gas Sensor | Bosch BME680 (I2C) | MQ sensors require a burn-in period, consume 800mW of heat (ruining local temp readings), and lack specificity. The BME680 provides calibrated IAQ indices via I2C. |
2026 Bill of Materials (BOM) & Pricing
Component pricing has stabilized post-supply-chain crisis. Here is the realistic cost to build a professional-grade IAQ mapping rover in 2026:
- Microcontroller: Arduino Nano 33 IoT or Seeed Studio XIAO ESP32S3 ($12 - $15) - Chosen for built-in Wi-Fi/BLE for telemetry.
- Drivetrain: 2x N20 300RPM Gearmotors with 12CPR Encoders ($18/pair)
- Wheels: 42mm Aluminum Hub Rubber Wheels ($8)
- Motor Driver: TB6612FNG Breakout ($6)
- IMU: Adafruit BNO055 Breakout ($25)
- Environmental Sensor: Bosch BME680 Breakout ($16)
- Power: 2S 7.4V 1200mAh LiPo + LM2596 Buck Converter ($18)
- Chassis: 3D Printed PLA+ Baseplate or CNC Acrylic ($10)
Total Estimated Cost: ~$113 - $120
Power Architecture: Bypassing the Linear Regulator Trap
Most tutorials instruct you to feed 7.4V from a LiPo directly into the Arduino's VIN pin. Do not do this. The onboard linear regulator will dissipate the excess voltage as heat. When your motors stall and draw 1.5A, the voltage sags, the linear regulator overheats, and the Arduino brownouts, corrupting your SD card logs.
The Fix: Use an LM2596 buck converter. Wire the 2S LiPo to the input of the buck converter, and use a multimeter to dial the output precisely to 5.1V. Connect this 5.1V directly to the Arduino's 5V pin (bypassing the onboard regulator entirely) and the TB6612FNG VCC logic line. Feed the raw 7.4V LiPo voltage only to the TB6612FNG VMOT terminal.
Sensor Integration and the I2C Noise Nightmare
Running PWM signals to motors while simultaneously polling I2C sensors is a recipe for bus lockups. The high-frequency switching of the TB6612FNG injects electromagnetic interference (EMI) into the I2C SDA/SCL lines, causing packet corruption.
Expert Mitigation Strategy: Keep I2C traces under 10cm. Use twisted-pair wiring for SDA/SCL. Add 4.7kΩ pull-up resistors to the 3.3V line (not 5V, to protect the BME680), and solder 100nF ceramic decoupling capacitors directly across the VCC and GND pins of both the BNO055 and BME680 breakout boards.
For absolute orientation, the Adafruit BNO055 must be mounted on a neoprene dampening pad to isolate it from high-frequency chassis vibrations caused by the N20 motors. Without vibration isolation, the internal accelerometer will interpret motor hum as physical tilting, ruining your dead-reckoning heading.
Navigation Logic: Boustrophedon Path Planning
To map a room efficiently, we use a Boustrophedon (lawnmower) algorithm. The robot car with Arduino doesn't just wander randomly; it executes a structured sweep.
- Wall Alignment: Use a pair of VL53L1X Time-of-Flight sensors to align parallel to the starting wall.
- Forward Sweep: Drive forward using closed-loop PID on the N20 magnetic encoders to maintain a perfectly straight line, correcting micro-drifts via the BNO055 yaw axis.
- End-of-Row Detection: A forward-facing HC-SR04 ultrasonic sensor detects the opposite wall. The car executes a precise 180-degree pivot using the BNO055's quaternion output.
- Lateral Shift: Drive laterally by exactly 30cm (the width of the sensor's effective sampling radius) and repeat.
Code Architecture: The State Machine
Avoid using delay() in your main loop. Air quality mapping requires continuous sensor polling. Implement a Finite State Machine (FSM) in your C++ code:
enum RoverState {
  STATE_IDLE,
  STATE_CALIBRATE_IMU,
  STATE_SWEEP_FORWARD,
  STATE_PIVOT,
  STATE_SHIFT_LATERAL,
  STATE_RETURN_DOCK
};
By wrapping the BME680's readGas() and BNO055's getQuat() functions inside a non-blocking timer interrupt (or a millis() based scheduler), you ensure that a 50ms I2C transaction doesn't cause the robot to overshoot its turning waypoint.
Real-World Troubleshooting Matrix
When building a robot car with arduino for data collection, you will encounter edge cases that toy kits never face. Here is how to solve them:
| Symptom | Root Cause | Hardware / Software Fix |
|---|---|---|
| BME680 VOC readings spike erratically when motors start. | Voltage sag on the 3.3V rail altering the gas heater resistance profile. | Add a 470µF electrolytic capacitor on the 3.3V rail near the sensor. Ensure the buck converter can supply at least 2A peak. |
| Robot drifts 15 degrees off-course over a 3-meter sweep. | Wheel slip on hardwood floors or mismatched encoder tick counts. | Implement a cross-coupling PID controller that compares left vs. right encoder ticks and dynamically adjusts PWM duty cycles to match. |
| I2C Bus hangs (SDA pulled low) mid-sweep. | EMI spike corrupting the I2C stop condition. | Implement a software I2C bus watchdog. If Wire.endTransmission() returns a timeout error, toggle the SCL pin manually 9 times to release the bus, then re-initialize. |
Conclusion: From Toy to Tool
Building a mapping robot car with Arduino is a profound exercise in systems engineering. By abandoning the L298N and TT motors in favor of MOSFET drivers and closed-loop encoders, and by treating power distribution and I2C noise as first-class design constraints, you transform a weekend distraction into a legitimate diagnostic tool. Upload your sweep data to a Python script using Matplotlib, and you will generate beautiful, actionable heatmaps of your indoor environment—proving that microcontrollers are best used when they solve problems we can't see.