
Building a Reliable Aquarium Temperature Sensor Arduino Monitor
Aquarium heaters are notorious for failing in two catastrophic ways: they either stop heating entirely, or the internal bi-metallic switch welds itself shut, slowly boiling the tank. Relying solely on the analog dial on a $15 submersible heater is a gamble with your livestock. By building a dedicated aquarium temperature sensor Arduino monitor, you create an independent, highly accurate failsafe that can trigger alarms or cut power via a relay.
For this 2026 guide, we are bypassing fragile thermistors and cheap DHT11 sensors. We are using the industry-standard waterproof DS18B20+ digital probe. Housed in a 304 stainless steel cylinder and sealed with marine-grade epoxy, this sensor communicates via the 1-Wire protocol, offering 12-bit resolution (0.0625°C increments) and factory-calibrated accuracy of ±0.5°C.
Component Bill of Materials (BOM)
Here is the exact hardware required. Prices reflect average 2026 market rates for genuine or high-quality clone components.
| Component | Specification | Est. Cost (USD) |
|---|---|---|
| Microcontroller | Arduino Nano V3.0 (ATmega328P) | $6.00 - $22.00 |
| Temperature Probe | DS18B20+ Waterproof (1m stainless steel) | $4.50 |
| Pull-up Resistor | 4.7kΩ (1/4W Metal Film) | $0.10 |
| Display (Optional) | 0.96' I2C OLED (SSD1306) | $5.50 |
| Wiring | 22 AWG Silicone stranded wire | $3.00 |
Wiring the DS18B20 to the Arduino
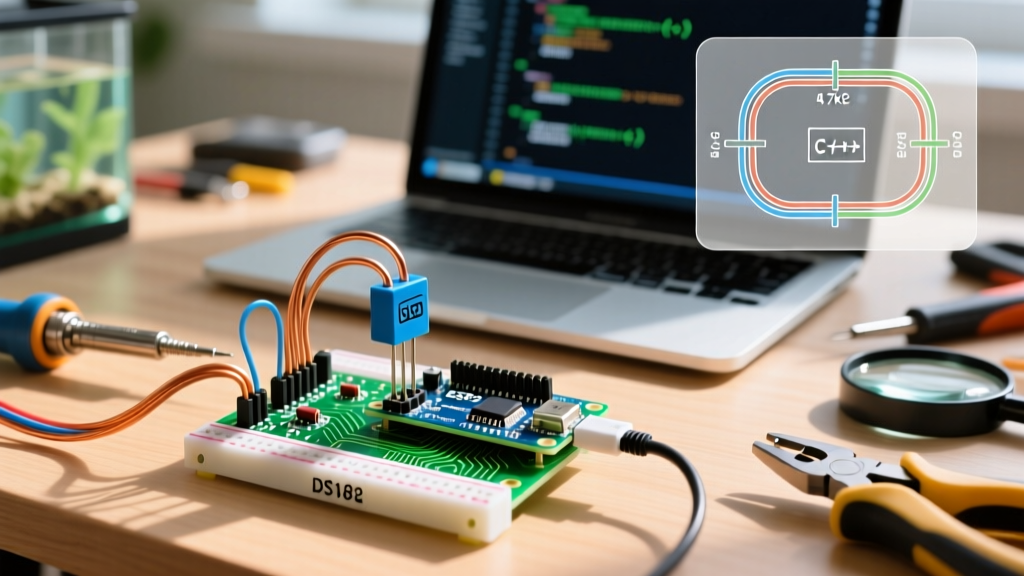
The DS18B20 uses the 1-Wire protocol, meaning data and power can theoretically share lines. However, for an aquarium setup where the cable runs through water and across the tank, do not use Parasitic Power mode. Always use the standard 3-wire configuration to ensure the sensor gets adequate current for the internal ADC conversion.
Pinout and Connections
- Red Wire (VDD): Connect to Arduino 5V pin.
- Black Wire (GND): Connect to Arduino GND pin.
- Yellow/White Wire (Data): Connect to Arduino Digital Pin 2.
Critical E-E-A-T Warning: You must place a 4.7kΩ pull-up resistor between the 5V line and the Data line. Without this resistor, the 1-Wire data line will float, resulting in 'Device not found' errors or random -127°C readings. If your waterproof cable is longer than 3 meters, the cable capacitance increases. Drop the pull-up resistor to 2.2kΩ or even 1kΩ to sharpen the rising edge of the data signal. Read more about 1-Wire timing in the PJRC OneWire Library Documentation.
Non-Blocking Arduino C++ Code
Most beginner tutorials use the sensors.requestTemperatures() function, which halts the Arduino for 750 milliseconds while the sensor performs its 12-bit analog-to-digital conversion. If you are also updating an OLED display or reading a pH sensor, a 750ms blocking delay will cause severe UI lag and missed serial buffer data.
The professional approach is to use non-blocking asynchronous reads. We trigger the conversion, use millis() to track time, and read the result on the next loop iteration. This methodology follows the Arduino BlinkWithoutDelay Reference pattern.
#include <OneWire.h>
#include <DallasTemperature.h>

#define ONE_WIRE_BUS 2
OneWire oneWire(ONE_WIRE_BUS);
DallasTemperature sensors(&oneWire);

unsigned long lastTempRequest = 0;
int delayInMillis = 750;
float currentTempC = -127.0;
bool conversionInProgress = false;

void setup() {
  Serial.begin(115200);
  sensors.begin();
  // Set resolution to 12-bit (highest accuracy)
  sensors.setResolution(12);
  // CRITICAL: Disable blocking wait
  sensors.setWaitForConversion(false);

  // Trigger first conversion
  sensors.requestTemperatures();
  lastTempRequest = millis();
  conversionInProgress = true;
}

void loop() {
  if (conversionInProgress && (millis() - lastTempRequest >= delayInMillis)) {
    // 750ms has passed, read the temperature
    currentTempC = sensors.getTempCByIndex(0);
    conversionInProgress = false;

    // Print to Serial Monitor
    Serial.print('Aquarium Temp: ');
    Serial.print(currentTempC);
    Serial.println(' C');

    // Trigger next conversion
    sensors.requestTemperatures();
    lastTempRequest = millis();
    conversionInProgress = true;
  }

  // Your non-blocking code here (OLED updates, relay logic, etc.)
}
Real-World Edge Cases and Failure Modes
Building an aquarium temperature sensor Arduino circuit on a desk is easy. Deploying it in a high-humidity, electrically noisy saltwater or freshwater environment introduces specific failure modes that generic guides ignore.
1. Galvanic Corrosion and Stray Voltage
Submersible water pumps and older aquarium heaters often leak small amounts of AC voltage into the water. If your Arduino is grounded to a different earth potential than the tank equipment, the stainless steel sleeve of the DS18B20 will act as an anode and corrode rapidly, eventually breaching the waterproof seal.
- Solution: Ensure all aquarium equipment and your Arduino power supply share the same grounded AC circuit.
- Advanced Fix: Use a digital isolator IC (like the ISO7721) between the Arduino and the sensor data line to completely break the galvanic path.
2. The 'Condensation Tail' Failure
The most common failure point of waterproof DS18B20 probes is not the steel tube, but the epoxy seal where the PVC cable enters the metal housing. Over months of temperature cycling, micro-cracks form, allowing humid tank air to wick into the probe. This causes internal condensation, shorting the data line to ground.
- Preventative Maintenance: Before deploying a new probe, coat the cable-to-metal junction with a layer of 3M Marine Adhesive Sealant 5200 or JB WaterWeld. Do not use standard silicone; it is gas-permeable and will fail over time.
3. Calibration Verification
While the Analog Devices DS18B20 Datasheet guarantees ±0.5°C accuracy, verifying your specific unit is best practice for sensitive livestock like Discus or reef corals.
- Suspend the probe in a stirred ice-water slurry (not just ice cubes, which create warm pockets). It should read exactly 0.0°C.
- For the upper bound, use a calibrated laboratory thermometer in heated aquarium water rather than boiling water, as boiling point shifts with barometric pressure and altitude.
- If an offset exists, apply a software correction factor in your code:
float correctedTemp = currentTempC + offset;
Scaling Up: Multiple Probes on One Bus
Because 1-Wire uses unique 64-bit serial numbers hardcoded into every sensor, you can wire up to 15 DS18B20 probes in parallel to the same Digital Pin 2. This is ideal for large sumps, where you need to monitor the display tank, the heater chamber, and the return pump chamber simultaneously. Simply keep the probes physically separated in the water to avoid thermal shadowing, and use the sensors.getTempCByIndex(1) method to read subsequent sensors.
Summary
Integrating a waterproof DS18B20 into your aquarium setup provides lab-grade thermal monitoring for under $15. By utilizing non-blocking code architecture, adding proper pull-up resistors, and sealing the cable junctions against humidity, your Arduino monitor will outlast the commercial heaters it is designed to supervise.