
Upgrading to an ILI9341 LED Screen for Arduino
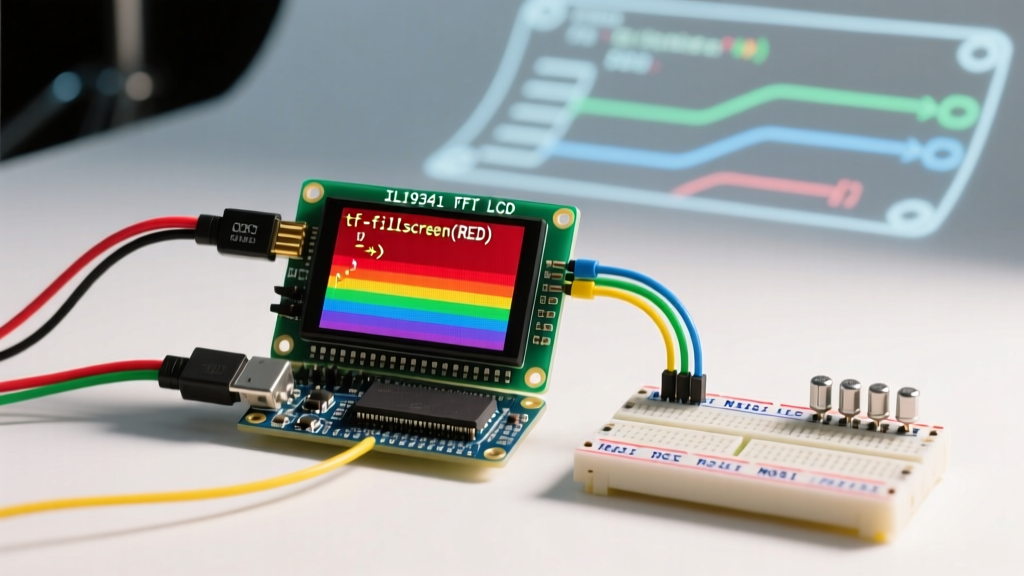
When transitioning from basic 16x2 character LCDs to full-color graphical interfaces, selecting the right LED screen for Arduino projects is a critical architectural decision. In 2026, the 2.8-inch ILI9341 TFT display (320x240 resolution) remains the undisputed workhorse for DIY electronics and prototyping. Priced between $9.50 and $13.00 USD from major distributors, it offers an excellent balance of color depth, refresh rates, and cost. However, integrating this display via the 4-wire SPI protocol introduces specific hardware and software challenges that generic tutorials often overlook.
This guide bypasses the fluff and dives straight into the electrical engineering realities of wiring the ILI9341, managing logic level voltages, safely driving the LED backlight, and configuring the TFT_eSPI library for maximum frame rates using Direct Memory Access (DMA).
The 3.3V Logic Trap: Hardware Prerequisites
The most common point of failure when interfacing an ILI9341 module with a 5V Arduino (like the Uno R3 or Nano) is ignoring the logic level thresholds. The ILI9341 controller silicon is strictly a 3.3V device. While the module's onboard LDO regulator handles the 5V power input (VCC), the data pins (MOSI, SCK, CS, DC, RST) are directly routed to the silicon.
Feeding 5V logic from an ATmega328P into these pins will cause immediate or progressive degradation of the internal ESD protection diodes. To ensure long-term reliability, you must step down the 5V SPI signals to 3.3V. The most cost-effective and robust method is using a CD4050BE hex non-inverting buffer, powered by the module's 3.3V output pin, as detailed in the SparkFun Tutorial on Logic Levels and Shifting. For 3.3V native boards like the ESP32 or Arduino Nano 33 IoT, you can wire the SPI pins directly without a level shifter.
SPI Pin Mapping and Wiring Matrix
Below is the definitive wiring matrix for 4-wire SPI integration. Note that the MISO pin is technically optional for the ILI9341 unless you plan to read back pixel data or verify the display ID register, which is rarely required in standard UI applications.
| ILI9341 Pin | Arduino Uno/Nano (5V) | ESP32 DevKit (3.3V) | Notes & Requirements |
|---|---|---|---|
| VCC | 5V | 5V (VIN) or 3.3V | Module LDO handles regulation. |
| GND | GND | GND | Ensure common ground plane. |
| CS (Chip Select) | Pin 10 (via CD4050BE) | GPIO 15 | Active LOW. |
| RESET | Pin 8 (via CD4050BE) | GPIO 4 | Requires RC delay circuit (see below). |
| DC (Data/Command) | Pin 9 (via CD4050BE) | GPIO 2 | LOW = Command, HIGH = Data. |
| SDI (MOSI) | Pin 11 (via CD4050BE) | GPIO 23 | Hardware SPI Data. |
| SCK (Clock) | Pin 13 (via CD4050BE) | GPIO 18 | Hardware SPI Clock. |
| LED (Backlight) | Transistor Circuit | Transistor Circuit | Do NOT wire directly to MCU GPIO. |
Powering the LED Backlight Safely
A critical edge case that destroys Arduino voltage regulators is the backlight pin. The 2.8-inch LED array typically draws between 60mA and 85mA at 3.3V. The onboard 3.3V regulator of a standard Arduino Uno R3 is only rated for ~50mA continuous current. Wiring the LED pin directly to the Arduino's 3.3V pin will cause the regulator to overheat and fail.
The Solution: Use a PNP transistor (such as a 2N3906) to switch the backlight. Connect the emitter to the module's 3.3V output, the collector to the LED pin, and the base to an Arduino GPIO via a 1kΩ resistor. This allows the MCU to toggle the backlight via software without routing the high current through the microcontroller's pins.
Configuring TFT_eSPI for Maximum Refresh Rates
While the Adafruit_ILI9341 library is popular, it relies on software-based SPI transaction management that bottlenecks frame rates. For modern 2026 standards, the Bodmer TFT_eSPI Official GitHub Repository is mandatory. It utilizes hardware SPI FIFO buffers and DMA (on supported architectures like ESP32 and STM32) to push pixels asynchronously, freeing the MCU to handle sensor polling and logic.
Editing User_Setup.h
After installing TFT_eSPI via the Arduino Library Manager, you must configure the User_Setup.h file located in the library's root directory. Comment out all default drivers and uncomment the ILI9341 definition:
#define ILI9341_DRIVER
#define TFT_WIDTH  240
#define TFT_HEIGHT 320
Next, define your SPI pins and clock speed. According to the Arduino SPI Reference Documentation, standard hardware SPI pins are fixed on AVR boards, but must be explicitly defined for ESP32:
// For ESP32
#define TFT_MISO 19
#define TFT_MOSI 23
#define TFT_SCLK 18
#define TFT_CS   15
#define TFT_DC    2
#define TFT_RST   4

// SPI Clock Frequency
// 40MHz causes signal degradation on Dupont wires >10cm
#define SPI_FREQUENCY  27000000
Pro-Tip on SPI Clocking: While the ILI9341 datasheet claims support for 10MHz write clocks, the TFT_eSPI library safely overclocks the SPI bus to 27MHz or 40MHz using specific MCU peripherals. However, if you are using standard 20cm female-to-female Dupont jumper wires, capacitive coupling will cause screen tearing at 40MHz. Stick to 27MHz for reliable operation without soldering custom twisted-pair harnesses.
Core Arduino Code Implementation
Below is a highly optimized initialization and rendering loop. This code demonstrates non-blocking text rendering and proper use of the sprite buffer to eliminate screen flicker—a common complaint when updating numerical sensor data on TFT displays.
#include <TFT_eSPI.h>
#include <SPI.h>

TFT_eSPI tft = TFT_eSPI();
TFT_eSprite sprite = TFT_eSprite(&tft);

void setup() {
  tft.init();
  tft.setRotation(1); // Landscape mode
  tft.fillScreen(TFT_BLACK);

  // Initialize Sprite for flicker-free rendering
  sprite.createSprite(320, 240);
  sprite.setSwapBytes(true); // Fix endianness for RGB565

  // Turn on backlight via transistor GPIO
  pinMode(5, OUTPUT);
  digitalWrite(5, LOW); // Active LOW for PNP transistor
}

void loop() {
  // Clear sprite buffer
  sprite.fillSprite(TFT_BLACK);

  // Draw UI elements
  sprite.setTextColor(TFT_CYAN, TFT_BLACK);
  sprite.setTextSize(2);
  sprite.setCursor(10, 10);
  sprite.print("Sensor Flux: 2026");

  sprite.setTextColor(TFT_YELLOW, TFT_BLACK);
  sprite.setTextSize(4);
  sprite.setCursor(10, 80);
  sprite.print(millis() / 1000);
  sprite.print("s");

  // Push entire sprite to display via DMA (non-blocking)
  sprite.pushSprite(0, 0);

  delay(16); // Target ~60 FPS
}
Critical Failure Modes and Troubleshooting
Even with perfect wiring, ILI9341 modules present specific edge cases that can halt development. Use this diagnostic framework if your display fails to initialize:
- The 'White Screen of Death': This occurs when the hardware reset sequence fails. Many budget clones omit the 10kΩ pull-up resistor and 100nF capacitor on the RST line. If your MCU toggles the RST pin too rapidly during
tft.init(), the ILI9341 bootloader hangs. Fix: Adddelay(120);immediately after toggling the RST pin in the library's initialization sequence, or solder a 10µF capacitor between the RST and 3.3V pins on the module. - Inverted Colors / Mirrored Axes: The ILI9341 Memory Access Control (MADCTL) register dictates orientation. If your X/Y axes are swapped or colors look like a film negative, the display panel uses a different physical RGB subpixel layout. Fix: Add
#define TFT_RGB_ORDER TFT_BGRin yourUser_Setup.hfile to swap the red and blue byte channels. - Random Screen Freezes: Often caused by voltage sag on the 3.3V rail during high-contrast white screen rendering, which spikes current draw. Fix: Solder a 100µF electrolytic capacitor directly across the VCC and GND header pins on the display module to provide local energy storage for transient spikes.
By respecting the 3.3V logic thresholds, implementing a proper transistor-driven backlight circuit, and leveraging the DMA capabilities of TFT_eSPI, your ILI9341 LED screen for Arduino will deliver crisp, high-speed graphics capable of handling complex 2026 IoT dashboards and real-time oscilloscope UIs.