
The Shift to Precision Home Irrigation in 2026
As water conservation becomes a stricter priority globally, automated garden irrigation has evolved from a luxury to a necessity. According to EPA WaterSense, up to 50% of water used for outdoor irrigation is wasted due to evaporation, wind, or runoff from inefficient systems. Building a custom soil water sensor Arduino project allows you to bypass cheap, timer-based sprinklers and deliver water exactly when the root zone demands it. However, the internet is littered with failed DIY irrigation projects. The culprit is almost always the same: using the wrong sensor technology and ignoring real-world environmental edge cases. This guide provides a field-tested blueprint for building a robust, capacitive-based soil moisture monitoring and actuation system.
The Electrolysis Problem: Why Standard Sensors Fail
If you have ever used the standard dual-pronged, nickel-plated resistive soil moisture sensor (often sold in $15 starter kits), you likely noticed it failing within two to three weeks. When a DC voltage is applied to resistive probes submerged in damp, ion-rich soil, galvanic corrosion occurs. The anode prong rapidly oxidizes and dissolves into the soil, leaving you with an open circuit and a dead plant.
Pro-Tip: Never use resistive sensors for permanent or semi-permanent soil water sensor Arduino deployments. Even if you power them via a digital pin and only turn them on for the 50 milliseconds it takes to read the analog value, the cumulative electrolysis will destroy the probes within a single growing season.
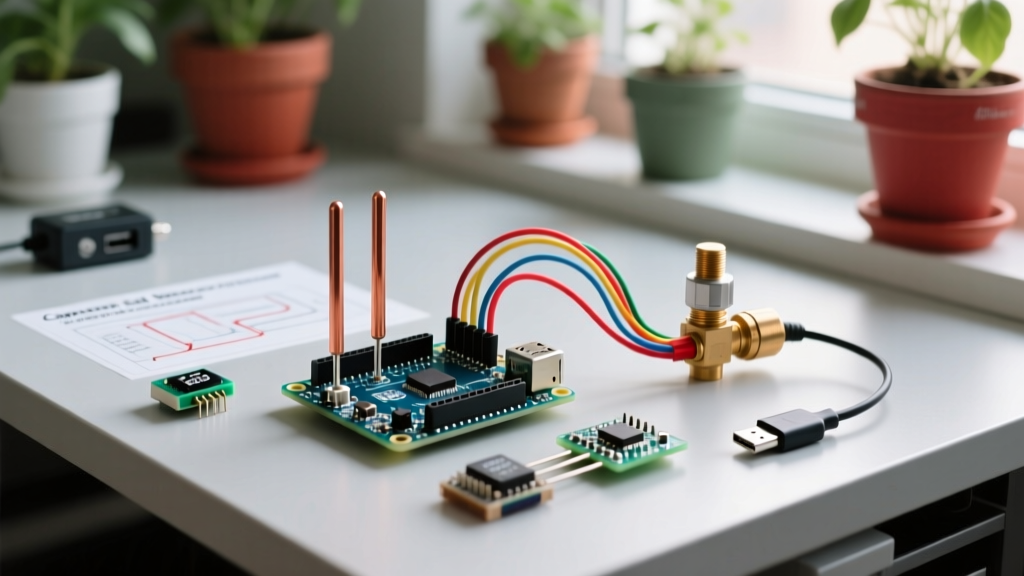
The solution is capacitive sensing. Capacitive sensors measure the dielectric permittivity of the surrounding soil. Because the conductive traces are sealed beneath a protective coating and never make direct galvanic contact with the soil, corrosion is virtually eliminated.
Hardware Selection Matrix
Choosing the right capacitive sensor depends on your budget, required accuracy, and deployment environment. Below is a comparison of the three most common options available to makers in 2026.
| Sensor Model | Technology | Output | Avg. Price (2026) | Best Use Case |
|---|---|---|---|---|
| Generic Capacitive v1.2 | Capacitive (Analog) | 0-3.3V Analog | $2.50 | Indoor pots, budget raised beds |
| Adafruit Stemma Soil Sensor | Capacitive (I2C) | I2C Digital | $7.50 | Greenhouses, multi-node arrays |
| Vegetronix VH400 | TDR / Capacitive | 0-2.5V Analog | $45.00 | Commercial agriculture, deep soil |
For this real-world application, we will use the Generic Capacitive v1.2 sensor. It is cost-effective, widely available, and perfectly adequate for automated raised bed watering when calibrated correctly.
Wiring the Arduino Uno R4 Minima
While the classic Arduino Uno R3 is still popular, the Arduino Uno R4 Minima is our recommended baseline for 2026 due to its 14-bit ADC (Analog-to-Digital Converter), which provides vastly superior resolution compared to the older 10-bit ADC. This allows for much finer granularity when detecting slight changes in soil moisture.
Pinout and Connections
- VCC: Connect to the Arduino's 3.3V pin. (Do not use 5V; the v1.2 sensor has an onboard voltage regulator that runs cooler and more reliably on 3.3V, reducing thermal drift).
- GND: Connect to Arduino GND.
- AOUT: Connect to Arduino Analog Pin A0.
Keep the wire run between the sensor and the Arduino under 3 feet (1 meter) if using standard 22 AWG jumper wires. For longer outdoor runs, you must use shielded cable and place the ADC read circuitry closer to the probe to prevent voltage drop and EMI interference from nearby AC lines.
Calibration: The Most Skipped Step
Out of the box, the analog readings from a capacitive sensor are meaningless. You must map the raw ADC values to a usable moisture percentage. Because the v1.2 sensor's output is inverted (lower voltage means higher moisture), the Arduino AnalogRead Documentation mapping function requires specific boundary parameters.
Step-by-Step Calibration Process
- Dry Air Reading: Hold the sensor in the air, completely dry. Read the serial monitor. On a 14-bit ADC (Uno R4), this typically yields a value around
13500. - Submerged Reading: Submerge the sensor in a glass of water up to the white line (do not submerge the exposed PCB edge). Read the value. This typically yields around
5500. - Define Boundaries: In your C++ code, set
const int AIR_VALUE = 13500;andconst int WATER_VALUE = 5500;.
int rawValue = analogRead(A0);
int moisturePercent = map(rawValue, AIR_VALUE, WATER_VALUE, 0, 100);
moisturePercent = constrain(moisturePercent, 0, 100);
This code snippet ensures your soil water sensor Arduino logic always outputs a clean 0-100% scale, regardless of minor manufacturing variances between individual v1.2 boards.
Real-World Actuation: Relays and Solenoids
Reading the soil moisture is only half the battle. To automate watering, you need to trigger a 12V solenoid valve connected to your garden hose or rain barrel pump. Never connect a solenoid valve directly to an Arduino pin. The inductive kickback will instantly destroy your microcontroller.
The Safe Switching Circuit
- 5V Relay Module: Use an opto-isolated 5V relay module. Connect the relay's VCC to the Arduino's 5V pin, GND to GND, and the IN pin to Digital Pin 8.
- 12V Solenoid Valve: Connect the 12V power supply's positive terminal to one side of the solenoid. Connect the other side of the solenoid to the relay's NO (Normally Open) terminal. Connect the 12V supply's ground to the relay's COM (Common) terminal.
- The Flyback Diode (Critical): Solder a 1N4007 diode in reverse bias across the solenoid's coil terminals (cathode to positive, anode to negative). This absorbs the back-EMF spike generated when the solenoid's magnetic field collapses, protecting your relay contacts and preventing ground-bounce resets on your Arduino.
Implementing Soil Hysteresis
A common failure mode in DIY irrigation is rapid cycling. If your target moisture is 40%, and the soil is at 39%, the pump turns on. The water hits the sensor, moisture jumps to 41%, and the pump turns off. Ten seconds later, the water disperses, moisture drops to 39%, and the pump turns on again. This will burn out your water pump and destroy your relay within days.
You must implement hysteresis (a deadband) in your code:
const int TARGET_MOISTURE = 50;
const int HYSTERESIS = 10;

if (moisturePercent < (TARGET_MOISTURE - HYSTERESIS)) {
  digitalWrite(RELAY_PIN, HIGH); // Turn Pump ON
}
else if (moisturePercent > (TARGET_MOISTURE + HYSTERESIS)) {
  digitalWrite(RELAY_PIN, LOW);  // Turn Pump OFF
}
This logic ensures the pump only activates when moisture drops to 40%, and runs until the soil reaches a thorough 60%, mimicking a natural, deep soaking rainstorm.
Edge Cases and Field Troubleshooting
Deploying electronics in dirt and water introduces unique failure modes. Here is how to handle the most common issues encountered in the field.
1. The Salinity Drift
Capacitive sensors are slightly affected by soil salinity. If you use heavy synthetic fertilizers or liquid fish emulsion, the changing ionic concentration of the soil can skew your baseline readings by up to 8%. Solution: Recalibrate your WATER_VALUE threshold every spring after amending your soil, or switch to an I2C digital sensor like the Adafruit Stemma Soil Sensor, which utilizes a specialized IC to filter out salinity interference.
2. PCB Edge Wicking
The generic v1.2 sensor has a conformal coating on the probe, but the top edge where the PCB meets the header pins is often exposed. In heavy rain, water wicks up into the header pins, causing a short circuit that reads as '100% moisture' permanently. Solution: Apply a layer of MG Chemicals 419D acrylic conformal coating or pot the top 10mm of the sensor in marine-grade epoxy before burying it. Ensure the sensor is buried at a slight 15-degree angle so water runs off the header joint rather than pooling on it.
3. False Triggers from Soil Settling
Freshly tilled soil is full of air pockets. If you insert a sensor into loose soil, it will read 'dry' even if the soil is wet, because air is touching the capacitive plates. Solution: Always pack the soil tightly around the sensor probe during installation, and wait 24 hours after the first heavy watering for the soil to naturally settle around the probe before trusting the automated readings.
Conclusion
Building a reliable soil water sensor Arduino system requires moving beyond basic tutorial code and addressing the physical realities of corrosion, inductive kickback, and soil hysteresis. By selecting capacitive hardware, properly isolating your 12V solenoid valves, and programming a deadband into your moisture thresholds, you can create a set-and-forget irrigation system that keeps your plants thriving while drastically reducing water waste.