
The Hidden Dangers of Direct-Drive Vibration Motors
Connecting a vibration motor directly to an Arduino GPIO pin is one of the most common and destructive mistakes in embedded prototyping. A standard 3V Eccentric Rotating Mass (ERM) motor typically draws between 60mA and 100mA during startup. The ATmega328P microcontroller on an Arduino Uno is rated for a maximum of 20mA continuous current per pin, with an absolute maximum of 40mA. Exceeding this limit will permanently damage the silicon trace inside the microcontroller. Furthermore, when the motor spins down, the collapsing magnetic field generates a reverse voltage spike (back-EMF) that can easily exceed 15V, instantly frying the I/O port.
To configure a vibration motor Arduino circuit safely and effectively in 2026, you must isolate the high-current motor path from the low-current logic path. This guide breaks down the exact hardware configurations, component selections, and code structures required for both ERM and Linear Resonant Actuator (LRA) haptic motors.
ERM vs. LRA: Selecting the Right Haptic Actuator
Before wiring your circuit, you must identify your motor type. The drive circuitry for an ERM is fundamentally different from that of an LRA. According to the Precision Microdrives Application Notes, ERMs rely on off-axis mass rotation, while LRAs use a voice coil moving a magnetic mass on a spring axis.
| Feature | ERM (Eccentric Rotating Mass) | LRA (Linear Resonant Actuator) |
|---|---|---|
| Typical Cost (2026) | $2.50 - $4.00 | $8.00 - $15.00 |
| Response Time | Slow (20ms - 50ms) | Fast (< 10ms) |
| Drive Signal | DC Voltage (PWM for intensity) | AC Waveform (Resonant Frequency) |
| Arduino Drive Method | N-Channel MOSFET + Flyback Diode | Dedicated I2C Haptic Driver IC |
| Frequency Dependence | Amplitude tied to frequency | Amplitude independent of frequency |
Configuration 1: The ERM MOSFET Switching Circuit
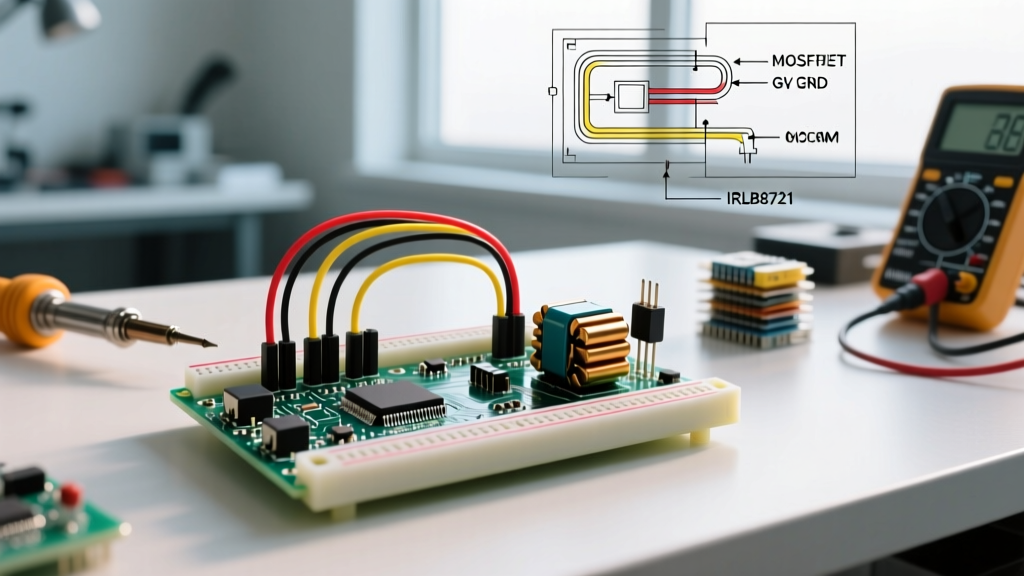
For standard ERM motors (like the Precision Microdrives 304-101), the most cost-effective and reliable configuration uses an N-Channel MOSFET as a low-side switch. While a BJT transistor like the 2N2222 can work, a MOSFET offers lower voltage drop and requires virtually zero continuous gate current, preserving your Arduino's power budget.
Bill of Materials & Component Values
- Q1 (MOSFET): 2N7000 (for 5V logic) or IRLZ44N (for 3.3V logic). Cost: ~$0.25.
- D1 (Flyback Diode): 1N4148 or 1N4001. Cost: ~$0.05.
- R1 (Gate Resistor): 100Ω. Prevents high-frequency ringing on the gate.
- R2 (Pull-down Resistor): 10kΩ. Critical for keeping the motor off during Arduino boot.
- C1 (Decoupling Capacitor): 100µF Electrolytic.
Wiring the ERM Circuit
- Gate Drive: Connect the Arduino PWM pin to the MOSFET gate through the 100Ω resistor (R1).
- Gate Stability: Connect the 10kΩ resistor (R2) between the MOSFET gate and ground. Without this, the gate acts as an antenna during the Arduino's boot sequence, causing the motor to vibrate erratically.
- Motor Connection: Connect the motor's positive terminal to your external power supply (e.g., 3.3V or 5V). Connect the negative terminal to the MOSFET drain.
- Flyback Protection: Place the 1N4148 diode in parallel with the motor. The cathode (striped end) must face the positive supply. This provides a safe path for the back-EMF current when the MOSFET switches off.
- Power Decoupling: Place the 100µF capacitor across the motor's power rails. ERM motors draw massive inrush currents; without this capacitor, the voltage sag will trigger the Arduino's brownout detector, causing continuous resets.
Expert Note on Logic Levels: The 2N7000 has a Gate-Source Threshold Voltage (Vgs-th) of up to 3.0V. If you are using a 3.3V Arduino (like the Due or Zero), the 2N7000 may not fully turn on, resulting in high Rds(on) resistance and weak vibration. Always use a true logic-level MOSFET like the IRLZ44N or AO3400 for 3.3V microcontrollers.
Configuration 2: The LRA I2C Haptic Driver
Linear Resonant Actuators (LRAs) cannot be driven by a simple DC MOSFET switch. They require an alternating current (AC) waveform tuned precisely to their mechanical resonant frequency (typically 175Hz ± 5Hz). Driving an LRA off-resonance results in weak vibrations and excessive current draw. To solve this, we use a dedicated haptic driver IC like the Texas Instruments DRV2605L.
As detailed in the Texas Instruments DRV2605L Datasheet, this IC contains an integrated H-bridge, DSP for waveform generation, and auto-resonance tracking circuitry.
Wiring the DRV2605L Breakout
You can purchase the DRV2605L on a breakout board from Adafruit for approximately $9.95. The wiring is strictly I2C and low-current:
- VIN: Connect to Arduino 5V (or 3.3V depending on the breakout's onboard regulator).
- GND: Connect to Arduino GND.
- SCL / SDA: Connect to the Arduino I2C pins (A5/A4 on Uno, D21/D20 on Mega, or dedicated SDA/SCL pins on modern boards).
- Motor Terminals: Solder the LRA directly to the OUT+ and OUT- pads on the breakout. No flyback diode is required, as the IC handles inductive kickback internally.
Software Configuration for LRA
To configure the Arduino IDE for the DRV2605L, install the Adafruit_DRV2605 library. A critical step often missed by beginners is telling the IC that an LRA is attached, as the default configuration assumes an ERM.
#include <Wire.h>
#include <Adafruit_DRV2605.h>

Adafruit_DRV2605 drv;

void setup() {
  Serial.begin(115200);
  drv.begin();

  // CRITICAL: Set the driver to LRA mode
  drv.useLRA();

  // Select a built-in haptic waveform (e.g., 'Strong Click')
  drv.setWaveform(0, 1);
  drv.setWaveform(1, 0); // End sequence
}

void loop() {
  drv.go();
  delay(1000);
}
Troubleshooting Common Vibration Motor Failures
Even with the correct schematic, real-world prototyping introduces edge cases. Use this diagnostic matrix to resolve common configuration issues.
| Symptom | Root Cause | Solution |
|---|---|---|
| Arduino resets when motor starts | Power supply brownout due to inrush current. | Increase decoupling capacitor to 220µF or 470µF. Power the motor from a separate LDO or battery pack, sharing only the GND with the Arduino. |
| Motor vibrates weakly and MOSFET gets hot | MOSFET is operating in the linear (ohmic) region, not fully saturated. | Verify gate voltage. If using a 3.3V MCU, swap the 2N7000 for a logic-level MOSFET like the IRLZ44N. |
| Motor hums but doesn't spin (ERM) | PWM frequency is too low, or duty cycle is below the motor's mechanical breakaway threshold. | Increase the PWM duty cycle. Most ERMs require at least 25% duty cycle to overcome static friction. |
| LRA produces no vibration (DRV2605L) | IC is in ERM mode, or I2C address collision. | Ensure drv.useLRA() is called in setup(). Verify pull-up resistors (4.7kΩ) are present on SDA/SCL lines. |
Advanced PWM Tuning for ERM Haptics
If you are building custom haptic feedback patterns (like simulating a heartbeat or a collision in a gaming peripheral) using an ERM, standard analogWrite() is insufficient. The default Arduino PWM frequency is approximately 490Hz. While this switches the MOSFET fast enough to prevent audible whine, it limits your control over the motor's mechanical braking.
To achieve sharper haptic 'clicks' with an ERM, you must implement active braking. This is done by briefly reversing the voltage across the motor or shorting the terminals to create dynamic braking. While a single MOSFET cannot short the terminals, you can configure an H-Bridge (like the DRV8833, ~$3.00) to handle active braking. By applying a 100% duty cycle in the reverse direction for 5-10 milliseconds immediately after turning the motor off, you can reduce the ERM's spin-down time from 150ms to under 30ms, drastically improving the perceived crispness of your haptic feedback.
Summary
Configuring a vibration motor Arduino project requires respecting the physical limitations of both the microcontroller and the actuator. For low-cost, simple alerts, an ERM driven by a properly biased MOSFET and flyback diode remains the industry standard. For high-fidelity, smartphone-grade haptic feedback, investing in an LRA paired with an I2C driver like the DRV2605L is mandatory. Always prioritize power decoupling and logic-level isolation to ensure your circuit survives long past the prototyping phase.