
The Evolution of MCU Audio: Beyond the Simple Piezo Buzzer
If you have been in the maker space for more than a few months, you have likely experimented with the tone() function to drive a piezo buzzer. While sufficient for basic alarm beeps, generating high-fidelity audio—whether for synthesizers, voice playback, or complex soundscapes—requires a fundamentally different approach to hardware and software. As we move through 2026, the landscape for building a high-quality speaker Arduino setup has shifted dramatically. The community has largely moved past 8-bit direct PWM on legacy ATmega328P chips, embracing I2S DACs, DMA-driven audio pipelines on the RP2350 and ESP32-S3, and advanced DSP libraries.
In this community resource roundup, we are curating the most reliable hardware configurations, battle-tested libraries, and real-world troubleshooting insights sourced from top-tier maker forums and audio engineering experts. Whether you are building a granular synthesizer or a simple WAV player, this guide provides the exact specifications you need.
The Hardware Matrix: Choosing Your Audio Output Stage
The most common point of failure in DIY audio projects is impedance mismatch and improper digital-to-analog conversion. Below is a comparison of the three primary methods the community uses to drive a speaker from a microcontroller in 2026.
| Method | Resolution / Bit Depth | CPU Overhead | Avg. Cost (2026) | Best Use Case |
|---|---|---|---|---|
| Direct PWM + RC Filter | 8-bit to 10-bit | High (Timer Interrupts) | $0.10 (Passive) | Legacy AVR projects, simple speech |
| R-2R Resistor Ladder | 8-bit (Parallel) | Medium (Port Manipulation) | $0.50 (Resistors) | Retro 8-bit chiptune synthesis |
| I2S DAC (External) | 16-bit to 24-bit | Near Zero (DMA / I2S Bus) | $3.50 - $6.00 | High-fidelity WAV, complex DSP |
Deep Dive: The I2S Standard and the MAX98357A
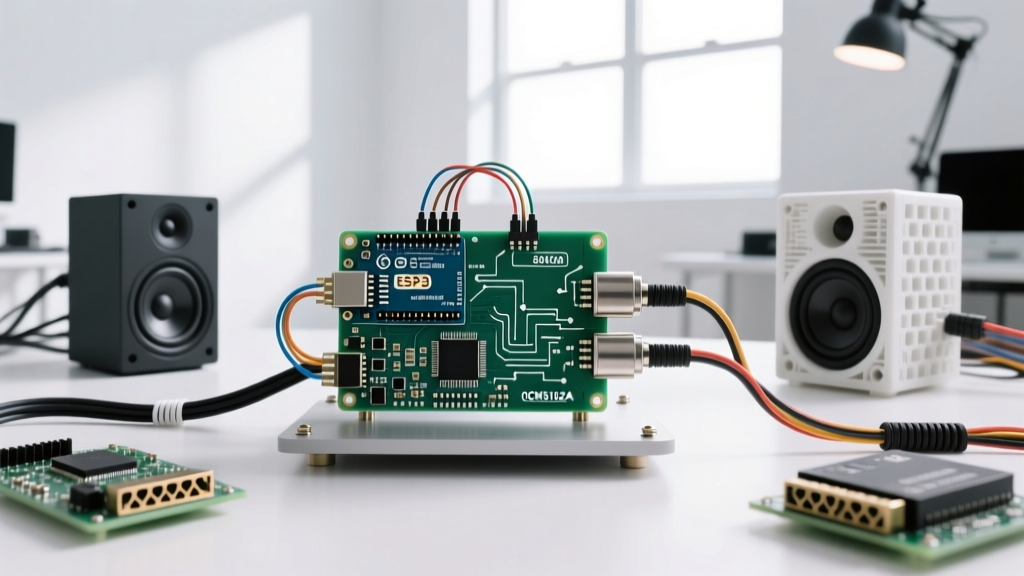
For any modern speaker Arduino project requiring clean audio, the I2S (Inter-IC Sound) protocol is the undisputed standard. Unlike PWM, which requires the CPU to toggle pins via timers, I2S offloads the data transfer to dedicated hardware peripherals or DMA (Direct Memory Access) channels.
The community favorite for amplification is the MAX98357A I2S Class-D amplifier breakout. Priced around $4.00, it takes the digital I2S signal directly from your MCU, performs the digital-to-analog conversion internally, and outputs up to 3.2W of power into a 4-ohm speaker. According to the Adafruit MAX98357A Learning Guide, this chip requires no external analog filtering, eliminating the ground-loop hum that plagues analog amplifier setups.
Top Community Libraries for Audio Synthesis & Playback
Hardware is only half the battle. The software architecture required to stream audio buffers without dropping samples (which causes audible clicking and popping) is complex. Here are the top three libraries dominating the 2026 ecosystem.
1. Teensy Audio Library (The Gold Standard)
While technically designed for the Teensy ecosystem (Teensy 4.0/4.1), the PJRC Teensy Audio Library remains the benchmark for MCU audio. It processes audio in 128-sample blocks at 44.1kHz using 16-bit signed integers. The community has ported many of its core DSP algorithms (biquad filters, delays, granular engines) to ESP32 and RP2350 environments. Its visual Audio System Design Tool allows makers to wire audio objects together graphically before exporting the C++ code.
2. Mozzi Sonification Library
For those constrained to 8-bit AVRs (like the Arduino Uno R3 or Nano) or looking for extreme low-latency synthesis, Mozzi is unparalleled. Mozzi operates with a control rate (for updating parameters like LFOs) of 16384 Hz and an audio rate of 16384 Hz or 32768 Hz. It uses specialized integer math and wavetable oscillators to generate complex FM and AM synthesis without floating-point math, which would cripple an ATmega328P.
3. ESP32-A2DP and Native I2S Drivers
With the ESP32-S3 now being a staple in maker kits, the community relies heavily on the ESP-IDF native I2S drivers for local playback, and the ESP32-A2DP library for Bluetooth audio sink projects. The ESP32-S3's ability to stream 16-bit/44.1kHz stereo audio via Bluetooth A2DP to a paired speaker setup has made it the go-to board for wireless audio receivers.
Real-World Troubleshooting: Edge Cases & Failure Modes
Building a speaker Arduino circuit on a breadboard often leads to frustrating audio artifacts. Here is how the community solves the most persistent issues.
The PWM Whine Problem: If you are forced to use Direct PWM on an ATmega328P, the default Timer1 frequency is roughly 490 Hz. This falls squarely in the mid-range of human hearing, resulting in a loud, whining carrier noise over your audio.
The Fix: You must reconfigure the timers. By setting the prescaler to 1 and using Fast PWM mode with ICR1 as TOP (set to 511 for 9-bit resolution), the PWM frequency becomes exactly 31,250 Hz (16MHz / 512). This pushes the carrier wave above human hearing, leaving only the audio envelope.
Designing the RC Low-Pass Filter for Class-D Analog Amps
If you are using an analog Class-D amplifier like the incredibly cheap PAM8403 (often found in packs of 5 for under $3.00), you cannot feed raw PWM directly into it. The PAM8403 expects an analog line-level signal. You must build an RC low-pass filter to smooth the PWM square wave into a sine-like analog wave.
The community standard calculation for the cutoff frequency ($f_c$) is:
f_c = 1 / (2 * π * R * C)
Using a 1kΩ resistor and a 10nF (0.01µF) ceramic capacitor, the cutoff frequency is approximately 15,915 Hz. This perfectly preserves the entire human hearing spectrum (20Hz - 15kHz) while aggressively attenuating the 31.25kHz PWM carrier wave. Place this filter as close to the amplifier input pins as possible to prevent high-frequency noise injection.
Combating USB Ground Loops
A frequent complaint on forums is a loud 50/60Hz hum or high-frequency switching noise when the MCU is powered via USB while the speaker amplifier is powered by a separate battery or wall wart. This is a classic ground loop. The 2026 best practice is to implement star grounding. Connect the ground of the MCU, the ground of the amplifier, and the ground of the speaker return path to a single, centralized physical point on your perfboard or PCB. Never daisy-chain grounds through a breadboard's long power rails, as the parasitic inductance of the breadboard traces will inject switching noise directly into your audio path.
2026 Community Project Showcase
- The RP2350 PIO Granular Synth: Makers are utilizing the Programmable I/O (PIO) state machines on the new Raspberry Pi RP2350 to read from external SPI SRAM chips (like the 23LC1024) while the main cores handle UI and MIDI parsing. This allows for stutter and granular effects previously impossible on sub-$10 MCUs.
- MIDI-to-CV/Audio Hybrid Gateways: Using the Teensy 4.1, community members are building hybrid modules that output both analog Control Voltage (CV) via true 16-bit DACs (like the MCP4922) for vintage synths, while simultaneously generating internal I2S audio for digital effects processing.
- Solar-Powered Ambient Soundscapes: Ultra-low-power projects using the Arduino Nano 33 BLE Sense, utilizing its onboard microphone to sample environmental noise, processing it through a neural-network-based edge AI model (TensorFlow Lite), and outputting generative ambient music via a MAX98357A to a small 3W full-range speaker.
Frequently Asked Questions
Can I use the Arduino analogWrite() function for audio?
No. The analogWrite() function on standard AVRs does not output true analog voltage; it outputs a PWM square wave at ~490Hz. Without an external RC low-pass filter and an amplifier, connecting this directly to a speaker will yield a faint, distorted clicking sound and may damage the MCU's GPIO pin due to excessive current draw.
What speaker impedance should I use with the MAX98357A?
The MAX98357A is optimized for 4-ohm to 8-ohm speakers. While it can technically drive higher impedance speakers, the power output will drop significantly. For maximum volume and efficiency in portable projects, a 4-ohm, 3W full-range driver is the community consensus for the best acoustic match.
How much SRAM is required to play a 10-second WAV file?
A 10-second, 16-bit, 44.1kHz mono WAV file requires roughly 882 KB of storage. Since an ATmega328P only has 2 KB of SRAM, you cannot load this into memory. You must stream the file block-by-block (e.g., 512 bytes at a time) from an SD card using the SdFat library, or store the audio on external SPI Flash memory.