
Defining the 'Linux on Arduino' Landscape in 2026
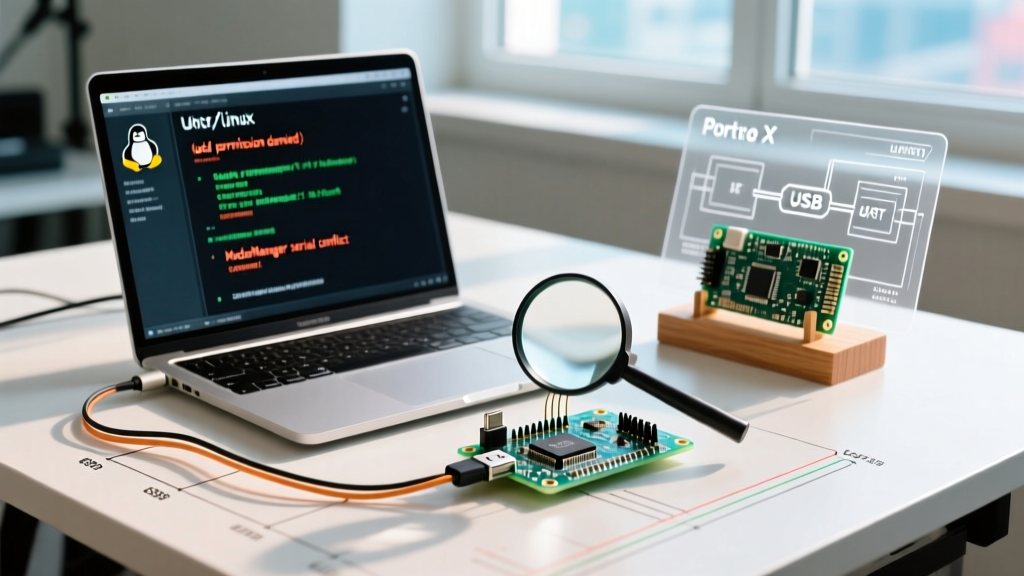
When embedded engineers and makers search for Linux on Arduino, they are typically navigating one of two distinct environments. The first is using a Linux host OS (like Ubuntu 26.04 LTS or Fedora 41) to compile and upload sketches to standard 8-bit or 32-bit microcontrollers. The second involves running embedded Linux directly on Arduino-branded Single Board Computers (SBCs) and hybrid modules, such as the Portenta X8. Both paradigms introduce unique, OS-level failure modes that do not exist in Windows or macOS environments.
This diagnostic guide bypasses generic troubleshooting and targets the exact kernel-level, udev, and bridge-architecture errors that stall Linux-based Arduino development. Whether you are fighting a Permission denied error on a CH340 clone or debugging a missing /dev/ttyRPMSG node on a hybrid SBC, the solutions below provide actionable, command-line resolutions.
Host OS Errors: The "Permission Denied" & Missing Ports
The most frequent roadblock when connecting an Arduino to a Linux machine is the kernel's strict handling of serial device nodes. Unlike Windows, which assigns COM ports with broad user access, Linux maps serial devices to /dev/ttyACM* (native USB CDC-ACM devices like the Leonardo or RP2040) or /dev/ttyUSB* (UART-to-USB bridges like the CH340 or CP2102). By default, these nodes are owned by root and the dialout group.
Fixing the dialout Group Restriction
If the Arduino IDE 2.3+ or Arduino CLI returns avrdude: ser_open(): can't open device "/dev/ttyACM0": Permission denied, your user lacks group membership. Execute the following command to append your user to the dialout group:
sudo usermod -a -G dialout $USERCritical Note: You must completely log out and reboot the system for group changes to propagate to the display server and IDE sandbox. Simply closing the terminal is insufficient.
Writing Custom udev Rules for Clone Boards
For non-official boards or specific industrial sensors using Arduino-compatible bootloaders, persistent device naming and automatic permission granting require custom udev rules. According to the official Arduino Linux permissions documentation, creating a rule ensures the OS sets the correct mode upon device connection.
Create a new file at /etc/udev/rules.d/99-arduino.rules and add the following syntax:
SUBSYSTEM=="tty", ATTRS{idVendor}=="1a86", ATTRS{idProduct}=="7523", SYMLINK+="arduino_nano", MODE="0666"
SUBSYSTEM=="usb", ATTRS{idVendor}=="2341", MODE="0666"- idVendor 1a86 / idProduct 7523: Targets the ubiquitous CH340 chip found on Nano clones.
- idVendor 2341: Targets official Arduino SA hardware.
- SYMLINK: Creates a persistent
/dev/arduino_nanoalias, preventing port-shifting when multiple devices are connected.
Reload the rules without rebooting using sudo udevadm control --reload-rules && sudo udevadm trigger.
The Silent Killer: ModemManager Serial Hijacking
If your board connects, the port appears in the IDE, but uploads randomly fail with bossac: Failed to open port or avrdude: stk500_recv(): programmer is not responding, you are likely a victim of ModemManager.
Expert Insight: The 1200bps Reset Trap
Arduino boards with native USB (ATmega32U4, SAMD21, RP2040) utilize a "1200bps touch" to trigger a bootloader reset. When a serial port is opened at exactly 1200 baud, the MCU resets and exposes a new bootloader COM port. ModemManager, designed to probe for 3G/4G cellular modems, routinely opens new/dev/ttyACM*nodes and sends AT commands. This accidental 1200bps touch forces the Arduino into bootloader mode prematurely, corrupting the upload handshake.
To diagnose this, monitor the kernel ring buffer while plugging in your board:
dmesg -w | grep ttyIf you see ModemManager probing the device, you must blacklist the Arduino vendor IDs or disable the service entirely. The safest approach for a dedicated maker workstation is to disable the service via systemd:
sudo systemctl stop ModemManager
sudo systemctl disable ModemManager
For enterprise environments where ModemManager is required for cellular WAN cards, consult the Freedesktop ModemManager documentation to configure custom udev tags (ID_MM_DEVICE_IGNORE="1") that instruct the daemon to ignore specific Arduino vendor IDs.
Arduino IDE 2.x and Wayland Display Server Glitches
As of 2026, Wayland is the default display server protocol on almost all major Linux distributions (Ubuntu 24.04/26.04, Fedora, Arch). The Arduino IDE 2.x is built on the Electron framework, which relies on Chromium's Ozone backend. Under Wayland, users frequently report the Serial Monitor failing to render dropdown menus, or the IDE losing keyboard focus during code compilation.
Diagnostic Fix: Force the IDE to use the native Wayland backend instead of falling back to XWayland (which causes scaling and focus bugs on 4K monitors). Edit your .desktop shortcut or launch from the terminal with the following flags:
arduino-ide --enable-features=UseOzonePlatform --ozone-platform=waylandIf you are using an older X11-dependent library for GUI serial plotting, force X11 mode temporarily by exporting the GDK backend: export GDK_BACKEND=x11 before launching the IDE.
Embedded Linux on Arduino SBCs: Bridge Diagnostics
Running Linux directly on Arduino hardware shifts the paradigm from host-OS development to embedded systems engineering. The premier example in the Arduino ecosystem is the Portenta X8, which pairs an NXP i.MX 8M Mini (running a Yocto-based embedded Linux) with an STM32H747 MCU. The two cores communicate via an internal virtual UART bridge using the Linux Remote Processor Messaging (RPMSG) framework.
When developing Python or C++ applications on the Linux side that need to read sensors from the MCU side, bridge errors are common. Below is a diagnostic matrix for /dev/ttyRPMSG failures.
| Error Symptom | Root Cause | Diagnostic Command | Resolution |
|---|---|---|---|
/dev/ttyRPMSG node missing entirely |
RPMSG kernel module failed to load or i.MX 8M firmware partition is corrupt. | lsmod | grep rpmsgdmesg | grep virtio |
Rebuild Yocto image with CONFIG_RPMSG_CHAR=y or re-flash the eMMC boot partition via USB OTG. |
EIO (Input/Output Error) on read() |
STM32H747 M7 core crashed or is not running the virtual UART bridge firmware. | Check MCU status via external SWD/J-Link debugger. | Flash the MCU with the Portenta_X8_Bridge sketch using an external programmer, bypassing the Linux DFU utility. |
| Permission denied on SBC terminal | Non-root Linux user lacks access to the RPMSG character device. | ls -l /dev/ttyRPMSG |
Add the user to the dialout group in /etc/group or write a custom udev rule for the virtio device. |
| Bridge latency > 50ms | Linux CPU frequency scaling (cpufreq) throttling the i.MX 8M Mini. | cat /sys/devices/system/cpu/cpu*/cpufreq/scaling_governor |
Set governor to performance to ensure deterministic bridge polling. |
For a deeper dive into initializing the hybrid architecture, refer to the Arduino Portenta X8 Getting Started Guide, which details the initial DFU flashing sequence required to establish the Linux-to-MCU handshake.
Summary Diagnostic Flowchart
When confronted with a Linux-to-Arduino failure, follow this strict elimination sequence to isolate the fault domain:
- Verify Physical Enumeration: Run
lsusbanddmesg -w. If the device does not appear, the issue is hardware (cable, USB hub power delivery, or dead MCU). - Check Node Permissions: Run
ls -l /dev/ttyACM*or/dev/ttyUSB*. If your user is not in the owning group, apply theusermodfix and reboot. - Eliminate Interference: Run
systemctl status ModemManager. If active, stop it and retry the upload. - Validate Bootloader State: If the upload hangs at 0%, manually double-tap the reset button on the board to force bootloader mode, then initiate the upload via CLI (
avrdudeorbossac) to bypass IDE serial-handshake bugs. - Inspect Bridge Architecture (SBCs only): If using a hybrid board, verify the RPMSG kernel modules and ensure the MCU core is powered and flashed with the correct bridge firmware.
By treating Linux not just as an IDE host, but as a complex kernel environment with strict device management and background daemons, you can systematically eliminate the variables that cause Arduino upload and communication failures.