
Designing the Ultimate Arduino Lighthouse Model
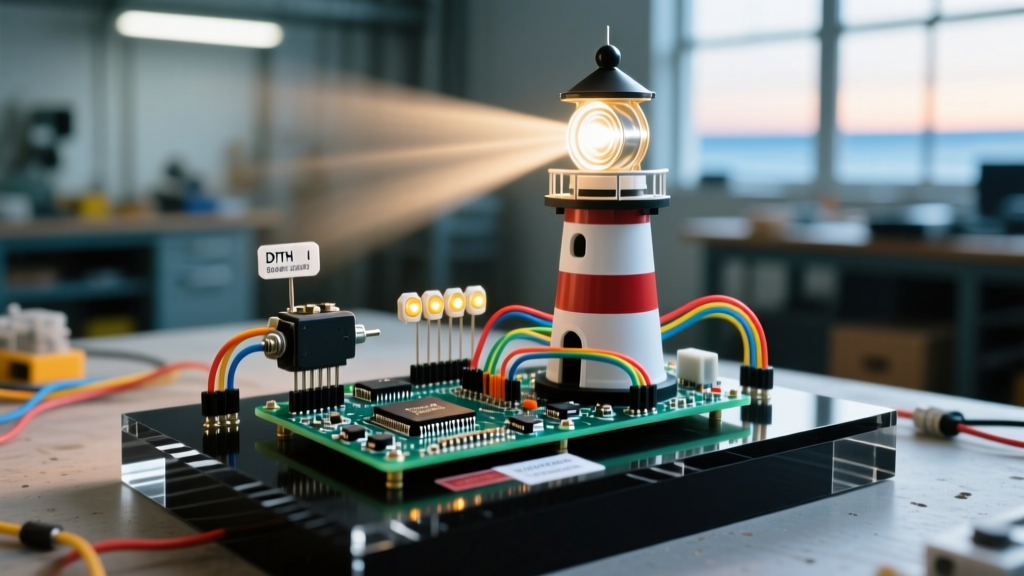
Building a scale maritime model is a rewarding endeavor, but integrating embedded systems transforms a static display into a living, breathing piece of engineering. The arduino lighthouse project is a staple in the maker community, yet most tutorials stop at blinking a standard 5mm LED. In this comprehensive guide, we will engineer a highly realistic, automated lighthouse model featuring a high-lumen rotating Fresnel beacon, a dusk-to-dawn ambient light sensor with software hysteresis, and a triggered maritime foghorn.
By moving away from basic delay() functions and implementing a non-blocking state machine, your model will operate smoothly without timing collisions between the stepper motor, audio playback, and sensor polling.
Bill of Materials (BOM) and 2026 Pricing
To achieve a professional-grade result, we must select components that balance torque, luminosity, and acoustic fidelity. Below is the exact hardware list required for this build, with estimated retail prices as of early 2026.
| Component | Model / Specification | Est. Cost | Purpose |
|---|---|---|---|
| Microcontroller | Arduino Nano Every (ATmega4809) | $12.50 | Core logic, increased SRAM over classic Nano |
| Stepper Motor | 28BYJ-48 (5V) + ULN2003 Driver | $4.00 | Smooth, low-RPM rotation for the beacon assembly |
| Primary Beacon LED | 3W Cool White LED Star PCB | $3.50 | High-lumen output for realistic beam projection |
| Optics | 50mm Acrylic Fresnel Lens | $8.00 | Collimates light into a tight, sweeping beam |
| Light Sensor | GL5528 LDR + 10kΩ Resistor | $1.00 | Dusk-to-dawn ambient light detection |
| Audio Module | DFPlayer Mini + 4GB MicroSD | $5.50 | MP3 playback for foghorn audio files |
| Speaker | 8Ω 1.5W Cavity Speaker | $2.00 | Acoustic output for the foghorn |
| Power Supply | 5V 3A Switching PSU (Barrel Jack) | $7.00 | Prevents brownouts during motor/LED spikes |
Total Estimated Electronics Cost: ~$43.50 (excluding 3D printed filament or physical modeling materials).
Power Architecture: Avoiding the Brownout Trap
The most common failure mode in DIY diorama lighting is relying on the Arduino's USB port or onboard 5V regulator to power high-draw peripherals. The 28BYJ-48 stepper motor draws roughly 250mA under load, and the 3W LED requires approximately 700mA. Combined with the DFPlayer Mini and the Nano Every, your system will peak near 1.2A.
Attempting to pull this current through the Arduino's linear voltage regulator will result in immediate thermal shutdown or erratic microcontroller resets. The solution is a parallel power rail.
- Wire the 5V 3A external power supply directly to a common ground bus and a 5V distribution bus.
- Feed the ULN2003 driver and the 3W LED (via a logic-level MOSFET like the IRLZ44N) directly from this 5V bus.
- Use a separate, clean 5V line from the same bus to power the Arduino Nano Every's
5Vpin, bypassing the onboard regulator entirely. - Place a 470µF electrolytic decoupling capacitor across the 5V and GND rails near the DFPlayer Mini to suppress voltage dips during audio transients.
Optics and Beacon Assembly
A realistic lighthouse beam relies on collimation, not just raw brightness. We use a 50mm acrylic Fresnel lens paired with the 3W LED Star PCB. The critical engineering challenge here is the focal distance.
The LED must be positioned exactly at the focal point of the Fresnel lens (typically around 35mm to 45mm away, depending on the specific lens molding). If placed too close, the beam will scatter; too far, and you will lose the characteristic tight horizontal sweep. Mount the LED on a 3D-printed sled that allows for micro-adjustments along the Z-axis. To manage the thermal output of the 3W LED, ensure the Star PCB is affixed to an aluminum heatsink or the metal chassis of the lantern room using thermal adhesive tape.
Dusk-to-Dawn Automation and Hysteresis
To automate the beacon, we use a GL5528 Light Dependent Resistor (LDR) configured as a voltage divider. According to Adafruit's photocell guide, pairing the LDR with a 10kΩ pull-down resistor and reading the midpoint via an analog pin provides a reliable 0-1023 lux mapping.
⚠️ The Oscillation Edge Case: If your LDR is exposed to the lighthouse's own sweeping beam, the sensor will detect a spike in light every time the beam passes, causing the system to rapidly toggle on and off. You must solve this with both physical baffling (a small 3D-printed shroud pointing the LDR strictly downward) and software hysteresis.
Implementing Software Hysteresis
Instead of a single threshold value, implement a dual-threshold state machine. If the system is currently OFF, require the ambient light to drop below 300 (deep dusk) to turn ON. Once ON, require the ambient light to rise above 600 (bright daylight) to turn OFF. This 300-point deadband prevents rapid toggling during twilight or from passing artificial light sources.
Integrating the Foghorn Audio
Maritime lighthouses often pair visual beacons with acoustic signals during low-visibility conditions. The DFPlayer Mini is ideal for this, as it handles MP3 decoding independently of the Arduino's processor. As detailed in the official DFRobot DFPlayer Wiki, you must wire the Arduino's TX pin (Pin 11) to the DFPlayer's RX pin through a 1kΩ resistor to prevent serial communication errors caused by voltage mismatches.
Load a high-quality, loopable foghorn MP3 file onto the MicroSD card, named 001.mp3 inside a folder named 01. In your code, you can trigger the audio based on a secondary condition, such as a toggle switch hidden in the model's base, or tie it to the dusk-to-dawn logic so the foghorn only sounds at night.
Non-Blocking Code Logic
To rotate the beacon, flash the LED, and poll the LDR simultaneously, you must abandon the delay() function. Using delay() halts the microcontroller, causing the stepper motor to stutter and audio triggers to be missed. Instead, leverage the Arduino millis() function to track time deltas.
Below is a conceptual breakdown of the main loop architecture:
- Sensor Polling (Every 500ms): Read the LDR analog value, apply an exponential moving average filter to smooth out noise, and evaluate the hysteresis thresholds to update the
isNightboolean. - Stepper Actuation (Continuous): If
isNightis true, step the motor one increment. The 28BYJ-48 requires roughly 2048 steps for a full revolution. Stepping every 15ms yields a realistic, slow sweep of about 2 RPM. - LED Sequencing (Event-Driven): Real lighthouses have specific flash signatures (e.g., two quick flashes every 10 seconds). Use a state machine tied to
millis()to toggle the MOSFET gate pin, creating the precise on/off signature without blocking the stepper motor's timing loop.
Troubleshooting and Final Calibration
Even with a solid schematic, physical modeling introduces unique edge cases. Here is how to resolve the most common issues encountered during the final calibration phase:
- Stepper Motor Jitter: If the beacon stutters during rotation, check your power supply's amperage. If the 3W LED turns on at the exact moment the motor steps, the resulting voltage sag can cause the ULN2003 driver to miss a pulse. Adding a 1000µF capacitor directly at the ULN2003's VCC pin usually resolves this.
- Acoustic Resonance: If the foghorn sounds hollow or distorted, the hollow tube of your lighthouse model is likely creating a standing wave. Line the interior of the model's tower with acoustic dampening foam or tightly packed cotton to absorb internal reflections before the sound exits the lantern room vents.
- LDR False Positives: If the beacon turns off when a car drives past your house at night, increase the hysteresis deadband and add a 2-second software delay before accepting a 'daylight' reading as valid.
By combining robust power distribution, precision optics, and non-blocking firmware, your arduino lighthouse will transcend standard hobby projects, resulting in a museum-quality, fully automated maritime display.