
Decoding the Arduino R3 Uno Schematic for Hardware Compatibility
When designing custom shields, engineering bespoke carrier boards, or debugging inconsistent third-party clones, the official Arduino R3 Uno schematic is your ultimate source of truth. While the Arduino ecosystem is famous for its plug-and-play simplicity, the underlying electrical engineering dictates whether a high-draw cellular shield will brownout, or if a clone board will safely handle USB hot-swapping. In 2026, with the market flooded with both premium maker hardware and ultra-cheap derivatives, understanding the exact component-level architecture of the Uno R3 is critical for hardware compatibility.
This guide dissects the official schematic to highlight critical compatibility vectors, voltage regulation nuances, and mechanical keepout zones that every PCB designer and advanced maker must know.
Core Architecture: The Dual-MCU Topology
Unlike single-chip microcontroller boards, the genuine Arduino Uno R3 utilizes a dual-MCU architecture. Understanding this split is vital when designing shields that interact with USB data lines or require native HID (Human Interface Device) emulation.
The Main Brain: ATmega328P-PU
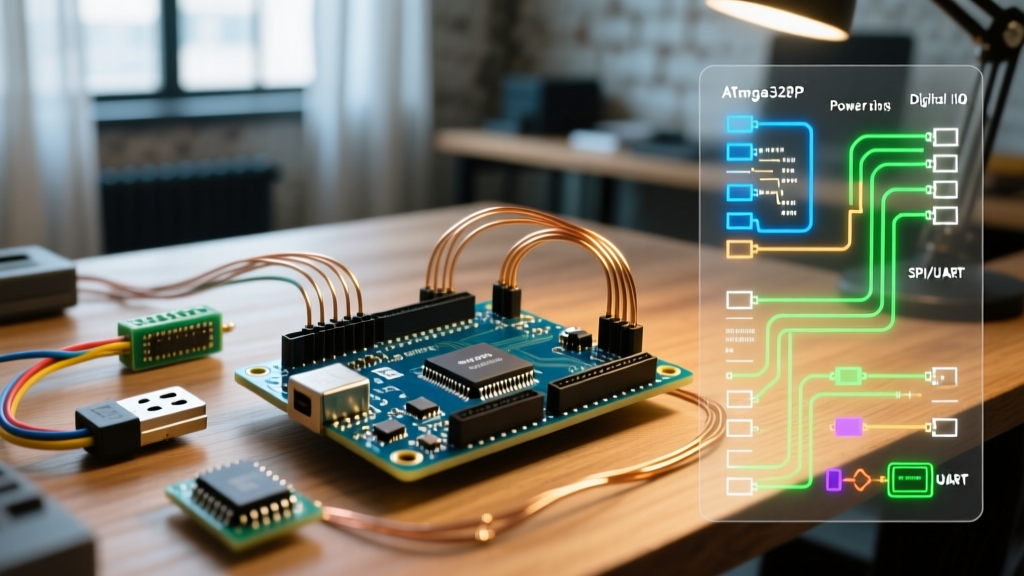
The primary microcontroller is the Microchip ATmega328P-PU, operating at 16 MHz via an external quartz crystal. From a shield compatibility standpoint, the ATmega328P's pinout dictates the standard digital (D0-D13) and analog (A0-A5) headers. However, the schematic reveals that pins D0 (RX) and D1 (TX) are routed through 1kΩ series resistors before reaching the USB-to-Serial interface. This is a crucial compatibility detail: if your shield uses a hard-wired UART peripheral that cannot tolerate 1kΩ series resistance, you must tap the UART lines directly from the ATmega's pins rather than the edge headers.
The USB Interface: ATmega16U2-MU vs. Clone Alternatives
The R3 revision replaced the older FTDI FT232RL chip with an ATmega16U2-MU. This secondary microcontroller handles USB-to-Serial conversion and allows the board to natively emulate USB keyboards or mice via LUFA firmware.
Clone Compatibility Warning: Most budget clones (typically priced between $4 and $8 in 2026) replace the 16U2 with a WCH CH340G or CH341A chip to cut costs. The CH340 requires fewer external passives (no secondary crystal or EEPROM) but completely lacks native USB HID capabilities. If your project relies on the Uno R3 acting as a native USB joystick or MIDI controller, CH340-based clones will fail at the hardware level, regardless of the sketch you upload.
Power Delivery: Voltage Regulation and Shield Brownouts
The most common point of failure in shield compatibility is power delivery. The Arduino R3 Uno schematic outlines a specific power tree that differs significantly from older revisions (like the Duemilanove) and cheaper clones.
The 3.3V LDO Upgrade
Older Arduino boards derived their 3.3V rail from the internal regulator of the FTDI chip, which was strictly limited to 50mA. The Uno R3 schematic shows the inclusion of a dedicated ON Semiconductor NCP1117ST33T3G low-dropout (LDO) regulator. This component can theoretically supply up to 150mA. This was a massive compatibility shift, allowing R3 boards to power early ESP8266 Wi-Fi modules and low-power LoRa transceivers directly from the 3.3V pin. However, modern high-draw peripherals (like 4G LTE modules requiring 2A peak bursts) will still trigger the thermal shutdown of the NCP1117. Always design shields with localized buck converters for peak currents exceeding 150mA.
Component Comparison: Genuine R3 vs. Common Clones
| Component / Feature | Genuine Uno R3 | Standard CH340 Clone | Compatibility Impact |
|---|---|---|---|
| USB-to-Serial IC | ATmega16U2-MU | WCH CH340G / CH341A | Clones lack native USB HID/MIDI support. |
| 5V Regulator | NCP1117ST50T3G (1A) | AMS1117-5.0 (Often 800mA) | Clones may overheat when powering 5V motor shields. |
| USB Overcurrent Protection | LMV358 Comparator + PTC | Often Omitted | Clones risk frying the host PC's USB port during shorts. |
| IOREF Pin Routing | Tied to 5V Rail | Tied to 5V Rail | Universal compatibility for modern logic-level shifters. |
Designing Compatible Shields: Pinouts and Keepout Zones
When routing a custom PCB to act as an Arduino shield, referencing the mechanical dimensions on the schematic is just as important as the electrical connections. The Uno R3 introduced specific header changes that older designs miss.
The IOREF and SDA/SCL Additions
The R3 revision added three critical pins to the standard headers:
- IOREF: Located on the power header, this pin outputs the operating voltage of the main microcontroller (5V on the Uno). Modern shields must read this pin via an ADC or comparator to dynamically switch logic-level translators between 3.3V and 5V, ensuring compatibility across the entire Arduino ecosystem (including 3.3V boards like the Due).
- SDA & SCL: Located adjacent to the AREF pin. The schematic reveals these are simply duplicated from A4 (SDA) and A5 (SCL). When designing a shield, route your I2C lines to these top pins to ensure physical compatibility with boards like the Arduino Leonardo or Mega 2560, where A4/A5 do not carry the I2C bus.
- Unconnected Pin: A reserved pin next to IOREF. Leave this floating on your shield to ensure forward compatibility with future revisions.
Mechanical Keepout Zones
The schematic's mechanical layer highlights severe overhang zones that trap novice PCB designers:
- USB-B Receptacle Overhang: The metal casing of the USB-B port extends laterally. Keep all shield components and vias at least 4mm away from the top-left corner edge.
- DC Barrel Jack: The 5.5mm/2.1mm power jack overhangs the bottom edge. Do not place tall electrolytic capacitors in the bottom-right quadrant of your shield.
- Reset Button Clearance: The tactile switch is positioned near the USB port. If your shield features a mating cutout or a secondary reset button, align it precisely to the X/Y coordinates specified in the official Eagle/KiCad footprint library.
Troubleshooting Incompatibilities Using the Schematic
When a shield works on a genuine board but fails on a clone (or vice versa), the schematic provides a diagnostic roadmap. Follow this step-by-step flow to isolate the fault:
Step 1: Verify the USB Polyfuse
The genuine R3 schematic includes a 500mA resettable PTC (Polymeric Positive Temperature Coefficient) fuse on the USB VBUS line. Many ultra-cheap clones omit this fuse to save $0.05 per unit. If your shield pulls 450mA, a genuine board will operate normally, but a clone lacking the fuse might cause your PC's USB hub to permanently shut down the port to protect the motherboard. Always measure the resistance across the fuse pads on the underside of the board if you suspect missing protection circuitry.
Step 2: Check the LMV358 USB Comparator
The Uno R3 uses an LMV358 dual op-amp to monitor the USB voltage. If the voltage drops below a specific threshold (indicating an overcurrent event), it signals the 16U2 to shut down. Some shields with high initial capacitive inrush currents can trip this comparator momentarily, causing the board to disconnect and reconnect from the IDE repeatedly. If your shield causes this "boot-loop" behavior, add a soft-start circuit or reduce the bulk input capacitance on your shield's 5V rail.
Step 3: Inspect the Auto-Reset Circuit
The schematic shows a 100nF capacitor coupling the DTR (Data Terminal Ready) signal from the 16U2 to the ATmega328P's RESET pin. This is what allows the IDE to automatically trigger the bootloader. If you are designing a custom carrier board and programming via an external USB-to-Serial adapter (like an FTDI Friend), you must replicate this exact 100nF AC-coupling on your DTR line. Direct DC coupling will hold the ATmega in a permanent reset state.
Conclusion
Treating the Arduino R3 Uno schematic as a mere reference diagram is a missed opportunity. For hardware engineers and advanced makers, it is a blueprint for robust compatibility. By respecting the 150mA limit of the 3.3V LDO, accommodating the mechanical overhangs of the USB and power jacks, and understanding the nuanced differences between the ATmega16U2 and clone alternatives like the CH340, you can design shields and custom integrations that work flawlessly across the entire ecosystem. Always cross-reference your custom PCB layouts against the official Arduino hardware documentation before sending your gerber files to the fab house.