
The Core Silicon: Identical Brains, Different Bodies
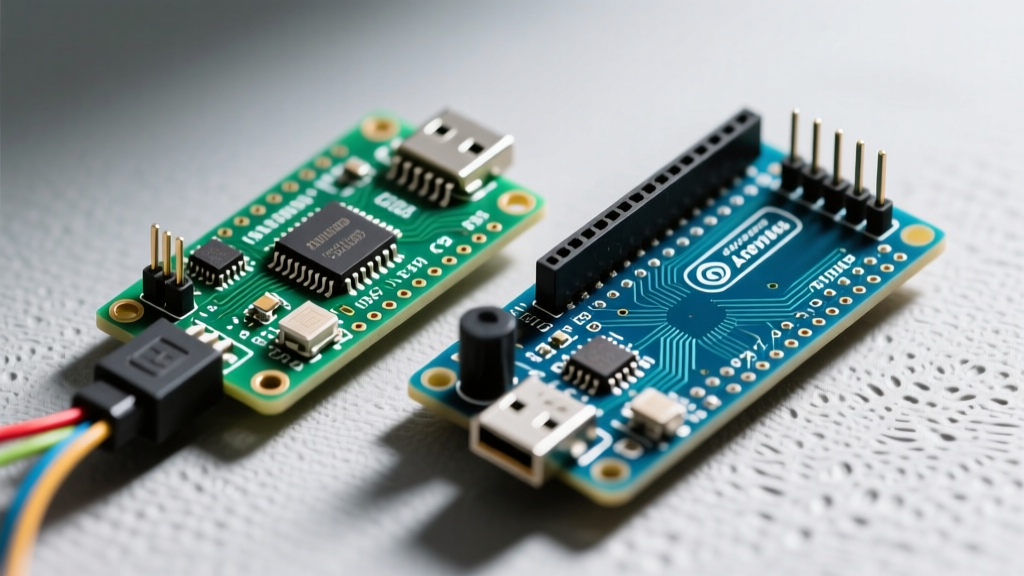
When evaluating the Arduino Nano vs Arduino Uno, the most fundamental truth is that their classic iterations share the exact same microcontroller unit (MCU): the Microchip ATmega328P. Both boards operate at a 16 MHz clock speed, driven by a 16 MHz crystal oscillator, and offer identical memory footprints: 32 KB of ISP flash memory (with 0.5 KB reserved for the Optiboot bootloader), 2 KB of SRAM, and 1 KB of EEPROM. From a purely logical and firmware-development perspective, code compiled for the Uno R3 will execute identically on the Nano V3, provided you select the correct board definition in the Arduino IDE to manage the bootloader size differences.
However, treating them as interchangeable ignores the critical hardware engineering differences in power delivery, USB interfacing, and mechanical design. In 2026, with the proliferation of high-current sensors and wireless modules, understanding these physical layer distinctions is vital to preventing project failures.
Power Delivery and Thermal Constraints
The most significant divergence between the two boards lies in their voltage regulation and power routing architectures. Both utilize linear drop-out (LDO) regulators to step down unregulated voltage to a clean 5V logic level, but their thermal management capabilities are vastly different.
The Uno R3 Power Architecture
The Arduino Uno R3 typically employs an NCP1117ST50T3G (or equivalent 1A SOT-223 package) LDO. Crucially, the Uno's PCB features a large copper pour area directly beneath and around the LDO's thermal tab, acting as a passive heatsink. Furthermore, the Uno includes a reverse-polarity protection diode (often a P-channel MOSFET or a standard Schottky diode depending on the exact manufacturing batch) on the DC barrel jack input, protecting the board if a user accidentally plugs in a center-negative power supply.
The Nano V3 Power Bottleneck
The Nano, constrained by its 45 x 18 mm footprint, uses a physically similar LDO (often an LM1117-5.0 or a generic clone equivalent) but lacks the expansive copper pour for heat dissipation. According to the Arduino Nano Hardware Documentation, while the regulator is technically rated for 800mA to 1A, the thermal resistance of the tiny PCB means it will hit thermal shutdown much faster than the Uno when dropping higher voltages.
Engineering Warning: If you power a Nano via the VIN pin with a 9V battery or a 12V wall adapter and attempt to draw 400mA from the 5V pin to run a strip of WS2812B LEDs, the Nano's LDO will likely overheat and trigger thermal shutdown within minutes. For high-current 5V peripherals, always bypass the onboard LDO and inject regulated 5V directly into the 5V pin.
USB-to-Serial Architecture: Why It Matters
While both boards use USB for programming and serial debugging, the underlying USB-to-Serial bridge ICs dictate their advanced capabilities.
- Arduino Uno R3: Uses the ATmega16U2 microcontroller programmed as a USB-to-Serial converter. Because the 16U2 is a fully programmable AVR chip, advanced users can reflash it using the DFU (Device Firmware Upgrade) protocol or the ICSP headers. By loading the LUFA firmware, the Uno can natively emulate USB HID devices (keyboards, mice, gamepads) or act as a native MIDI controller without requiring a separate serial bridge on the host PC.
- Arduino Nano V3: Original Nanos use the FTDI FT232RL chip, while the vast majority of modern third-party clones use the WCH CH340G or CH340C. These are dedicated, hard-wired UART bridge ICs. While the FT232RL supports asynchronous and synchronous bit-bang modes for niche applications, neither the FTDI nor the CH340 can be reprogrammed to act as a native USB HID device. Furthermore, the CH340 requires specific driver installations on older Windows systems, whereas the 16U2 and FT232 are generally recognized natively by modern operating systems.
Comparison Matrix: Uno R3 vs. Nano V3
| Feature | Arduino Uno R3 | Arduino Nano V3 |
|---|---|---|
| Microcontroller | ATmega328P | ATmega328P |
| Operating Voltage | 5V | 5V |
| Input Voltage (Recommended) | 7-12V | 7-12V |
| Digital I/O Pins | 14 (6 PWM) | 14 (6 PWM) |
| Analog Input Pins | 6 | 8 (A6, A7 are input-only) |
| DC Current per I/O Pin | 20 mA | 20 mA |
| USB-to-Serial IC | ATmega16U2 | FT232RL / CH340 (Clones) |
| Dimensions | 68.6 x 53.3 mm | 45 x 18 mm |
| Average Genuine Price (2026) | ~$27.00 | ~$22.00 |
| Average Clone Price (2026) | $6.00 - $9.00 | $3.50 - $5.00 |
Note: The Nano includes two extra analog pins (A6 and A7). However, on the ATmega328P, these pins are physically connected only to the ADC multiplexer and lack digital I/O registers or internal pull-up resistors. They cannot be used for digital read/write operations.
Mechanical Design and Prototyping Ergonomics
The physical footprint dictates the prototyping workflow. The Arduino Uno Rev3 Documentation highlights its standardized shield layout. The Uno's female headers are spaced perfectly to accept standard Arduino shields (motor drivers, Ethernet shields, data loggers), making it the undisputed king of modular, stackable prototyping.
Conversely, the Nano is engineered for the solderless breadboard. A standard 830-point or 400-point breadboard features a center power rail gap of exactly 0.6 inches (15.24 mm). The Nano's dual 15-pin male header rows are spaced to straddle this gap perfectly. When seated, the Nano leaves exactly one row of accessible holes on either side of the board, allowing you to plug in jumper wires directly adjacent to the MCU pins without needing a custom shield or a tangled mess of Dupont wires. For permanent installations, the Nano can be surface-mounted or soldered directly to a custom PCB, saving significant vertical clearance compared to the Uno's stacked female headers.
Real-World Failure Modes and Edge Cases
Experienced hardware engineers know that theoretical specs differ from field realities. Here are the most common failure modes for both platforms:
- Nano USB Connector Shearing: The classic Nano V3 uses a Mini-B USB connector. Because it sits at the very edge of a lightweight PCB, lateral stress on the cable frequently causes the connector to shear off the SMD pads. Mitigation: Always use a strain-relief cable tie or hot glue the connector base when deploying in high-vibration environments, or opt for modern USB-C Nano clones.
- Uno Barrel Jack Voltage Drops: The Uno's DC barrel jack passes through the reverse-polarity diode and the LDO. If you supply 7V and draw 500mA, the voltage drop across the diode and LDO can cause the 5V rail to sag below 4.7V, leading to brownout resets in sensitive RF modules like the nRF24L01+. Mitigation: Supply at least 8.5V via the barrel jack when running high-current peripherals.
- Clone Auto-Reset Failures: Both boards use a 100nF capacitor between the DTR line of the USB IC and the RESET pin of the ATmega328P to trigger auto-reset during programming. On ultra-cheap Nano clones, this capacitor is sometimes omitted or misaligned, requiring the user to manually press the physical reset button the exact millisecond the "Uploading" message appears in the IDE.
The 2026 Ecosystem: R4 and RP2040 Variants
While the classic ATmega328P boards remain industry workhorses, the modern Arduino ecosystem has expanded. The Arduino Uno R4 Minima replaces the 8-bit AVR with a 32-bit Renesas RA4M1 (Cortex-M4F at 48 MHz), offering a DAC, hardware floating-point unit, and a 12-bit ADC, all while maintaining the exact Uno shield footprint. On the Nano side, the Arduino Nano RP2040 Connect utilizes the dual-core Raspberry Pi RP2040 chip, integrating an ESP32-C3 for Wi-Fi/Bluetooth and a dedicated ECC608 crypto chip. When choosing between the Nano and Uno form factors today, you are no longer just choosing a size; you are choosing between a legacy 8-bit architecture and modern 32-bit ARM/RISC-V ecosystems.
Decision Framework: Which Should You Choose?
Use this practical framework to select the right board for your next project:
- Choose the Arduino Uno if: You are building a modular prototype using off-the-shield components, you need robust thermal dissipation for 9V-12V barrel-jack power delivery, you require native USB HID/MIDI capabilities via the 16U2, or you are teaching a classroom where the ruggedness of the female headers and larger PCB prevents accidental damage.
- Choose the Arduino Nano if: You are prototyping directly on a solderless breadboard, you are designing a custom PCB and need a surface-mountable or DIP-socketed module, you are building a compact wearable or drone payload where every gram and millimeter counts, or you are deploying a low-cost sensor node where a $4 CH340 clone is financially advantageous.