
The Evolution of the Nano: ATmega328P vs. ATmega4809
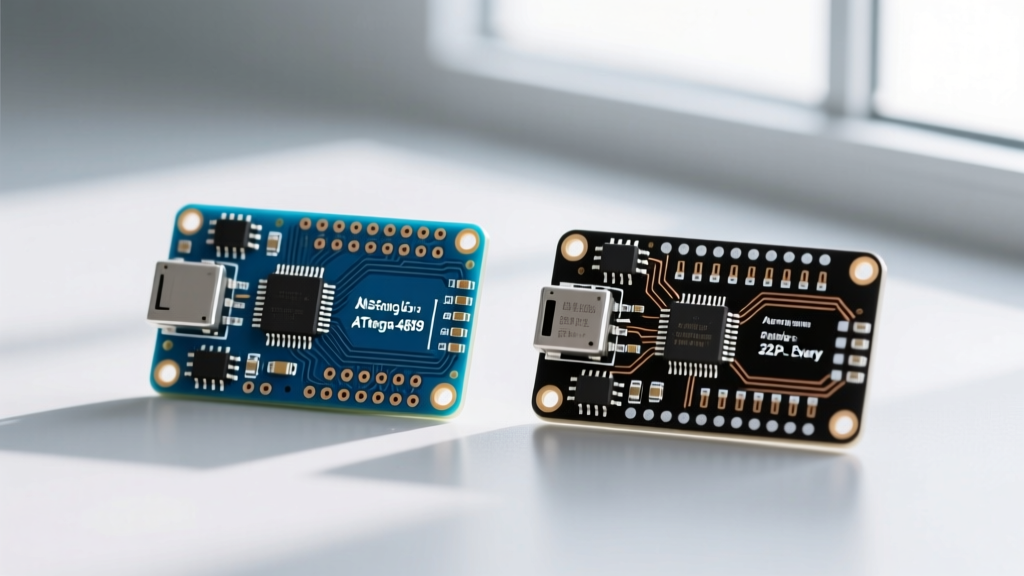
For over a decade, the classic Arduino Nano was the undisputed king of compact DIY microcontrollers, relying on the trusty ATmega328P. However, as supply chain constraints and modern peripheral demands evolved, Arduino introduced the Nano Every. Priced around $11.50 on the official Arduino Store (with clone alternatives hovering near $4 to $6 in 2026), the Every maintains the exact same 18-pin DIP footprint but swaps the silicon heart for the much more capable ATmega4809. While the physical Arduino Nano Every pinout mimics the classic board to preserve shield compatibility, the underlying electrical mappings, timer assignments, and internal routing are drastically different. Understanding these nuances is critical for migrating legacy projects or designing new hardware integrations.
Core Silicon Comparison: 328P vs. 4809
Before dissecting the physical pins, we must understand the silicon driving them. The ATmega4809 brings double the flash memory, a more advanced interrupt controller, and a completely different timer architecture.
| Feature | Classic Nano (ATmega328P) | Nano Every (ATmega4809) |
|---|---|---|
| Microcontroller | ATmega328P (8-bit AVR) | ATmega4809 (8-bit AVRxt) |
| Flash Memory | 32 KB | 48 KB |
| SRAM | 2 KB | 6 KB |
| EEPROM | 1 KB | 256 Bytes (Emulated via Flash) |
| Clock Speed | 16 MHz | 16 MHz (or 20 MHz capable) |
| Programming Interface | ICSP (SPI) | UPDI (Single Wire) |
Deep Dive: Arduino Nano Every Pinout Breakdown
Let us map the physical headers to the ATmega4809's internal PORT architecture. According to the Arduino Nano Every Official Documentation, the board uses a complex multiplexing scheme to keep the external headers identical to the classic Nano.
1. Power Pins: The 5V vs. VUSB Jumper Nuance
The most common hardware trap for new Nano Every users lies on the bottom of the PCB. The classic Nano ties the 5V pin directly to the USB VBUS (through a polyfuse) or the onboard regulator output. The Nano Every introduces a configurable jumper pad.
- VUSB Pad (Default): The 5V pin is connected directly to the USB 5V line. This allows you to draw up to 500mA (USB limit) directly from the 5V header pin to power external sensors or LED strips.
- 5V Pad: By scratching the trace and bridging the alternative pad, the 5V pin is routed through the onboard MPM3610 step-down regulator. This is mandatory if you are powering the board via the VIN pin (up to 21V) and need a stable 5V output on the header.
Critical Warning: Never feed 5V into the VIN pin. The Nano Every's step-down regulator is designed for 7V to 21V input. Supplying 5V to VIN will result in a brownout, as the regulator requires a higher dropout voltage.
2. Digital I/O and PWM Mapping
The Nano Every features 14 digital I/O pins (D0 to D13, plus A6/A7 which are strictly analog). While D0 through D13 function as standard GPIOs, their internal timer assignments differ wildly from the 328P.
On the classic Nano, PWM on pins D3, D9, D10, and D11 is controlled by Timer 1 and Timer 2. On the Nano Every, PWM is distributed across Timer A (TCA0), Timer B (TCB0/TCB1), and Timer D (TCD0). This means that libraries relying on direct register manipulation (like older versions of the Servo library or custom IR remote decoders) will fail silently or output erratic signals on the Every. Always ensure you are using the megaavr core compatible libraries that abstract the ATmega4809 timer registers.
3. Analog Pins and ADC Resolution
The analog inputs (A0 to A5) map to PORT D and PORT A on the 4809. The ADC remains 10-bit, but the internal voltage references have changed. On the classic 328P, calling analogReference(INTERNAL) sets the reference to 1.1V. On the Nano Every, the Microchip ATmega4809 features multiple internal references: 0.55V, 1.1V, 1.5V, 2.5V, and 4.3V.
To use the 1.1V reference on the Every, your code must explicitly call analogReference(INTERNAL1V1). Using the legacy INTERNAL macro will often throw a compilation error or default to VDD (5V), ruining high-precision sensor readings like those from thermistors or load cells.
4. Communication Interfaces and the UPDI Pin
Communication pinouts are where shield compatibility meets internal routing reality.
- UART (Serial): TX (D1) and RX (D0) map to USART3 on the 4809. This is completely separate from the USB-to-Serial bridge (which uses a secondary MCU or dedicated USB IC depending on the board revision).
- SPI: MOSI (D11), MISO (D12), and SCK (D13) map to the SPI0 peripheral. This mapping is hardware-native and highly reliable for SD card modules and SPI displays.
- I2C (Wire): SDA (A4) and SCL (A5) are physically mapped to PORT C (PC3 and PC2). However, the 4809's native TWI (Two-Wire Interface) pins are not natively on these exact port pins. The Nano Every uses the internal PORTMUX to route the I2C signals to A4 and A5. Because of this multiplexing, the internal pull-up resistors are slightly weaker. When interfacing with 5V I2C devices (like legacy LCD backpacks), you may need to add external 4.7kΩ pull-up resistors to the SDA and SCL lines to prevent bus lockups.
- UPDI (D6 / PF0): Unlike the 328P which uses ICSP (SPI) for bootloader programming, the 4809 uses UPDI (Unified Program and Debug Interface). On the Nano Every, the UPDI pin is shared with Digital Pin 6 (PF0). If you need to use D6 as a standard GPIO, you must ensure the UPDI fuse is disabled, or you risk the pin acting erratically during boot sequences.
Real-World Migration: Moving from Classic to Every
If you are upgrading an existing PCB or breadboard design from the classic Nano to the Nano Every, follow this actionable checklist to avoid hardware and software failures:
- Check 3.3V Logic Needs: Neither the classic Nano nor the Every has an onboard 3.3V regulator capable of supplying high current. If your project requires 3.3V logic (e.g., ESP8266 or NRF24L01 modules), you must add an external AMS1117-3.3 LDO regulator powered from the 5V pin.
- Update EEPROM Code: The 4809 does not have physical EEPROM; it uses a flash-based emulation. Standard
EEPROM.hlibrary calls work, but write endurance is tied to flash memory wear-leveling. Avoid high-frequency logging to EEPROM addresses on the Every. - Verify Interrupt Vectors: External interrupts on D2 and D3 still work via the
attachInterrupt()function, but the underlying Pin Change Interrupt (PCINT) registers have been replaced by the PORT A and PORT D interrupt controllers. Direct register porting will fail.
Troubleshooting Common Pinout Pitfalls
Even experienced engineers run into edge cases when dealing with the Nano Every pinout. Here are the most frequent issues and their solutions:
The Pin 13 LED Timer Conflict
On the classic Nano, the onboard LED on Pin 13 is tied to Timer 2. On the Every, it is tied to TCB1. If you use the tone() function to generate audio frequencies on certain pins, it may conflict with the TCB1 timer, causing the Pin 13 LED to flicker or disabling the tone output entirely. Solution: Use the ToneOnTimer alternative libraries that allow you to specify which TCA/TCB peripheral handles the audio generation, leaving TCB1 free for the LED or other PWM tasks.
USB Enumeration Failures
Because the Nano Every uses a separate ATSAMD11 microcontroller to handle USB-to-Serial conversion and UPDI programming, a corrupted bootloader on the SAMD11 will brick the board's USB connectivity. Solution: Unlike the classic Nano where you could easily use an external ISP programmer to burn the bootloader, recovering a bricked SAMD11 on the Every requires a specialized EDGB programmer and Atmel Studio, making it crucial to avoid shorting the TX/RX pins to ground during hot-plugging.
Final Verdict: Is the Pinout Trade-off Worth It?
The Arduino Nano Every is a masterclass in backward-compatible physical design masking a completely modernized internal architecture. The physical Arduino Nano Every pinout ensures your old shields and breadboard layouts will plug in seamlessly. However, the electrical reality demands a modernized software approach. By understanding the PORTMUX routing, the VUSB jumper pad, and the distinct internal voltage references, you can leverage the 4809's superior memory and processing capabilities without falling victim to legacy code assumptions.