
Why Bypass Pre-Compiled Binaries for WLED?
WLED is the undisputed champion of addressable LED control, but downloading standard .bin files from the GitHub releases page only gets you so far. Pre-compiled binaries are designed for maximum compatibility, meaning they strip out niche hardware support to save flash memory and RAM. If you want to integrate an OLED display, a PIR motion sensor, or an I2S digital microphone for audio reactivity, you must compile the firmware yourself. Learning how to WLED add user mods transforms a basic LED strip into an interactive, environment-aware smart home fixture.
The Hardware Toolchain: Microcontroller & Programmer Reviews
Before touching the code, you need the right physical tools. The hardware you choose dictates which usermods are even possible.
ESP32 vs. ESP8266: The Core Decision
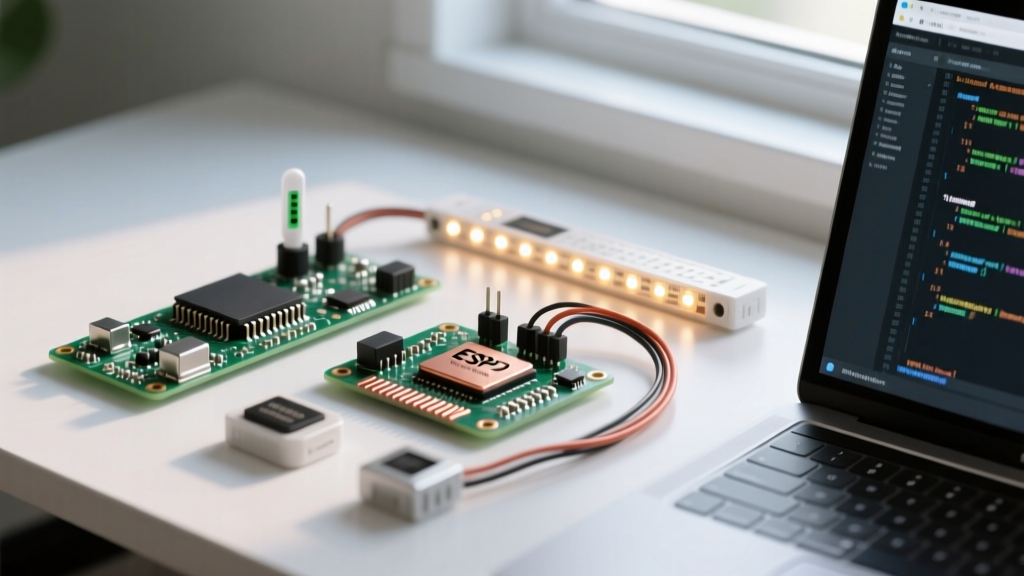
While the ESP8266 (NodeMCU v3) is a classic, it is fundamentally limited for advanced usermods. It features a single-core processor and an ADC (Analog-to-Digital Converter) that conflicts with WiFi operations. For complex mods like AudioReactive or FourLineDisplay, the ESP32-WROOM-32 is mandatory.
Expert Recommendation: Skip the standard ESP32 DevKit V1 if your LEDs will be housed in a metal enclosure or behind thick acrylic. Instead, source an ESP32-WROOM-32U variant with an external IPEX antenna connector. It costs roughly $2 more but prevents the WiFi dropouts that plague metal-housed LED lamps.
USB-TTL Flashing Tools
If you are building a custom PCB or flashing a bare ESP32 module, you need a reliable USB-TTL serial adapter. Avoid the cheap, unbranded CH340 clones that often suffer from 5V logic leaks, which can fry the ESP32's 3.3V RX/TX pins. Invest in a CP2102-based programmer (approx. $6). The CP2102 provides stable 3.3V logic and, crucially, properly wired DTR/RTS pins to automate the boot-mode sequence, saving you from manually holding the 'BOOT' button on every upload.
Software Stack Review: Why PlatformIO Wins
Many beginners attempt to add usermods using the Arduino IDE. This is a mistake. WLED's architecture relies on complex build flags, custom partition tables, and specific library versions that the Arduino IDE struggles to manage. According to the WLED Official Documentation, PlatformIO (an extension for Visual Studio Code) is the officially supported and highly recommended toolchain.
PlatformIO reads the platformio.ini file, automatically downloading the exact versions of the FastLED and NeoPixelBus libraries required for your specific build environment. It eliminates the missing library errors that plague Arduino IDE users attempting custom compilations.
Top 4 Recommended Hardware Usermods
When deciding which modifications to inject into your firmware, consider the physical utility they bring to your installation. Below is a comparison of the most valuable usermods for custom ESP32 builds.
| Usermod Name | Required Hardware | Interface | ESP32 GPIO Pins | Best Application |
|---|---|---|---|---|
| Four Line Display | SSD1306 128x64 OLED | I2C | SDA: 21, SCL: 22 | Desk lamps; viewing IP & active effects |
| Audio Reactive | INMP441 MEMS Mic | I2S Digital | WS: 15, SD: 32, SCK: 14 | Music-synced bias lighting & wall art |
| Rotary Encoder | EC11 Encoder Module | Digital | DT: 18, CLK: 19, SW: 5 | Physical brightness & effect dial |
| PIR Sensor | HC-SR501 or AM312 | Digital | GPIO: 13 | Auto-on closet and stair lighting |
Execution: Injecting Usermods via PlatformIO
Here is the exact workflow to compile and flash your custom firmware, as outlined in the WLED GitHub Repository.
- Clone the Repository: Download the latest stable WLED release ZIP or clone via Git.
- Create the Override File: In the root directory, copy
platformio_override.ini.exampleand rename it toplatformio_override.ini. This ensures your custom settings are not overwritten during future Git pulls. - Define Your Build Flags: Open the override file and locate the
[env:esp32_custom]section. Add your specific usermod flags to thebuild_flagsarray.
For example, to add an OLED display and a rotary encoder, your configuration block should look like this:
[env:esp32_custom_oled_dial]
board = esp32dev
platform = ${esp32.platform}
build_flags = ${esp32.build_flags}
  -D WLED_RELEASE_NAME=esp32_custom_oled_dial
  -D USERMOD_FOUR_LINE_DISPLAY
  -D USERMOD_ROTARY_ENCODER_UI
  -D FLD_PIN_SCL=22
  -D FLD_PIN_SDA=21
  -D ROTARY_ENCODER_PIN_A=18
-D ROTARY_ENCODER_PIN_B=19- Compile and Upload: Connect your CP2102 programmer, select the correct COM port in VS Code, and click the Upload arrow. PlatformIO will handle the compilation and flashing sequence.
Critical Failure Modes & Troubleshooting
Custom compilation introduces hardware-software intersection points where things can go wrong. Here are the most common failure modes when adding usermods:
1. The I2C Address Collision
If you add both an SSD1306 OLED and a BME280 temperature sensor, both devices often default to the I2C address 0x3C. WLED will fail to initialize one or both. Fix: Check your sensor breakout board for solder pads that allow you to shift the address to 0x3D, or use an I2C multiplexer like the TCA9548A.
2. Bootlooping from Strapping Pins
The ESP32 uses specific GPIO pins to determine boot modes. If your Rotary Encoder or PIR sensor pulls GPIO 0, 2, or 12 HIGH or LOW during startup, the ESP32 will enter flash mode or halt entirely, resulting in a bootloop. Fix: Always cross-reference your chosen pins with an ESP32 pinout strapping guide. Stick to safe input/output pins like 13, 14, 15, 18, 19, 21, 22, and 32.
3. Brownout Resets Under Load
When testing an Audio Reactive usermod, the ESP32's CPU usage spikes. If you are powering the ESP32 and 100+ LEDs simultaneously from a standard 5V 2A USB phone charger, the voltage will sag, triggering the ESP32's brownout detector. Fix: Power the LED strip via a dedicated 5V 10A switching power supply, and inject power directly into the ESP32's 5V and GND pins, bypassing the USB port's polyfuse.
Final Verdict: Is Custom Compilation Worth It?
Learning to WLED add user mods requires a slight learning curve with PlatformIO and C++ build flags, but the payoff is immense. Pre-compiled binaries treat your ESP32 as a generic web server; custom usermods turn it into a dedicated, interactive hardware appliance. By investing in a CP2102 programmer, selecting the right ESP32 variant, and carefully planning your GPIO assignments, you can build commercial-grade smart lighting fixtures right from your workbench. For deeper dives into specific C++ code modifications and environment setups, consult the PlatformIO Documentation and the WLED developer wiki.